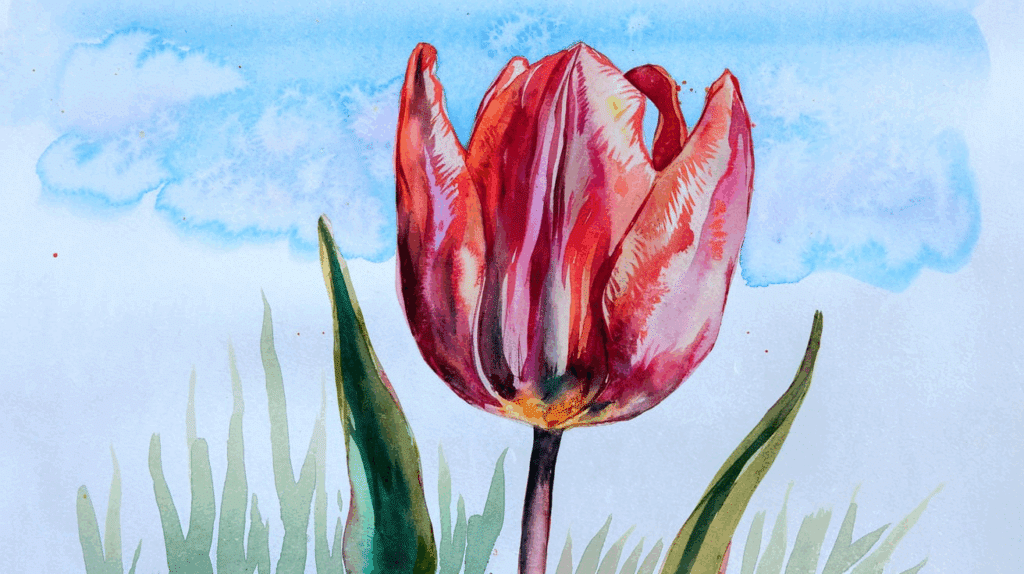
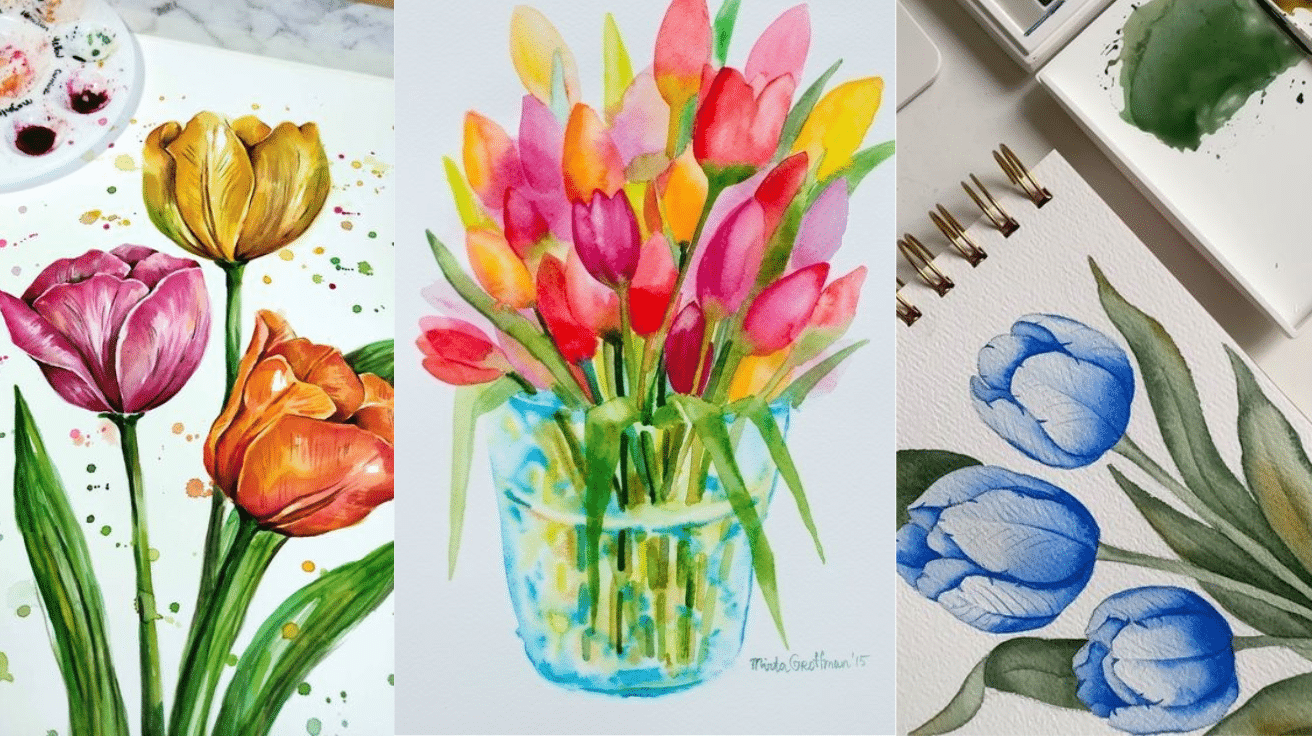
Painters often struggle with capturing the subtle beauty of flowers on paper.
Many find themselves frustrated when their brushstrokes fail to convey the gentle curves and Lively colors of nature’s blooms.
But there’s good news for artists looking to improve their floral painting skills. The
The method breaks down the complex shapes of tulips into basic forms, allowing artists to build confidence while creating remarkable results.
By learning this technique, artists can develop skills that transfer to other floral subjects as well.
Ready to create your flower paintings? Let’s find out how to create gorgeous watercolor tulips with just a few basic supplies and straightforward steps.
Watercolour Tulip Tips for Clean & Bright Results
Getting clean and luminous results in watercolor takes more than just brushing on color. These expert tips will help you avoid muddy tones, keep your petals fresh, and bring out the natural beauty of your tulip with confidence.
Control Your Water Load – Too much water can flood the paper and cause colors to bleed uncontrollably. Dip your brush, then blot lightly before painting to maintain control and transparency.
Start with a Light Base Layer – Always begin with a soft, diluted wash of color. This gives you room to build depth later without overwhelming your paper or your petals.
Let Layers Dry Fully – Patience is key. Adding new layers before the previous one dries can create murky colors and unwanted blending. Use a hairdryer if you’re short on time.
Avoid Overworking the Paper – The more you scrub or rework an area, the more the paper will break down. Aim for light, intentional strokes rather than constant corrections.
Use a Limited Palette – Stick to two or three harmonious colors for your tulip. This keeps your painting clean and cohesive without risking unexpected muddy mixes.
Test Colors on Scrap First – Always try your colors on a spare sheet before applying them to your actual piece. This helps you gauge how the hues behave and blend when wet.
How to Paint a Watercolour Tulip Step by Step
Painting a tulip in watercolour might seem subtle, but with a clear plan, it becomes surprisingly simple. Below, you’ll find a beginner-friendly breakdown of each step, from the first pencil stroke to the final brush of detail.
Follow along carefully, and you’ll build up your tulip in soft, natural layers without overcomplicating the process.
1. Prepare Your Tools and Palette
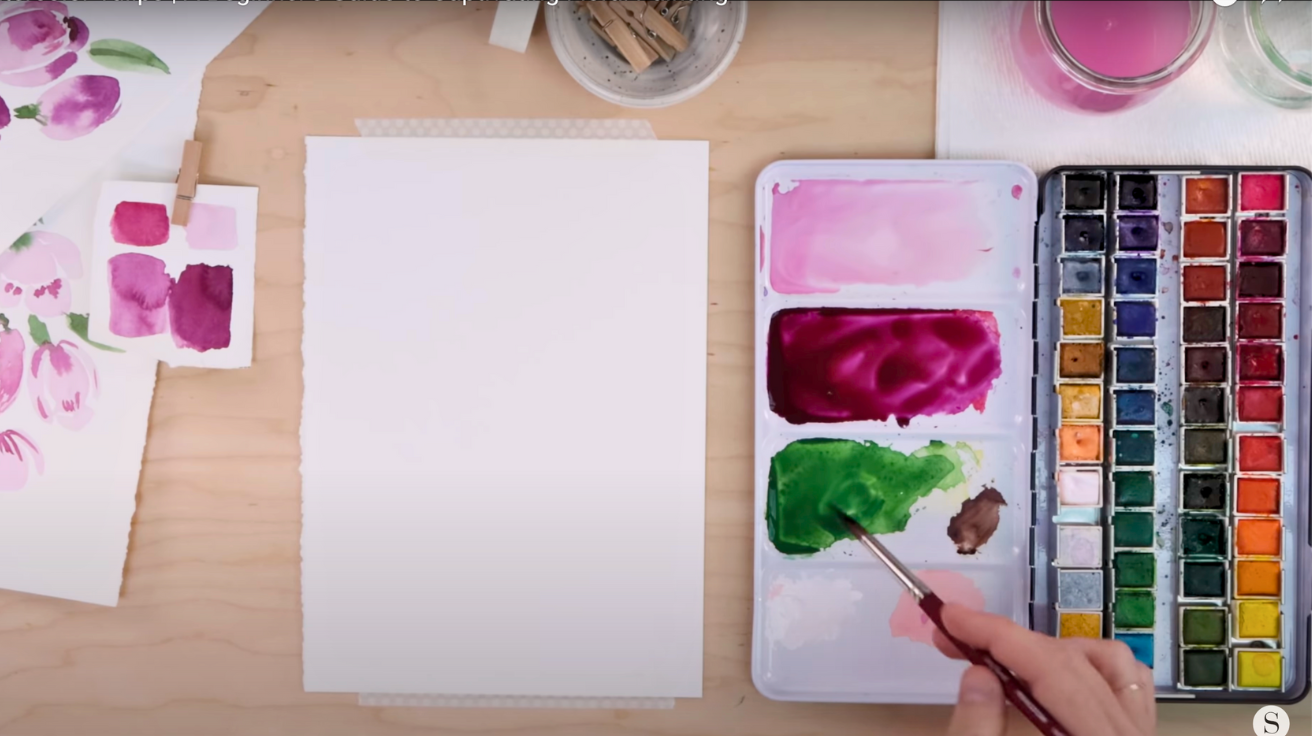
Before pitching into your
Keep a smaller brush nearby, just in case. For your palette, prepare a soft pinkish red (white mixed with red and violet) and deepen it with touches of burgundy, Van Dyke brown, and green for accents. These choices set the perfect tone for a dreamy
2. Sketch Loose Tulip Shapes with Confidence
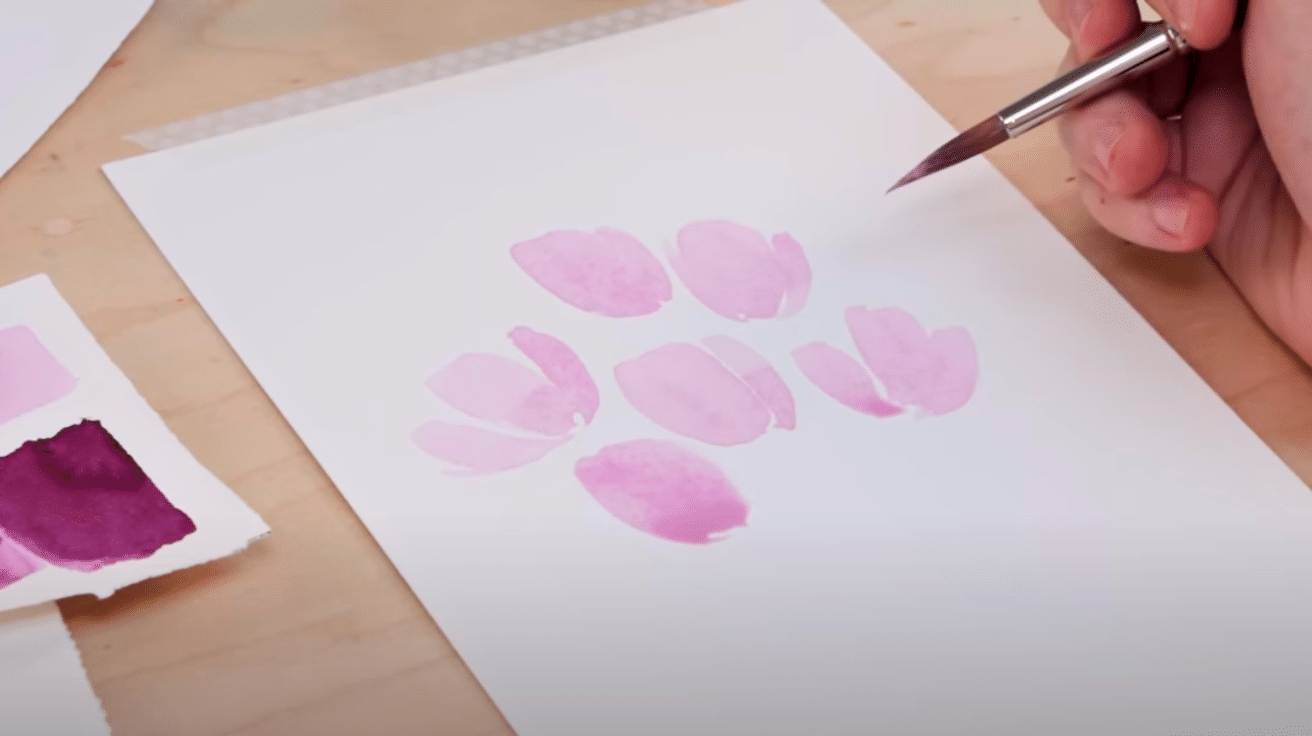
Start with light pink on your brush and gently lay down petal shapes. Don’t aim for perfectioninstead, go for soft, natural outlines. Think of tulips in various stages of bloom.
- Use pointed ovals to form petals, then add a small petal off to the side for variety.
- Layer brush strokes to suggest overlapping petals.
- Keep your wrist relaxed for fluid, expressive marks.
This approach brings charm and looseness to your
3. Add Depth with Burgundy Accents
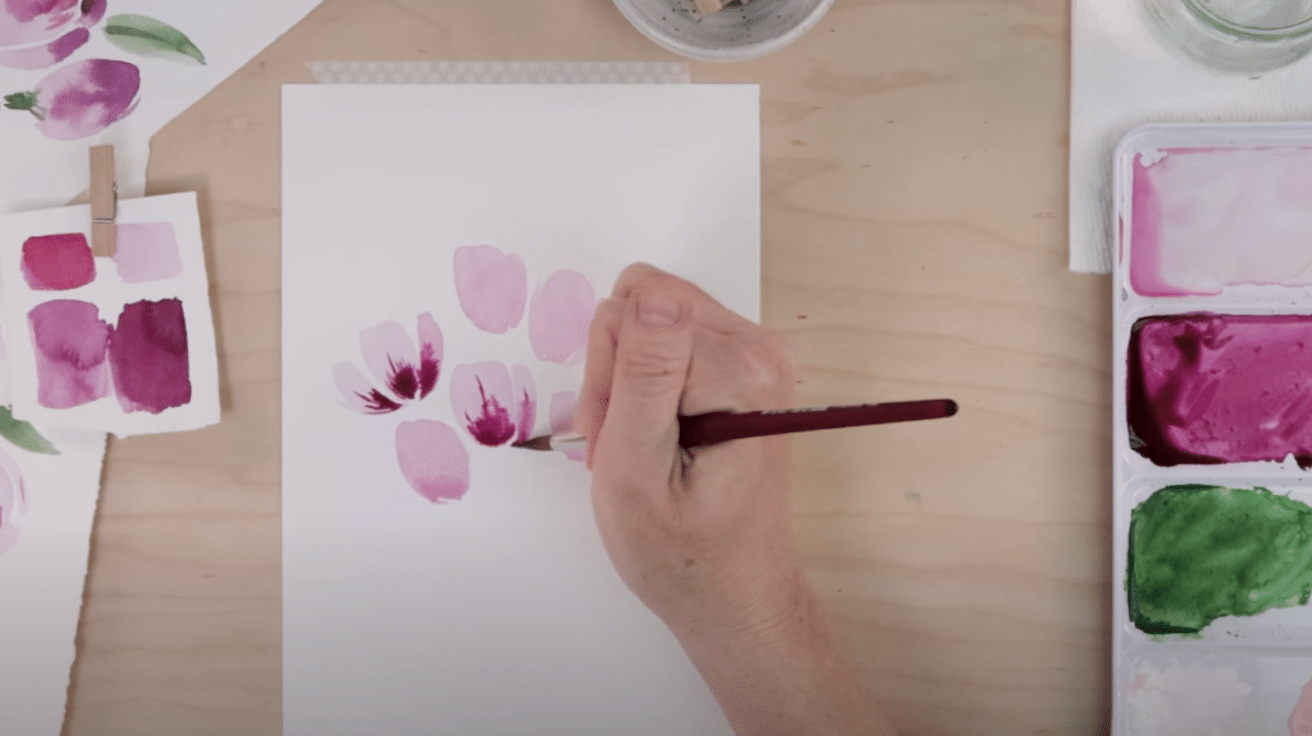
While your pink petals are still damp, dip just the tip of your brush into your dark burgundy mix. Gently touch the base or top of each bloom and watch the magic happen as the color softly bleeds.
This technique enhances the dimension of your
This isn’t about controllet the water do some of the work. Just guide the color into place with a light touch.
4. Blend for Softness and Flow
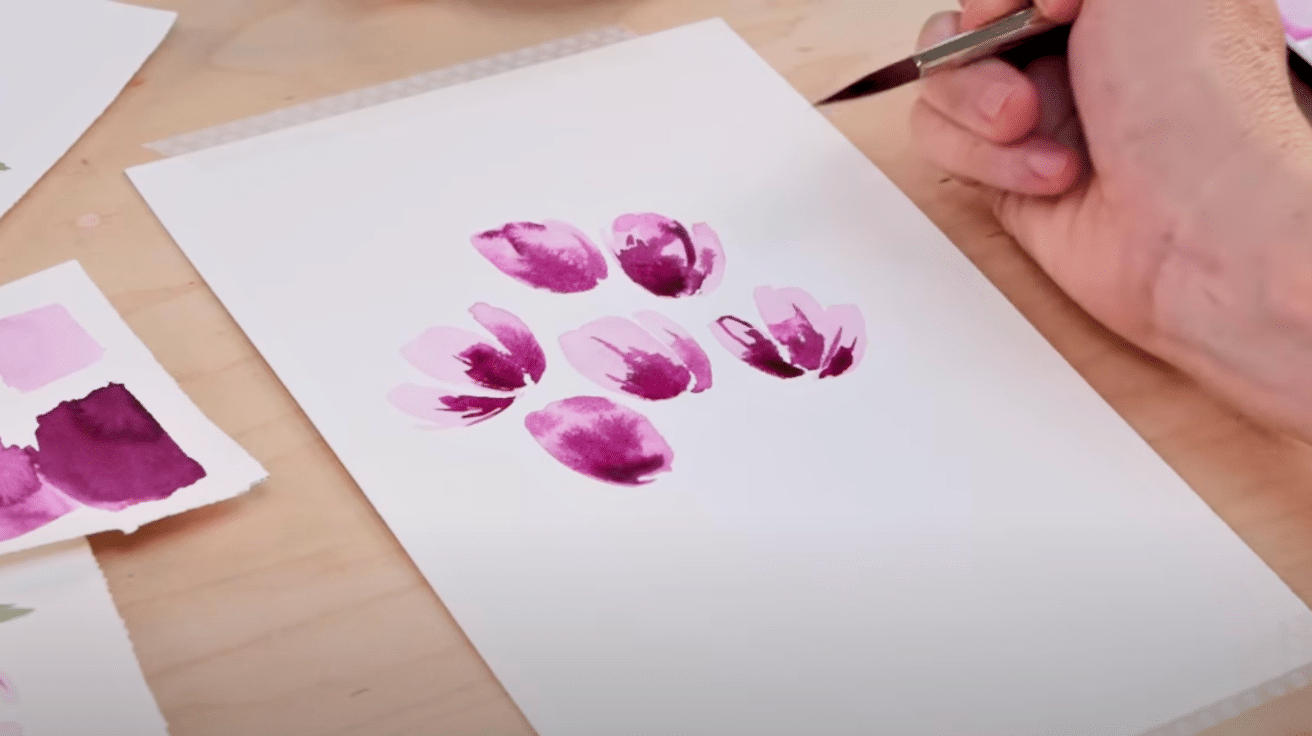
Once you’ve added burgundy to the petal bases or tips, allow the color to bleed softly into the pink. That natural blending is where the magic happens.
- Use a clean, damp brush only if edges need softening.
- Avoid fussing too Imperfections add character.
- Let unusual blends create depth and surprise.
- For more contrast, add pigment while the paper is still damp.
5. Paint Natural-Looking Stems
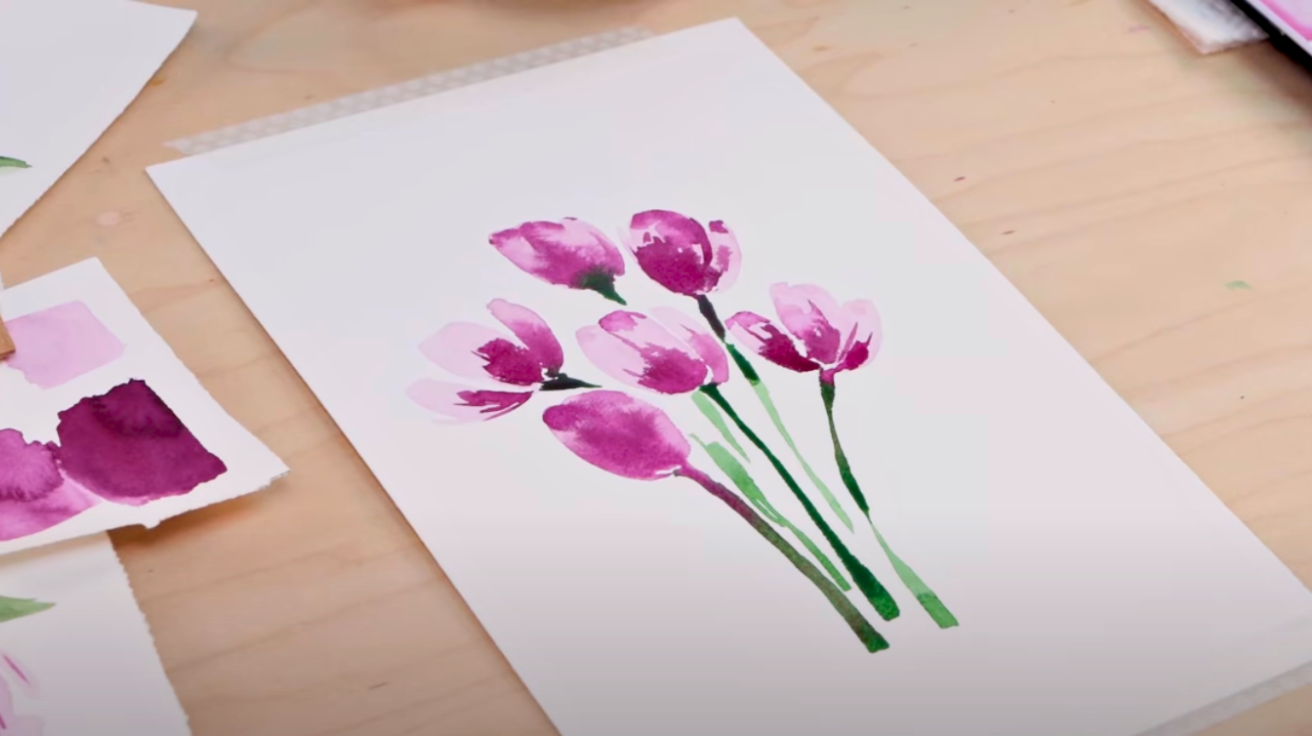
Dip your brush in dark green and start at the base of each flower. Pull downward in one continuous, fluid motion to create stems.
Vary your pressure slightly as you move to keep things looking natural, not mechanical. Let a bit of burgundy mix into the stems for subtle tonal variation.
This adds life and depth to your
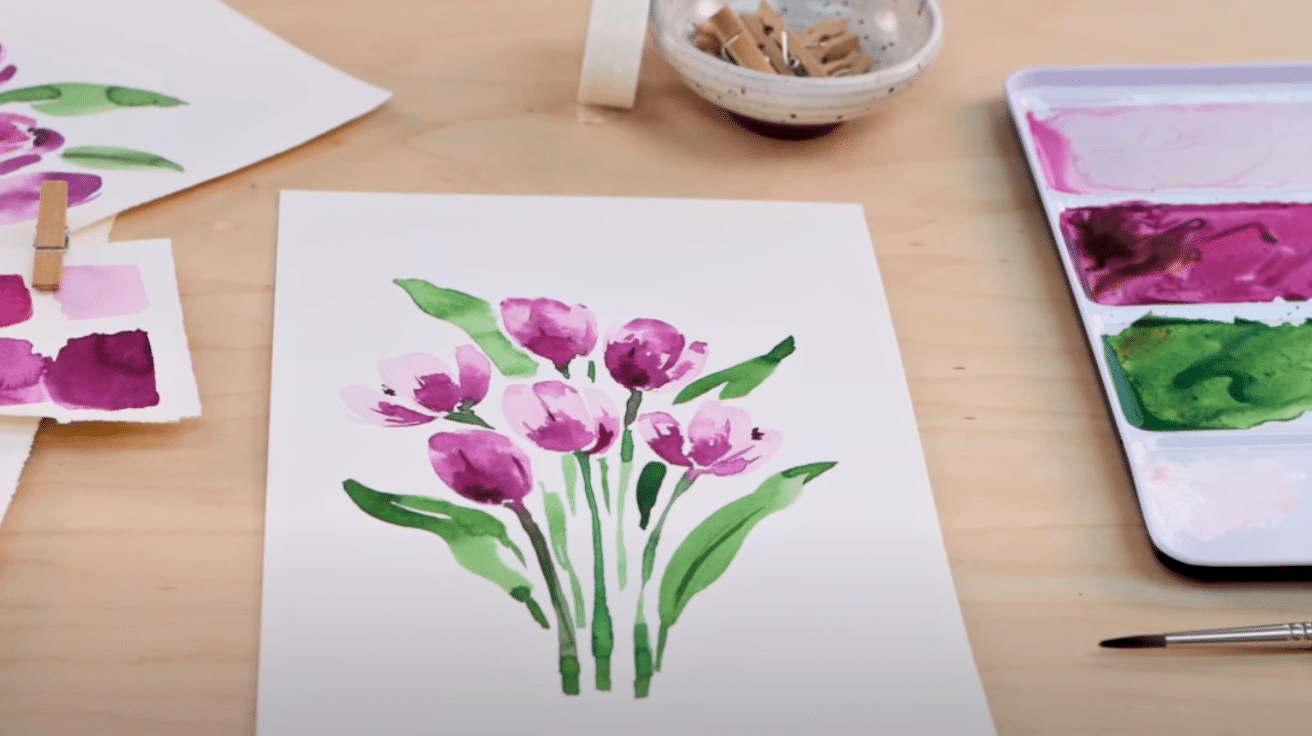
6. Create Lush, Flowing Leaves

Now it’s time to surround your
Load your brush with dark green and start building wide, natural-looking leaves beside your tulips.
- Push or pull the brush to form long, pointed shapes.
- Let the brush wiggle slightly for organic flow.
- Add darker streaks for dimension or leave highlights.
- Place some leaves detached from stems for airy spacing.
These varied leaf placements add movement and fullness to your
7. Add Finishing Touches with Heart
Take a moment to review your work and add any final details. You might deepen a shadow, lift a runaway color with a clean damp brush, or dot a stamen in the center of an open bloom with Van Dyke brown.
A
Creative Styles and Color Combos Ideas to Try
Artists looking to expand their skills can try various approaches when painting flowers.
Here are six inspiring ideas to help you push your creative boundaries while keeping your
Use Lively Pinks and Cool Purples: Choose a warm pink (like opera rose) and a soft purple (like lavender or violet) to create contrast between petals.
Loose–Blended Rainbow Tulip: Skip the sketch and use a wet-on-wet technique to blend multiple colors, such as yellow, magenta, and blue, softly into one another.
Modern Abstract Style Tulip: Focus more on shape and color blocking than realism. Use simplified petal forms, bold brushstrokes, and unconventional colors (like teal, mustard, or magenta). Great for wall art or contemporary portfolios.
Combine Ink with Any Style: Even if you’ve painted in a minimalist or detailed style, adding subtle ink lines afterward can raise the whole piece. Use it sparingly to highlight edges, add petal veins, or define overlapping parts for extra clarity.
Sunset Palette Tulip (Orange, Pink, and Gold): Create a tulip inspired by warm evening skies. Start with a soft peach or coral base, then layer hints of orange, pink, and touches of metallic gold for highlights.
Tulip in Cool Blue Tones: Use shades like cerulean, ultramarine, or turquoise to paint a tulip with an unexpected, calming feel. This color scheme is perfect for abstract or modern compositions, and it works gorgeously against white or dark backgrounds.
Final Thoughts
Creating a
Each
Remember that perfect results come with practice. As you continue painting, you’ll notice improvements in your brush control and color blending. Your early attempts might not match your vision, but they represent important steps in your growth.
Artists at all levels find meaning in depicting these simple yet graceful flowers. The
Paint with freedom, experiment with techniques, and most importantly, enjoy the creative process.