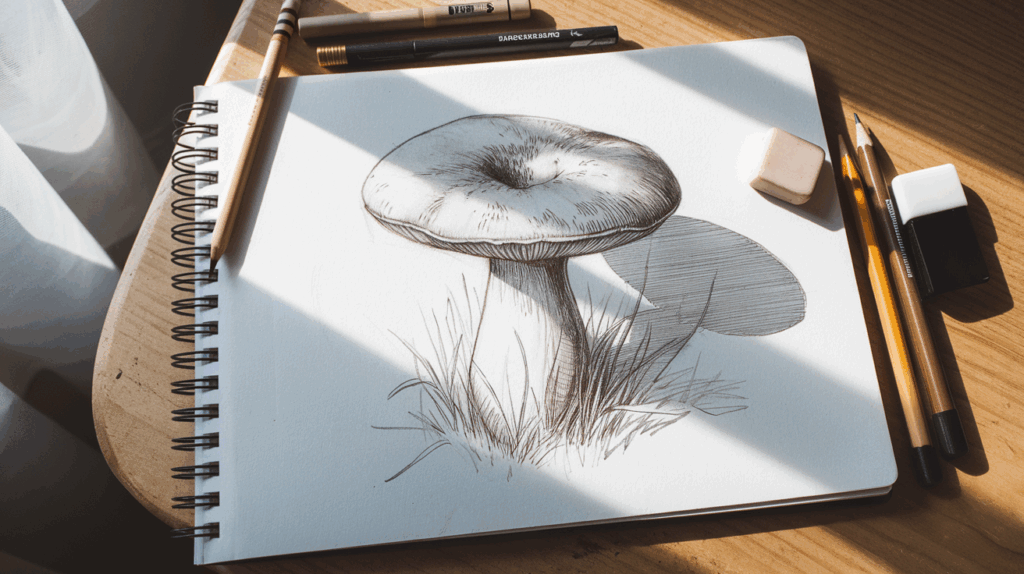
Drawing mushrooms with pencil offers artists a chance to study the small wonders of nature.
These forest inhabitants have shapes and textures that make them perfect subjects for art. Their caps, stems, and gills create interesting shadows and lines that can be brought to life on paper.
This blog walks through a step-by-step tutorial for pencil mushroom drawing that anyone can follow. We’ll look at the basic forms of mushrooms and how to capture their unique features.
The guide includes helpful tips to improve your technique and shows several ideas for creating different mushroom varieties.
By the end, you’ll have the skills to fill your sketchbook with these intriguing organisms from nature’s floor.
Master Your Mushroom Drawing: Must-Know Pencil Tips
Creating beautiful pencil mushroom drawings starts with understanding a few key points. These tips will help you craft lifelike fungi on your paper without much trouble.
-
Choosing the Right Tools – Use H pencils for light outlines, 2B for main lines, and 4B for dark shadows. A kneaded eraser helps with fine details.
-
Understanding Light and Shadow – Notice where light hits the mushroom cap and stem. This creates depth in your drawing.
-
Drawing from Reference – Keep real mushrooms or photos nearby to check details as you draw.
-
Practice Basic Shapes First – Begin with circles for caps and tubes for stems. These simple forms build the mushroom’s structure.
-
Focus on Textures – Pay attention to the mushroom’s surface. Some caps are smooth while others have ridges. Gills under the cap need fine, close lines.
Pencil Mushroom Drawing: A Simple Step-by-Step Tutorial
Picking up your pencil to draw mushrooms might seem challenging at first. Let’s break down this process into manageable steps that anyone can follow.
With these simple techniques, you’ll be sketching lifelike fungi in no time.
1. Preparation and Acquiring Materials
Before diving into your mushroom drawing, it’s important to gather all the necessary materials to ensure a smooth and enjoyable experience.
A well-prepared workspace and the right tools will help bring your vision to life with ease. Start by choosing a quiet, well-lit spot where you can comfortably focus.
Gather your drawing tools and paper, and make sure your materials are in reach. With everything ready, you can focus on the creative process without interruptions.
Materials Required:
-
HB pencil (for general shading and details)
-
F pencil (for darker areas and contrasts)
-
Kneaded eraser (for highlights)
-
Smooth, high-quality drawing paper
-
Blending tool (such as a paper stump)
2. Sketching the Basic Mushroom Shape

Begin by sketching the basic outline of the mushroom. Lightly draw a rounded cap in the center, and slightly offset it for a more natural look.
Then, add the stem beneath the cap, ensuring it tapers slightly as it moves downward. Make sure your lines are light at this stage so you can easily adjust them later.
3. Defining the Mushroom Cap and Stem
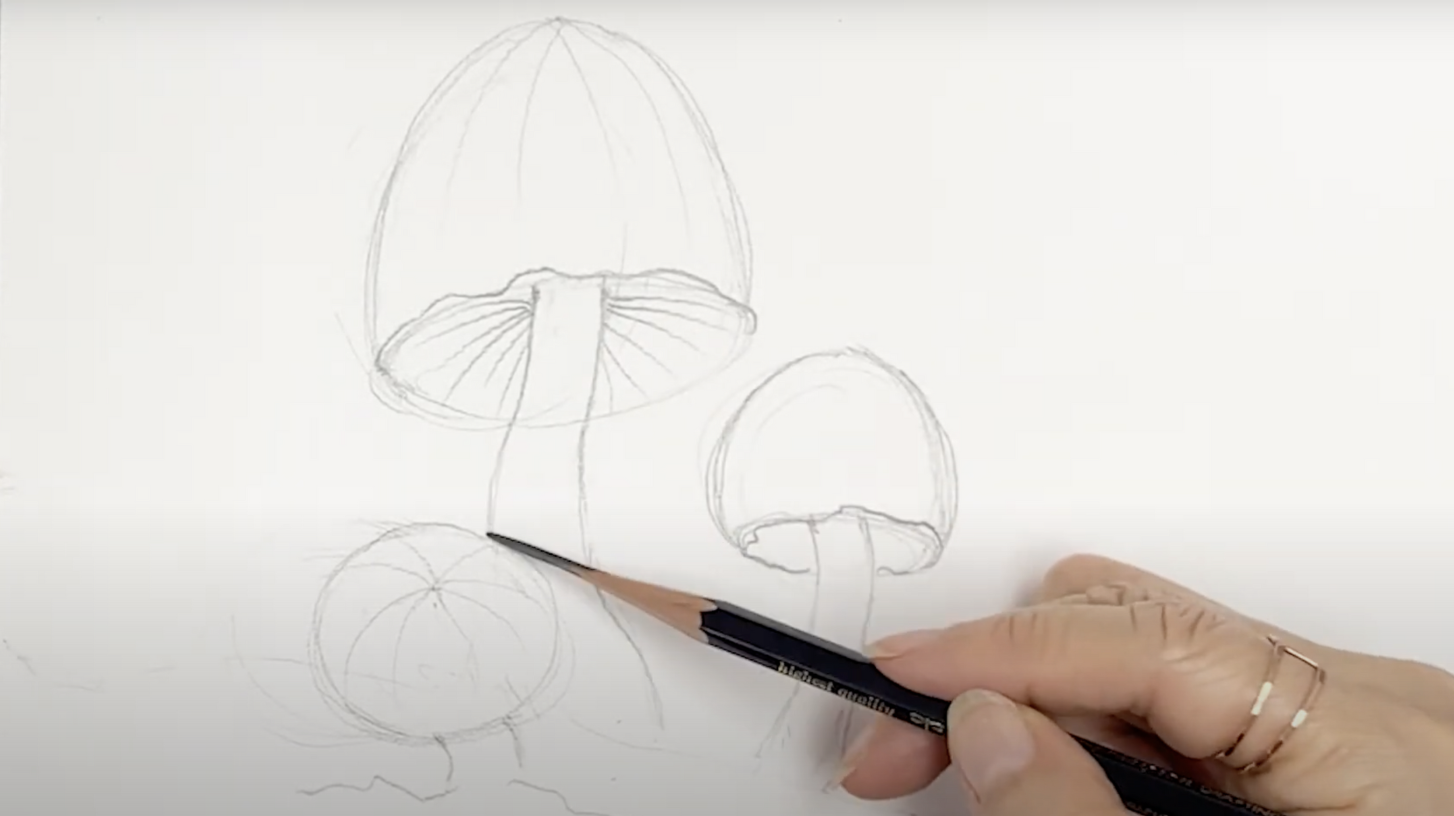
Once you are happy with the shape, start to refine the mushroom cap and stem.
Focus on the cap’s curvature by adding gentle curves around the edges to give it a more natural, organic feel.
For the stem, draw a few lines down its length to represent texture, and make sure it flows naturally from the base of the cap.
4. Shading the Cap
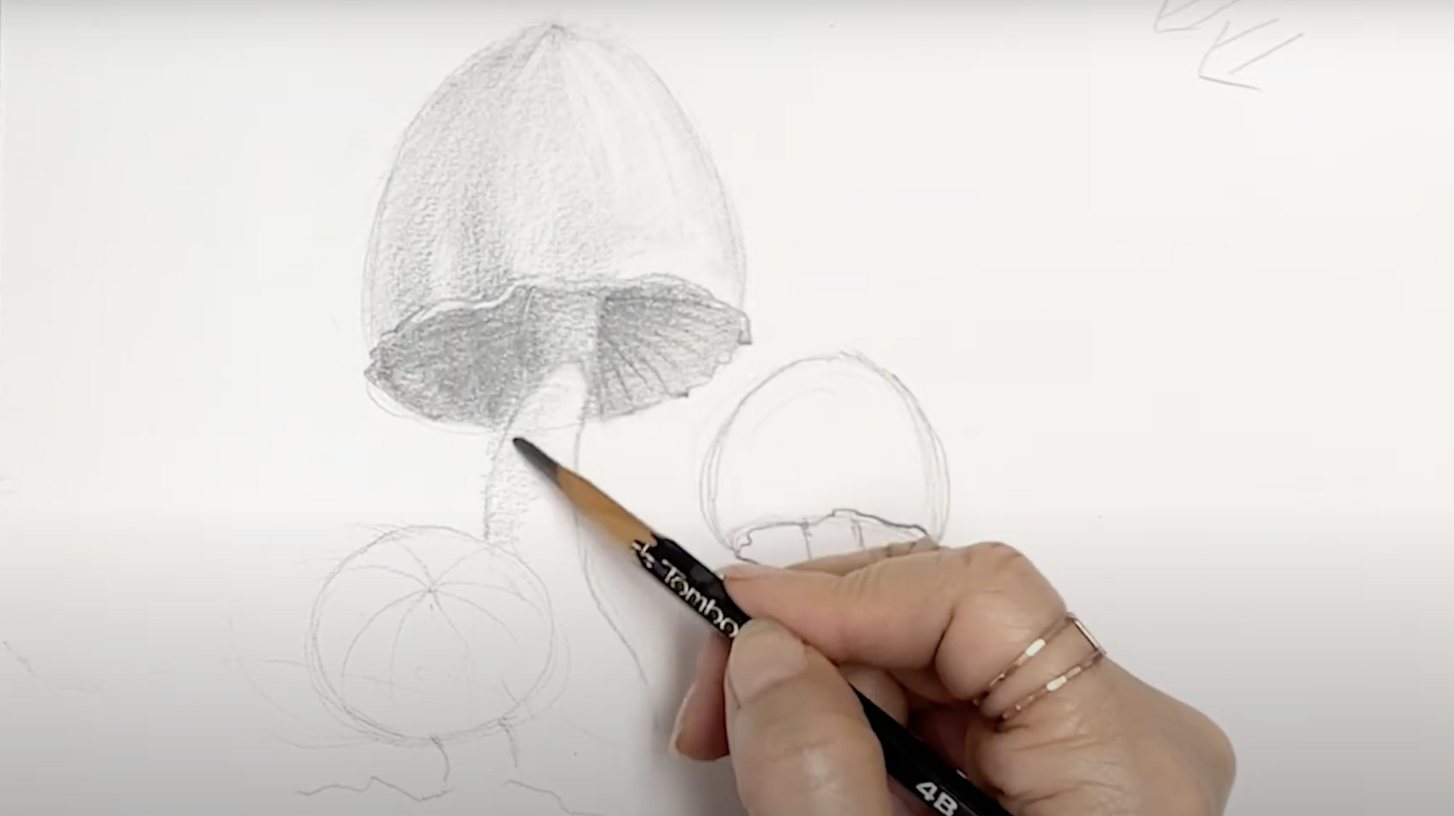
Now, focus on adding depth to the mushroom cap. Lightly shade the left side (since light is coming from the top-right), leaving the right side a little lighter to show where the light source hits.
Use the side of your HB pencil to create soft, smooth shading.
Add depth around the edges where the cap folds to make it appear three-dimensional. A paper stump can help blend the shading smoothly.
5. Shading the Stem and Adding Texture
Next, begin shading the stem, starting with light layers and gradually darkening areas where shadows naturally fall.
Use a blending tool for smoother transitions. Add small cross-hatching or tiny vertical lines to give texture to the stem. Pay attention to the natural patterns on the mushroom’s surface to make it more lifelike.
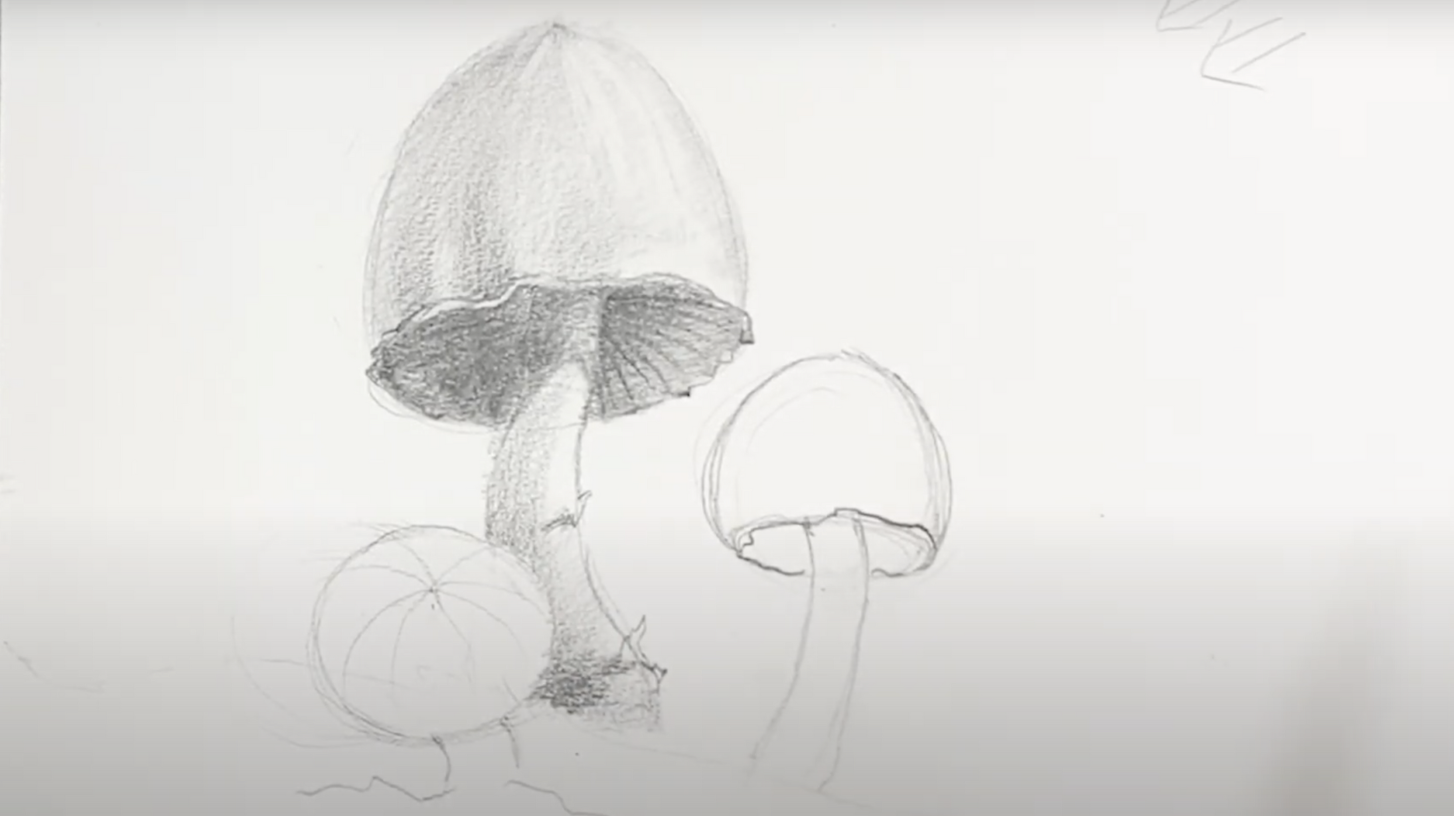
6. Adding Details to the Mushroom Cap
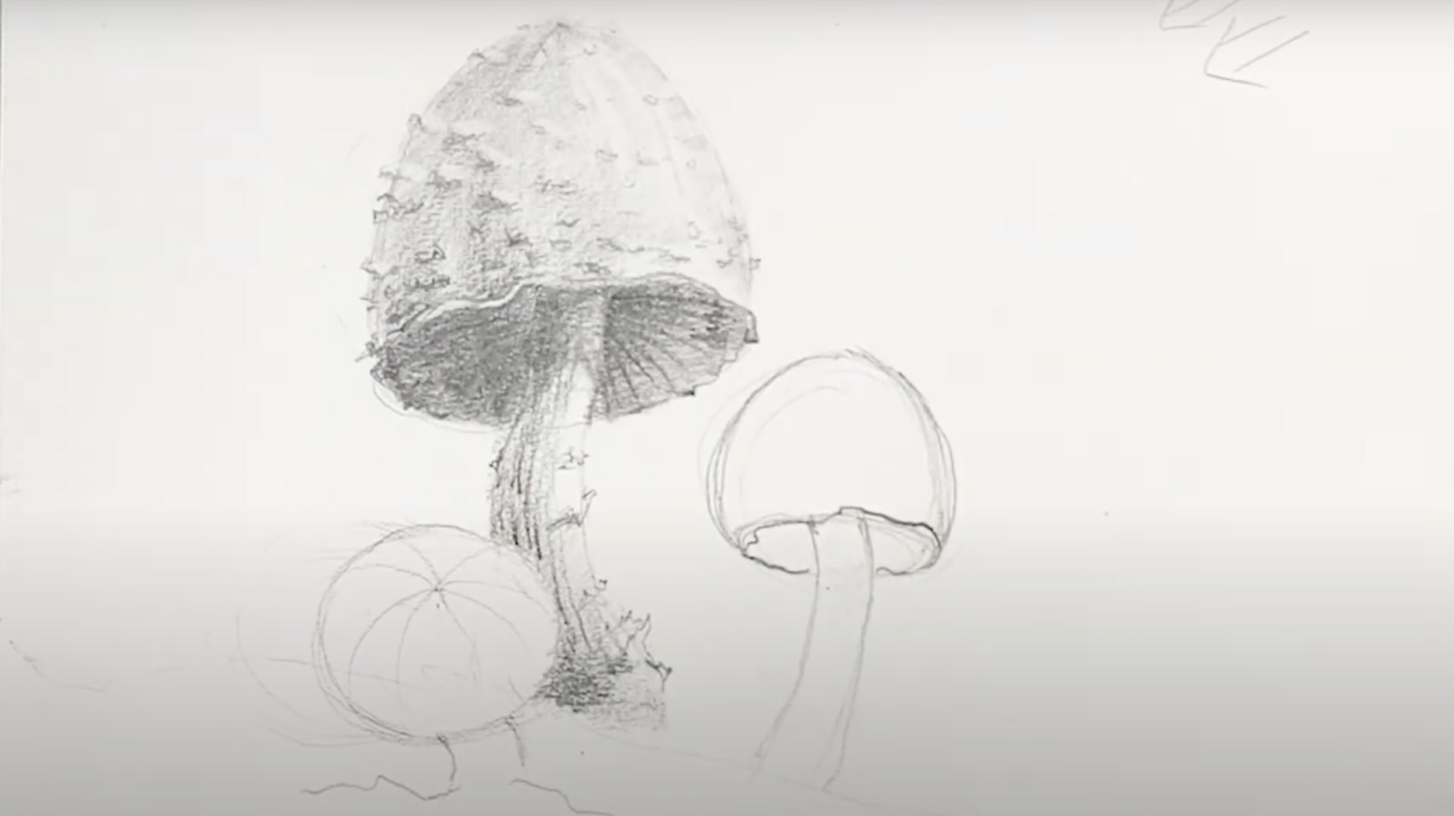
It’s time to add more character to the mushroom cap. Use the HB pencil to draw small, scale-like patterns or speckles on the cap, giving it more realism.
Add some highlights by gently erasing parts of the cap to create the illusion of light reflecting off its surface. These highlights will help the mushroom appear more vibrant.
7. Final Touches and Grounding the Mushroom
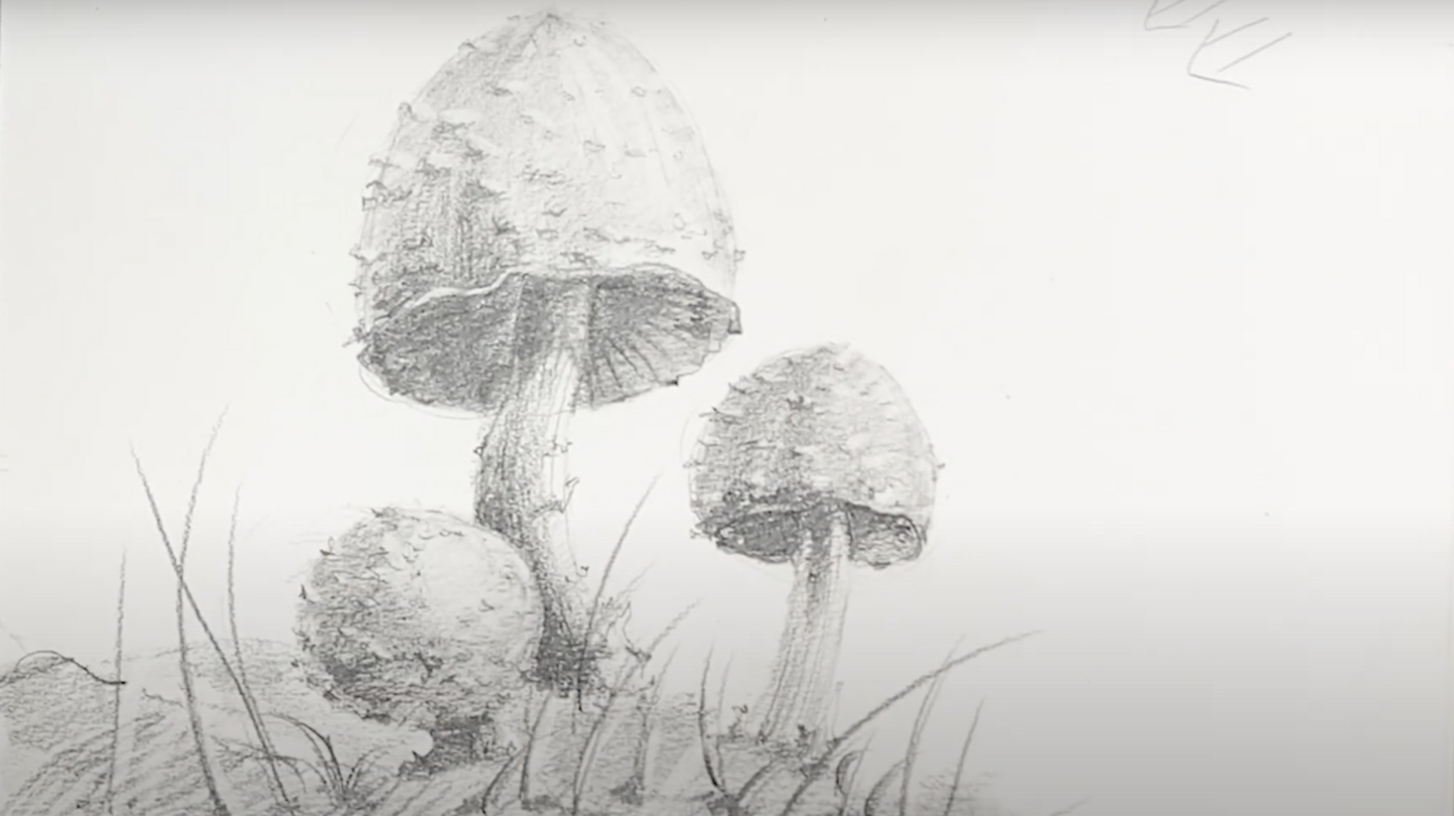
To bring your mushroom drawing to life, it’s essential to create a natural environment around it.
Begin by sketching elements like grass or small plants at the base of the mushroom. Use light, soft strokes to depict the ground, ensuring it doesn’t distract from the mushroom itself.
The key is to make the surroundings blend smoothly into the background, helping the mushroom stand out as the focal point.
This subtle approach adds depth and context to your drawing, giving it a more realistic, grounded appearance while maintaining the mushroom’s prominence.
-
Sketch grass or small plants around the base.
-
Use soft, light strokes for the ground.
-
Blend the surrounding elements gently into the background.
-
Ensure the mushroom remains the main focal point.
Inspiring Pencil Mushroom Designs for Every Artist
Let’s get on some creative ways to bring mushrooms to life on paper. These design ideas range from simple to detailed and offer something for artists at every skill level.
Find inspiration for your next drawing project right here.
Simple Mushroom Drawing
Scribble Mushroom Drawing
Pencil Mushroom Drawing with Light Shading
Realistic Mushroom Art
Colored Pencil Mushroom Drawing
Colored Mushroom House Drawing
Beautiful Mushroom Garden
Wrapping Up
The pencil mushroom drawing brings the quiet beauty of forest life to your sketchbook.
We’ve covered the steps from basic shapes to fine details and shared tips for making your fungi look real.
Remember that good drawings come from watching how light falls on shapes and taking time with textures. The gills, caps, and stems each need their own special touch.
What matters most is that you keep practicing. Try drawing different mushroom types, or place them in forest scenes.
You might also enjoy sketching other woodland finds like ferns or acorns using these same skills.
Have you tried drawing mushrooms before? Share your artwork in the comments below! We’d love to see how you use these tips in your own way.
If you found this guide helpful, let us know what nature subject you’d like to learn to draw next.