Learning to draw can feel scary for many beginners. They look at artists’ work and think, “I could never do that.” The blank page sits there, and the pencil feels awkward in their hand. Most new artists face this same feeling of not knowing where to start.
But here’s the good news: drawing is a skill anyone can learn with the right methods and practice. No special talent is required, just helpful techniques and a bit of patience.
This blog shows six basic drawing techniques that help beginners start making art right away. These approaches break down the complex process of drawing into simple steps that make sense.
From basic line work to shading techniques, these methods give new artists the tools they need.
The following sections will walk through each method with clear instructions and tips. By trying these techniques, readers will gain skills and confidence in their artistic abilities.
Let’s look at these six drawing methods that can help turn beginners into confident artists.
Why Are Learning Pencil Drawing Techniques Important?
Pencil drawing is one of the most basic yet powerful forms of artistic expression. Many artists start their creative path with a simple pencil and paper. The skills you build with pencil drawing serve as a foundation for almost all other art forms.
- Better control: Learning proper techniques helps you control your pencil with more precision, making your lines cleaner and more intentional.
- Improved confidence: When you know the methods, you feel more sure of yourself with each stroke you make on the paper.
- Faster progress: Instead of learning through trial and error alone, these techniques give you shortcuts to better results.
- More expression: Good techniques free you to focus on what you want to say through your art rather than struggling with the basics.
- Foundation for other media: The skills you gain from pencil drawing transfer to painting, digital art, and other creative forms.
- Personal style development: Once you master basic methods, you can mix and adapt them to create your unique artistic approach.
- Problem-solving skills: Techniques teach you how to think through visual challenges and find solutions.
Practice Tips to Improve Your Pencil Drawing
Pencil drawing takes time to master, but consistent practice leads to noticeable improvement. Many artists find that small, regular practice sessions yield better results than occasional long ones. Learning to handle a pencil with control and confidence comes through repetition and mindful practice.
Here are some effective practice tips to help improve your pencil drawing skills:
- Start with the basics: Begin with simple shapes and lines before moving to complex subjects. Circles, squares, and straight lines build fundamental control.
- Use proper grip: Hold your pencil lightly about an inch from the tip for detailed work or further back for looser sketching. Your grip affects line quality.
- Practice different pressures: Try making marks with varying degrees of pressure to create light, medium, and dark values with the same pencil.
- Draw daily: Even 15 minutes of daily practice will improve your skills faster than one long session per week.
- Use quality materials: Good pencils and paper make a difference. Try different hardness grades (2H to 6B) to find what works for you.
- Study light and shadow: Practice shading by placing simple objects under a single light source and drawing what you see.
- Work from life: Drawing real objects teaches you to observe form and proportion better than copying photos.
- Keep a sketchbook: Carry a small sketchbook to practice whenever you have a few spare minutes.
- Try blind contour drawing: Look only at your subject (not your paper) while drawing its outline to improve hand-eye coordination.
- Embrace mistakes: Don’t erase immediately. Sometimes “mistakes” can be incorporated into your drawing in interesting ways.
Core Pencil Drawing Techniques to Master
1. Hatching
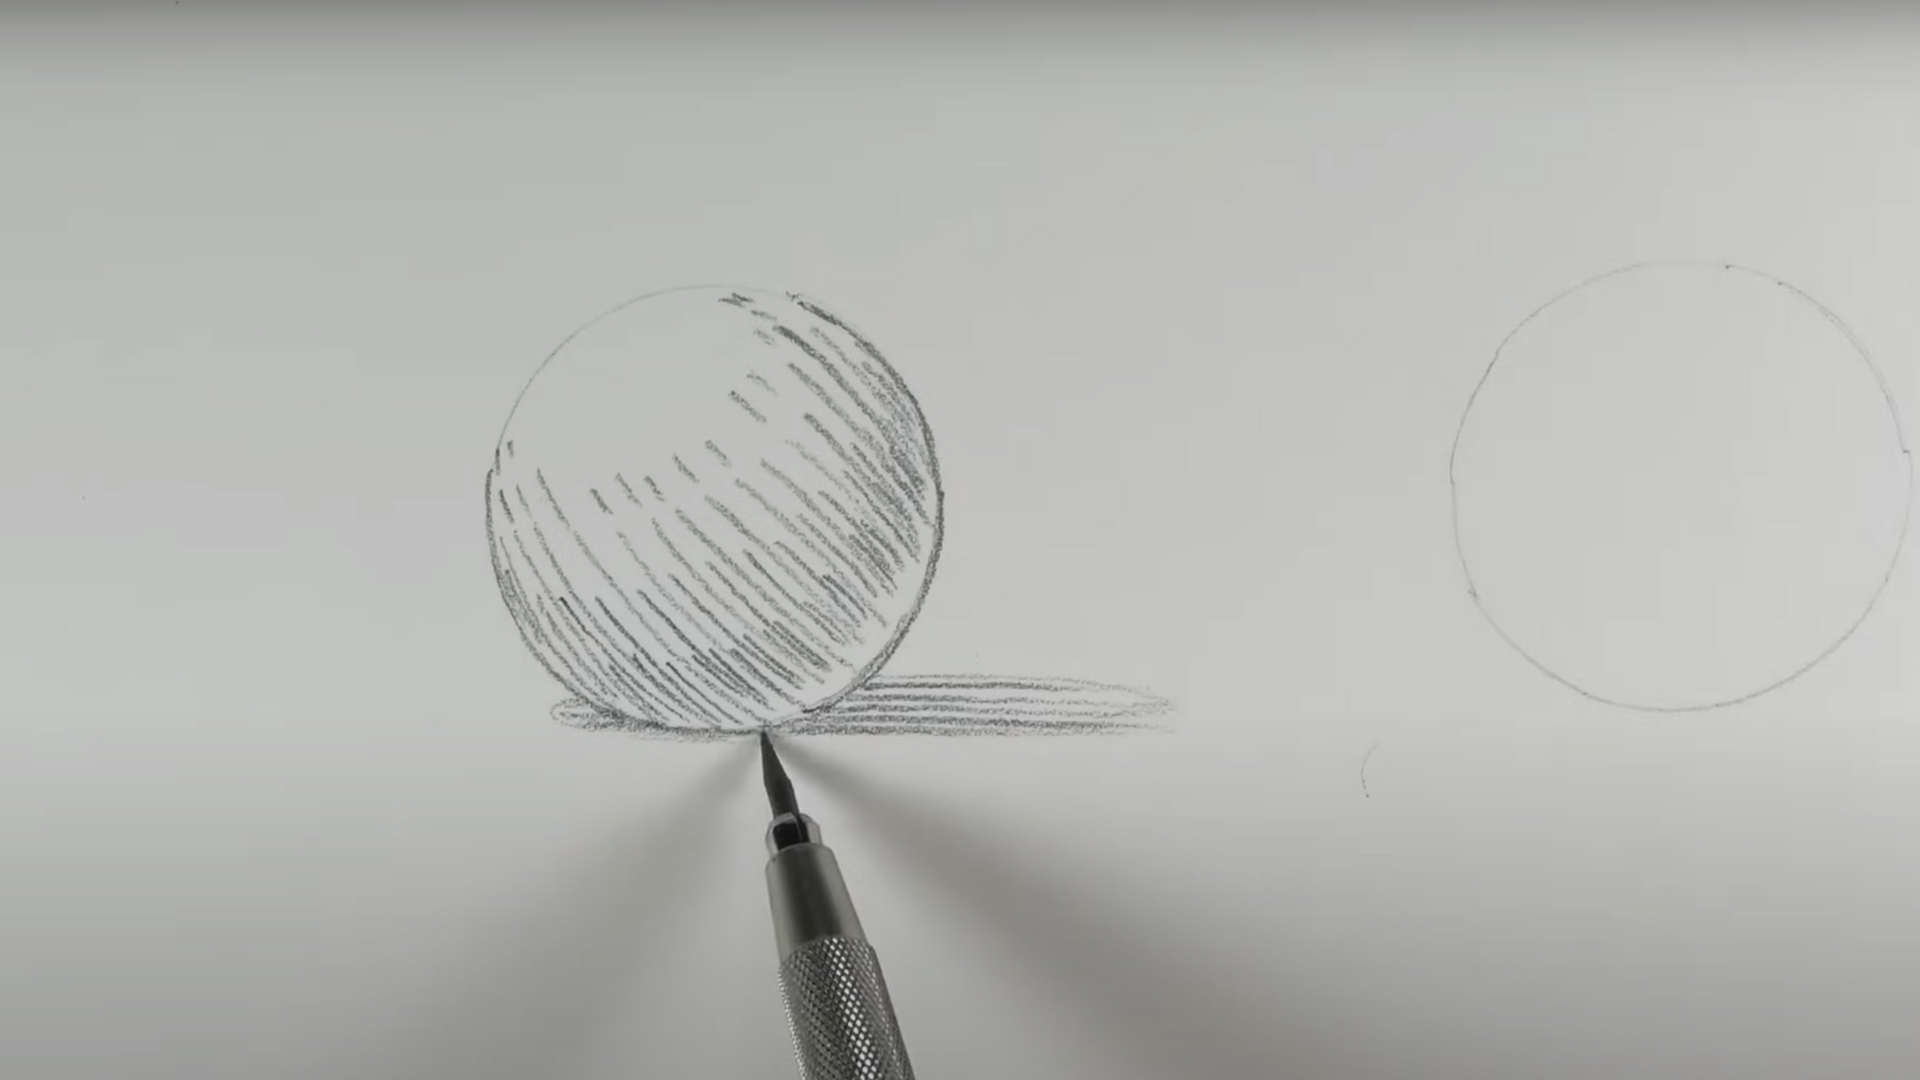
Start by drawing a series of parallel lines that never intersect. This technique helps you build tonal values and suggest form. The closer the lines are, the darker the area will appear.The wider the spacing, the lighter it feels.
When hatching, be sure to follow the contour of your subject; this enhances the illusion of depth. These slight curves are called cross-contour lines and can subtly define three-dimensional form. To darken areas, simply add more lines where needed.
2. Cross-Hatching
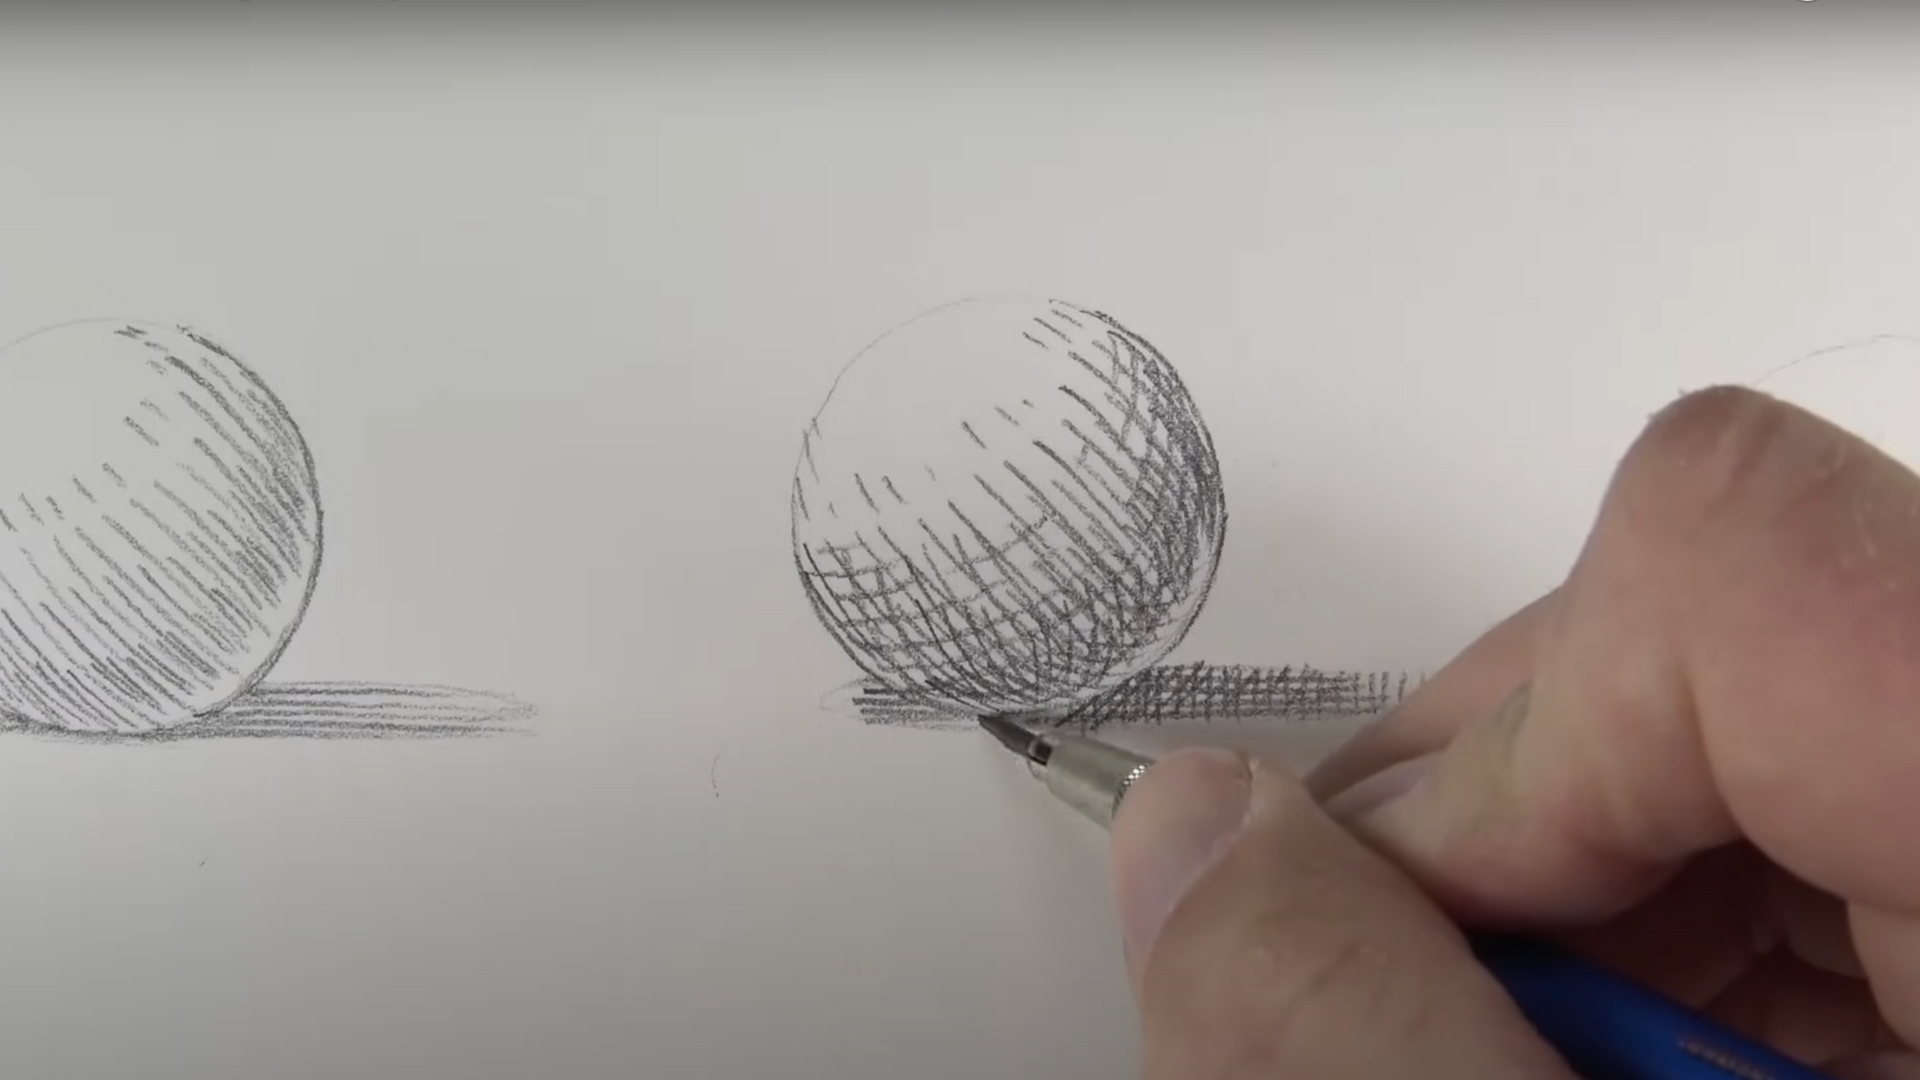
Begin like hatching, then layer another set of lines that crisscross over the first. The more times these layers intersect, the deeper and richer the tone becomes.
Use curved lines that mimic the subject’s shape to reinforce form. Cross-hatching gives you more flexibility because you can build value gradually through overlapping. For both hatching styles, a sharp pencil ensures precision, and the result can be remarkably sculptural.
3. Scribbling
This is a loose, free-flowing method using random, swirling lines. Despite its casual look, it still relies on density and pressure: the more lines you pile up, the darker it gets.
You can press harder to intensify the tone or lighten your touch to soften it. It’s great for sketching quickly or capturing motion and texture. Don’t underestimate its potential, scribbling can be used for polished, expressive artworks, too.
4. Stippling
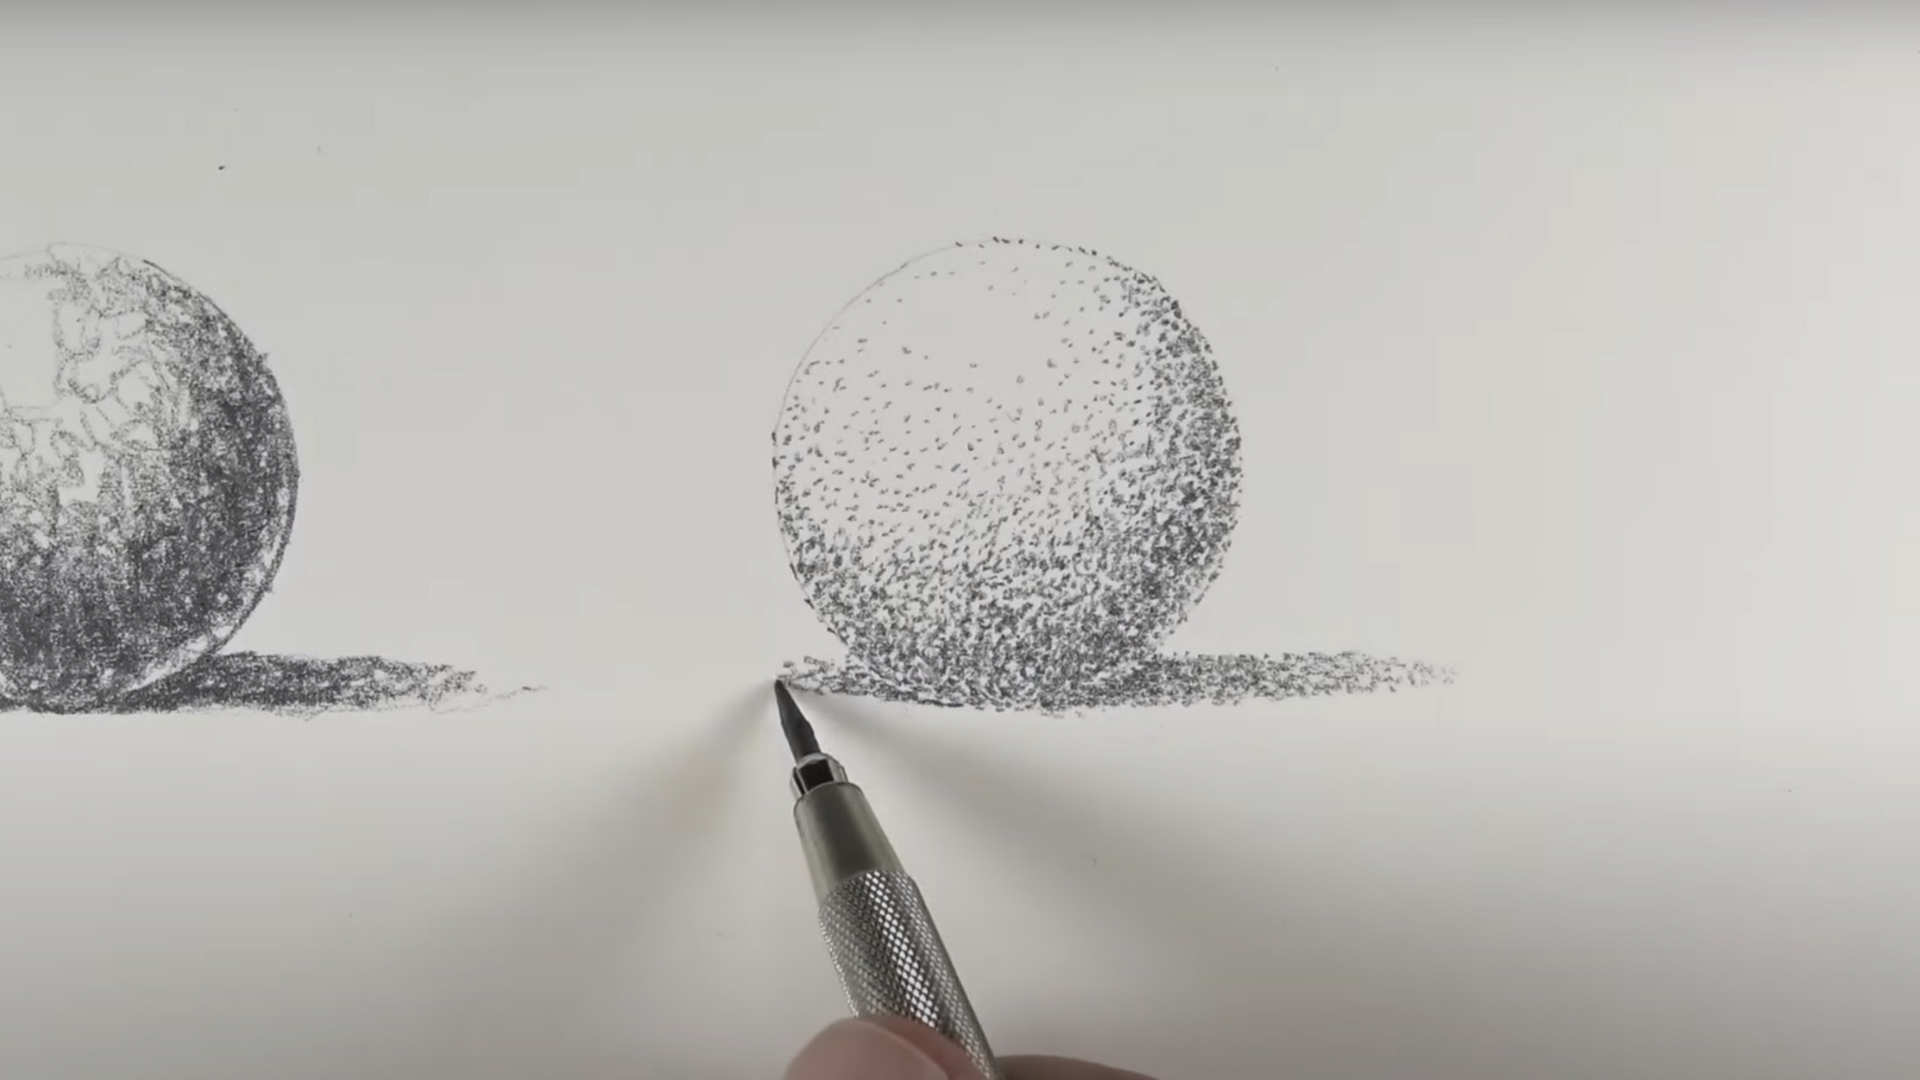
Stippling means creating a series of tiny dots. More dots close together mean darker values. Fewer, scattered dots in lighter tones. It’s time-consuming but meditative and results in a beautifully textured surface.
Though more common in pen and ink work, it can also be done effectively with soft graphite pencils (like 2B). Be patient, stippling rewards your attention with delicate gradation and charm.
5. Circling
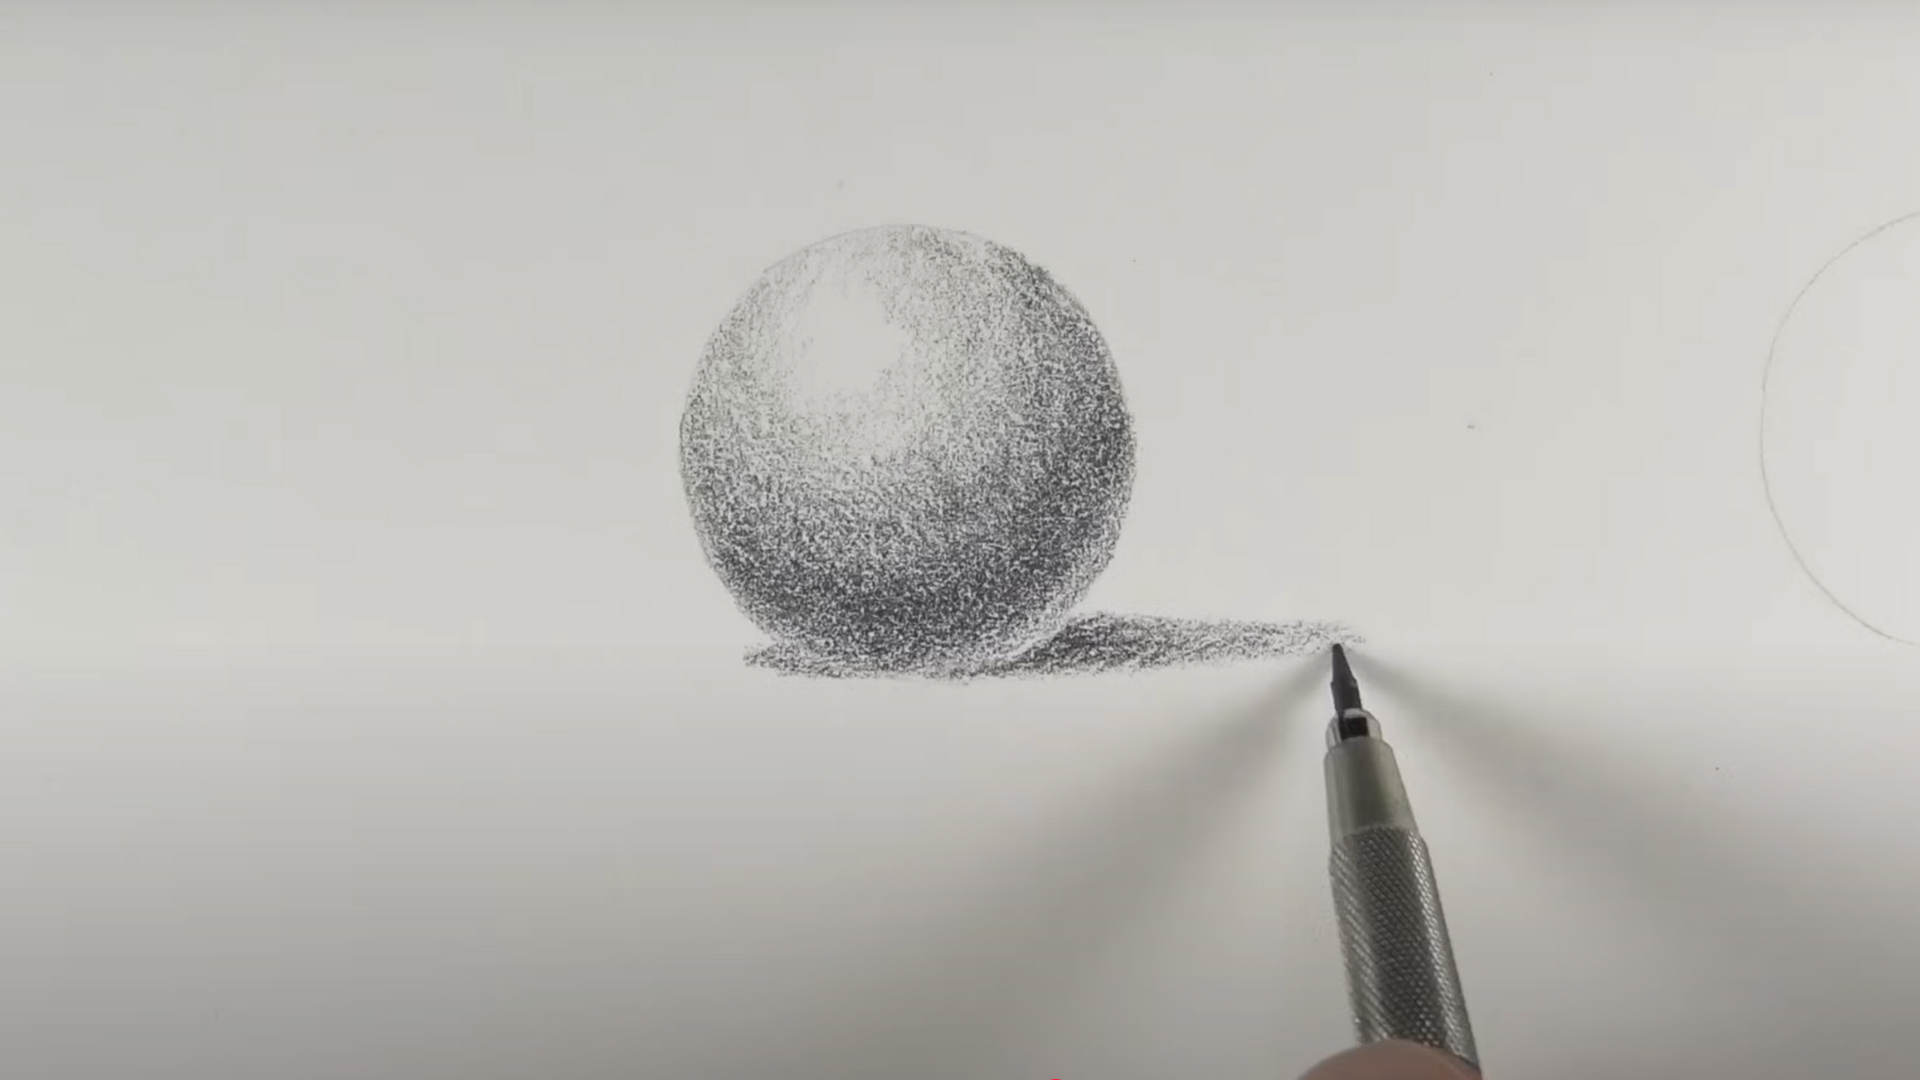
Use gentle circular motions to apply graphite in soft, controlled strokes. While it may sound like drawing circles, it’s more about continuously rotating your wrist to form even coverage.
This technique allows for smooth transitions between dark and light and works especially well with a slightly dull pencil. It picks up the paper’s texture too, giving your drawing a soft and organic finish. It’s ideal when you want fine control over tonal blending.
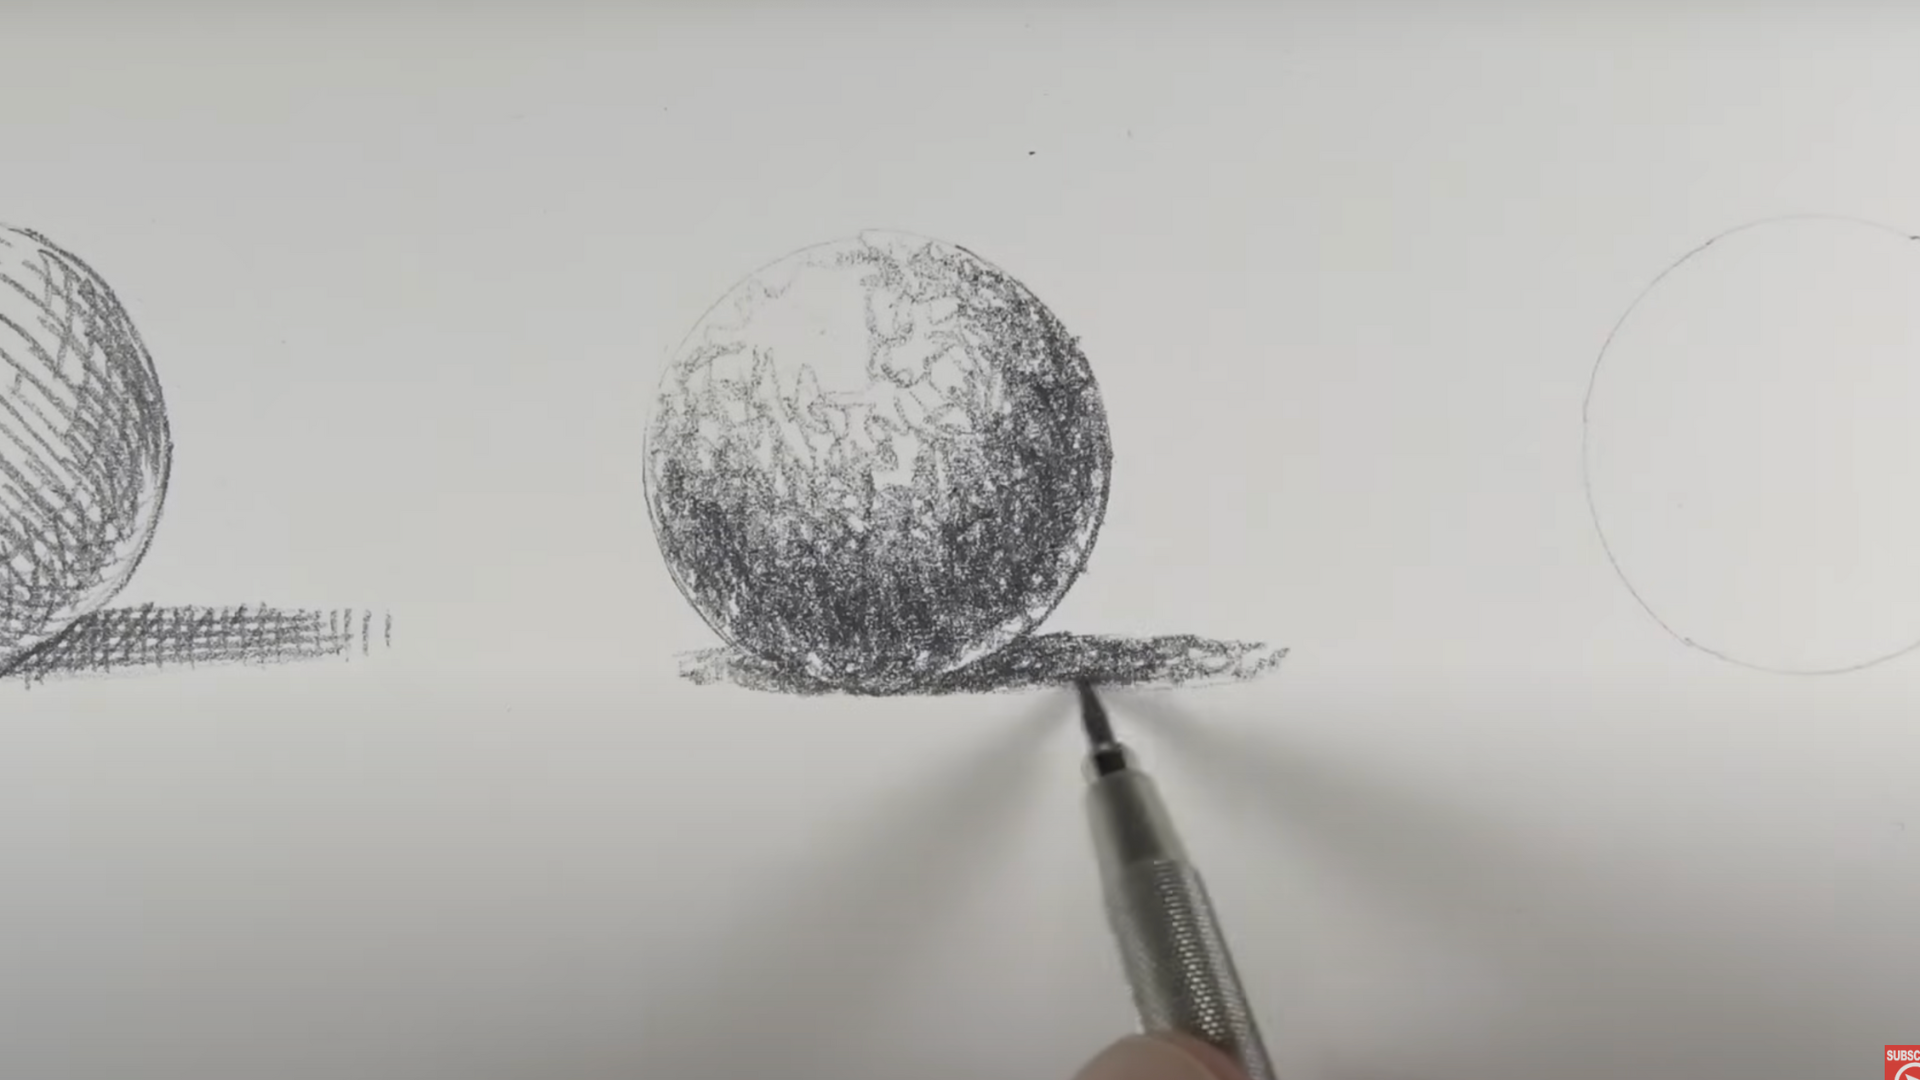
6. Blending
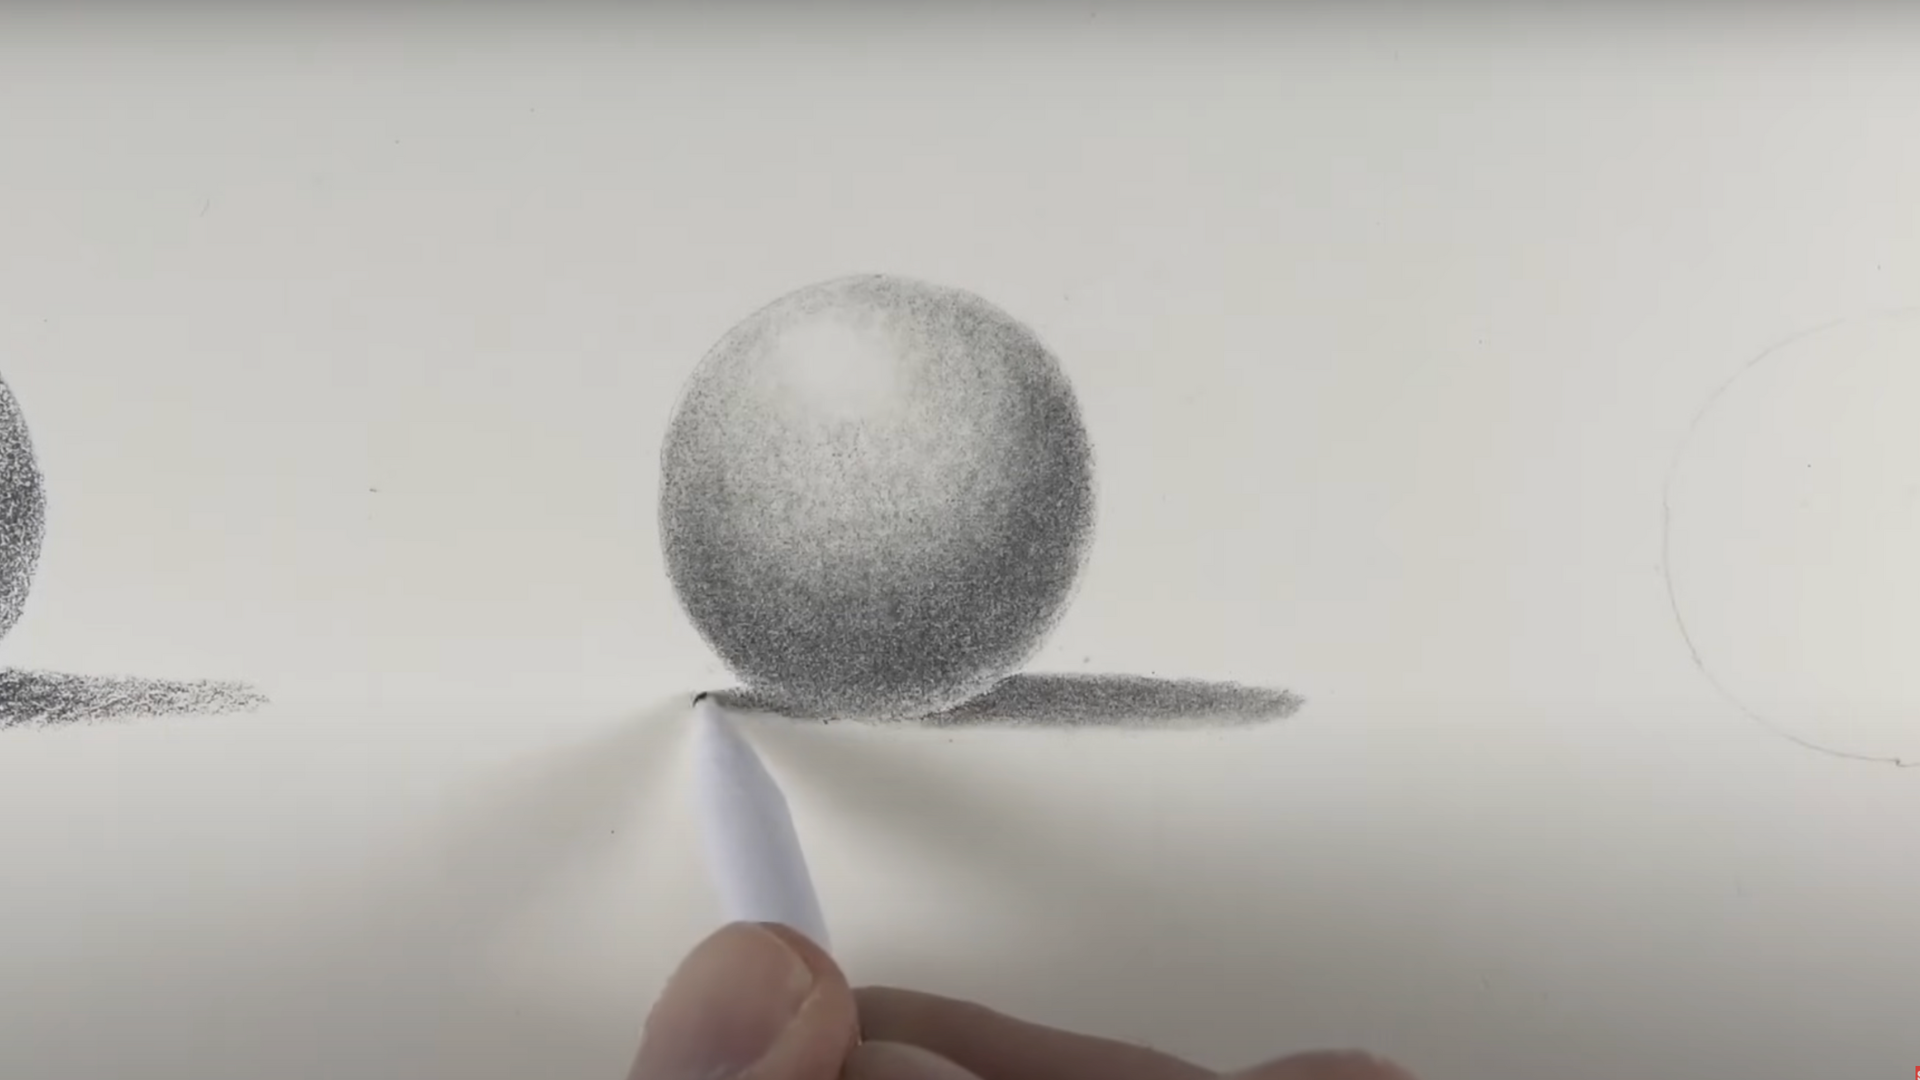
First, lay down graphite with soft, circular strokes (as in circling). Then, use a blending stump to smudge and spread the graphite, pushing it gently into the paper’s tooth. Always follow the direction of your original pencil marks.
Avoid using your fingers; they leave oils that can stain and distort your drawing. Alternate between pencil and stump until you achieve the desired softness. Blending also lets you smooth out shadows and fade edges beautifully.
7. Rendering
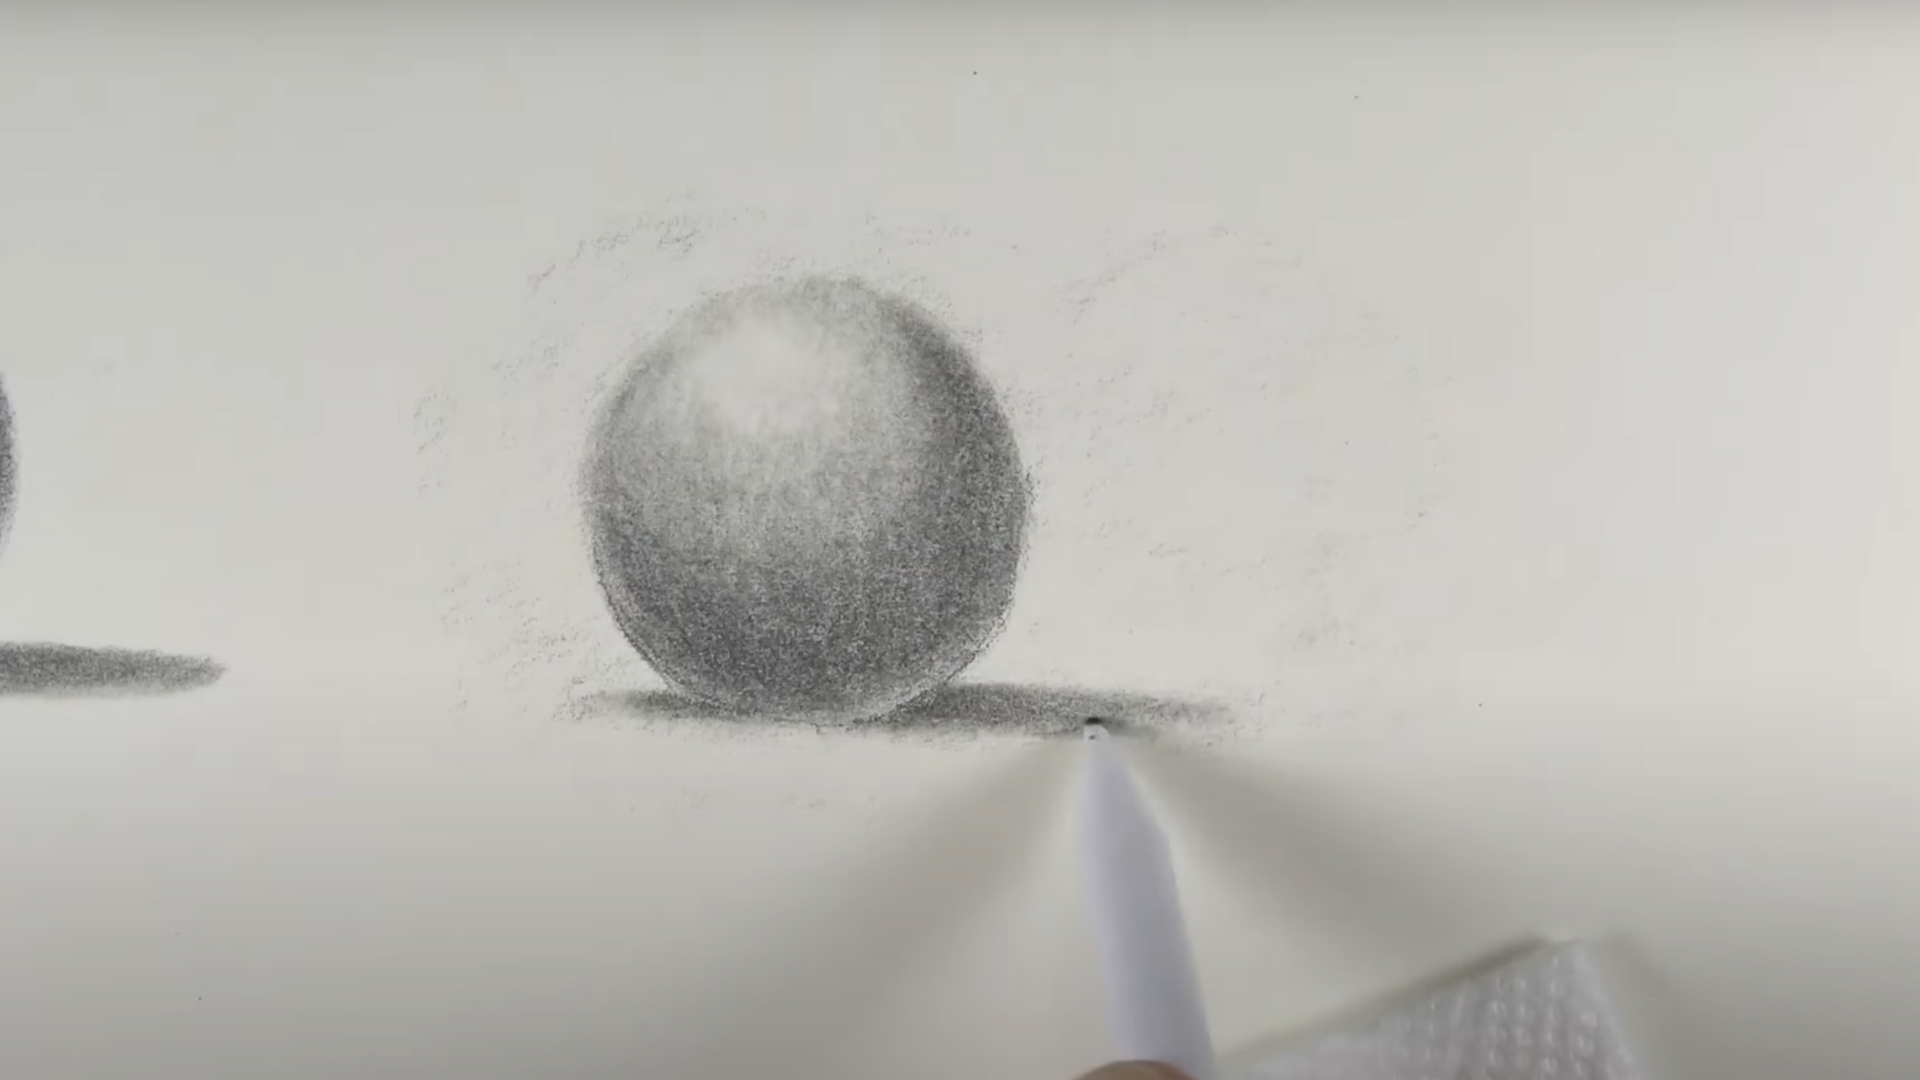
Rendering involves both applying and removing graphite to shape values and highlights. Begin by shading an area. Then, using a precision eraser, gently lift out lighter sections like highlights.
You can adjust your pressure on the eraser to vary how much graphite you remove, even revealing mid-tones. Rendering isn’t just erasing; it’s a dance between adding and subtracting material. Done well, it creates complex, layered textures and subtle realism.
Essential Tools for Pencil Drawing
|
Item |
Purpose |
|
Graphite Pencils (HB, 2B, 4B, 6B) |
Different grades for varied tone and softness |
|
Kneaded Eraser |
For gently lifting graphite and creating highlights |
|
Precision Eraser |
Helps remove small details for rendering and highlights |
|
Blending Stump |
For smooth and controlled blending |
|
Drawing Paper (Toothy) |
Slight texture improves graphite grip and helps techniques like circling |
|
Pencil Sharpener |
Keeps fine points essential for hatching and cross-hatching |
|
Ruler or Guides (Optional) |
Helpful for structure in technical hatching or sketching |
Wrapping It Up
Drawing is a skill that grows stronger with each stroke of the pencil. The six drawing techniques outlined in this blog offer beginners a solid foundation to build upon.
These techniques aren’t magic tricks but practical tools that help artists see the world differently and transfer what they see onto paper.
As artists practice these methods, they’ll find their own style emerging. The key is to stay patient and keep going. Progress happens in small steps, not giant leaps.
For those just starting their artistic path, remember that every skilled artist was once a beginner, too. The difference between giving up and getting better often comes down to showing up and putting pencil to paper regularly.
What’s next? Pick one technique, try it today, and watch your confidence grow with each drawing session.