Rabbits can be tricky to draw. Many artists struggle to make their rabbit drawings resemble the real thing, rather than cartoon characters. The ears might be too big, the proportions off, or the fur texture doesn’t look right.
These issues can leave your artwork looking flat and lifeless.
Anyone can learn to draw rabbits that truly capture their natural charm. This guide breaks down the process into clear steps that help you focus on the key details that make rabbits look genuine.
From basic shapes to finishing touches, you’ll find out exactly what to pay attention to for creating rabbit drawings that hop off the page.
Art Supplies Needed to Draw a Rabbit
-
Drawing paper (horizontal orientation)
-
Pencil with eraser
-
Black pen or marker for outlining
-
Prismacolor pencils or any colored pencils in the colors:
- Ginger Root (light tan)
- Light Umber or Medium Brown
- Grass Green and Dark Green
- White
How to Draw a Rabbit Step by Step
Let’s learn!
Step 1: Sketch the Bunny’s Head and Eyes
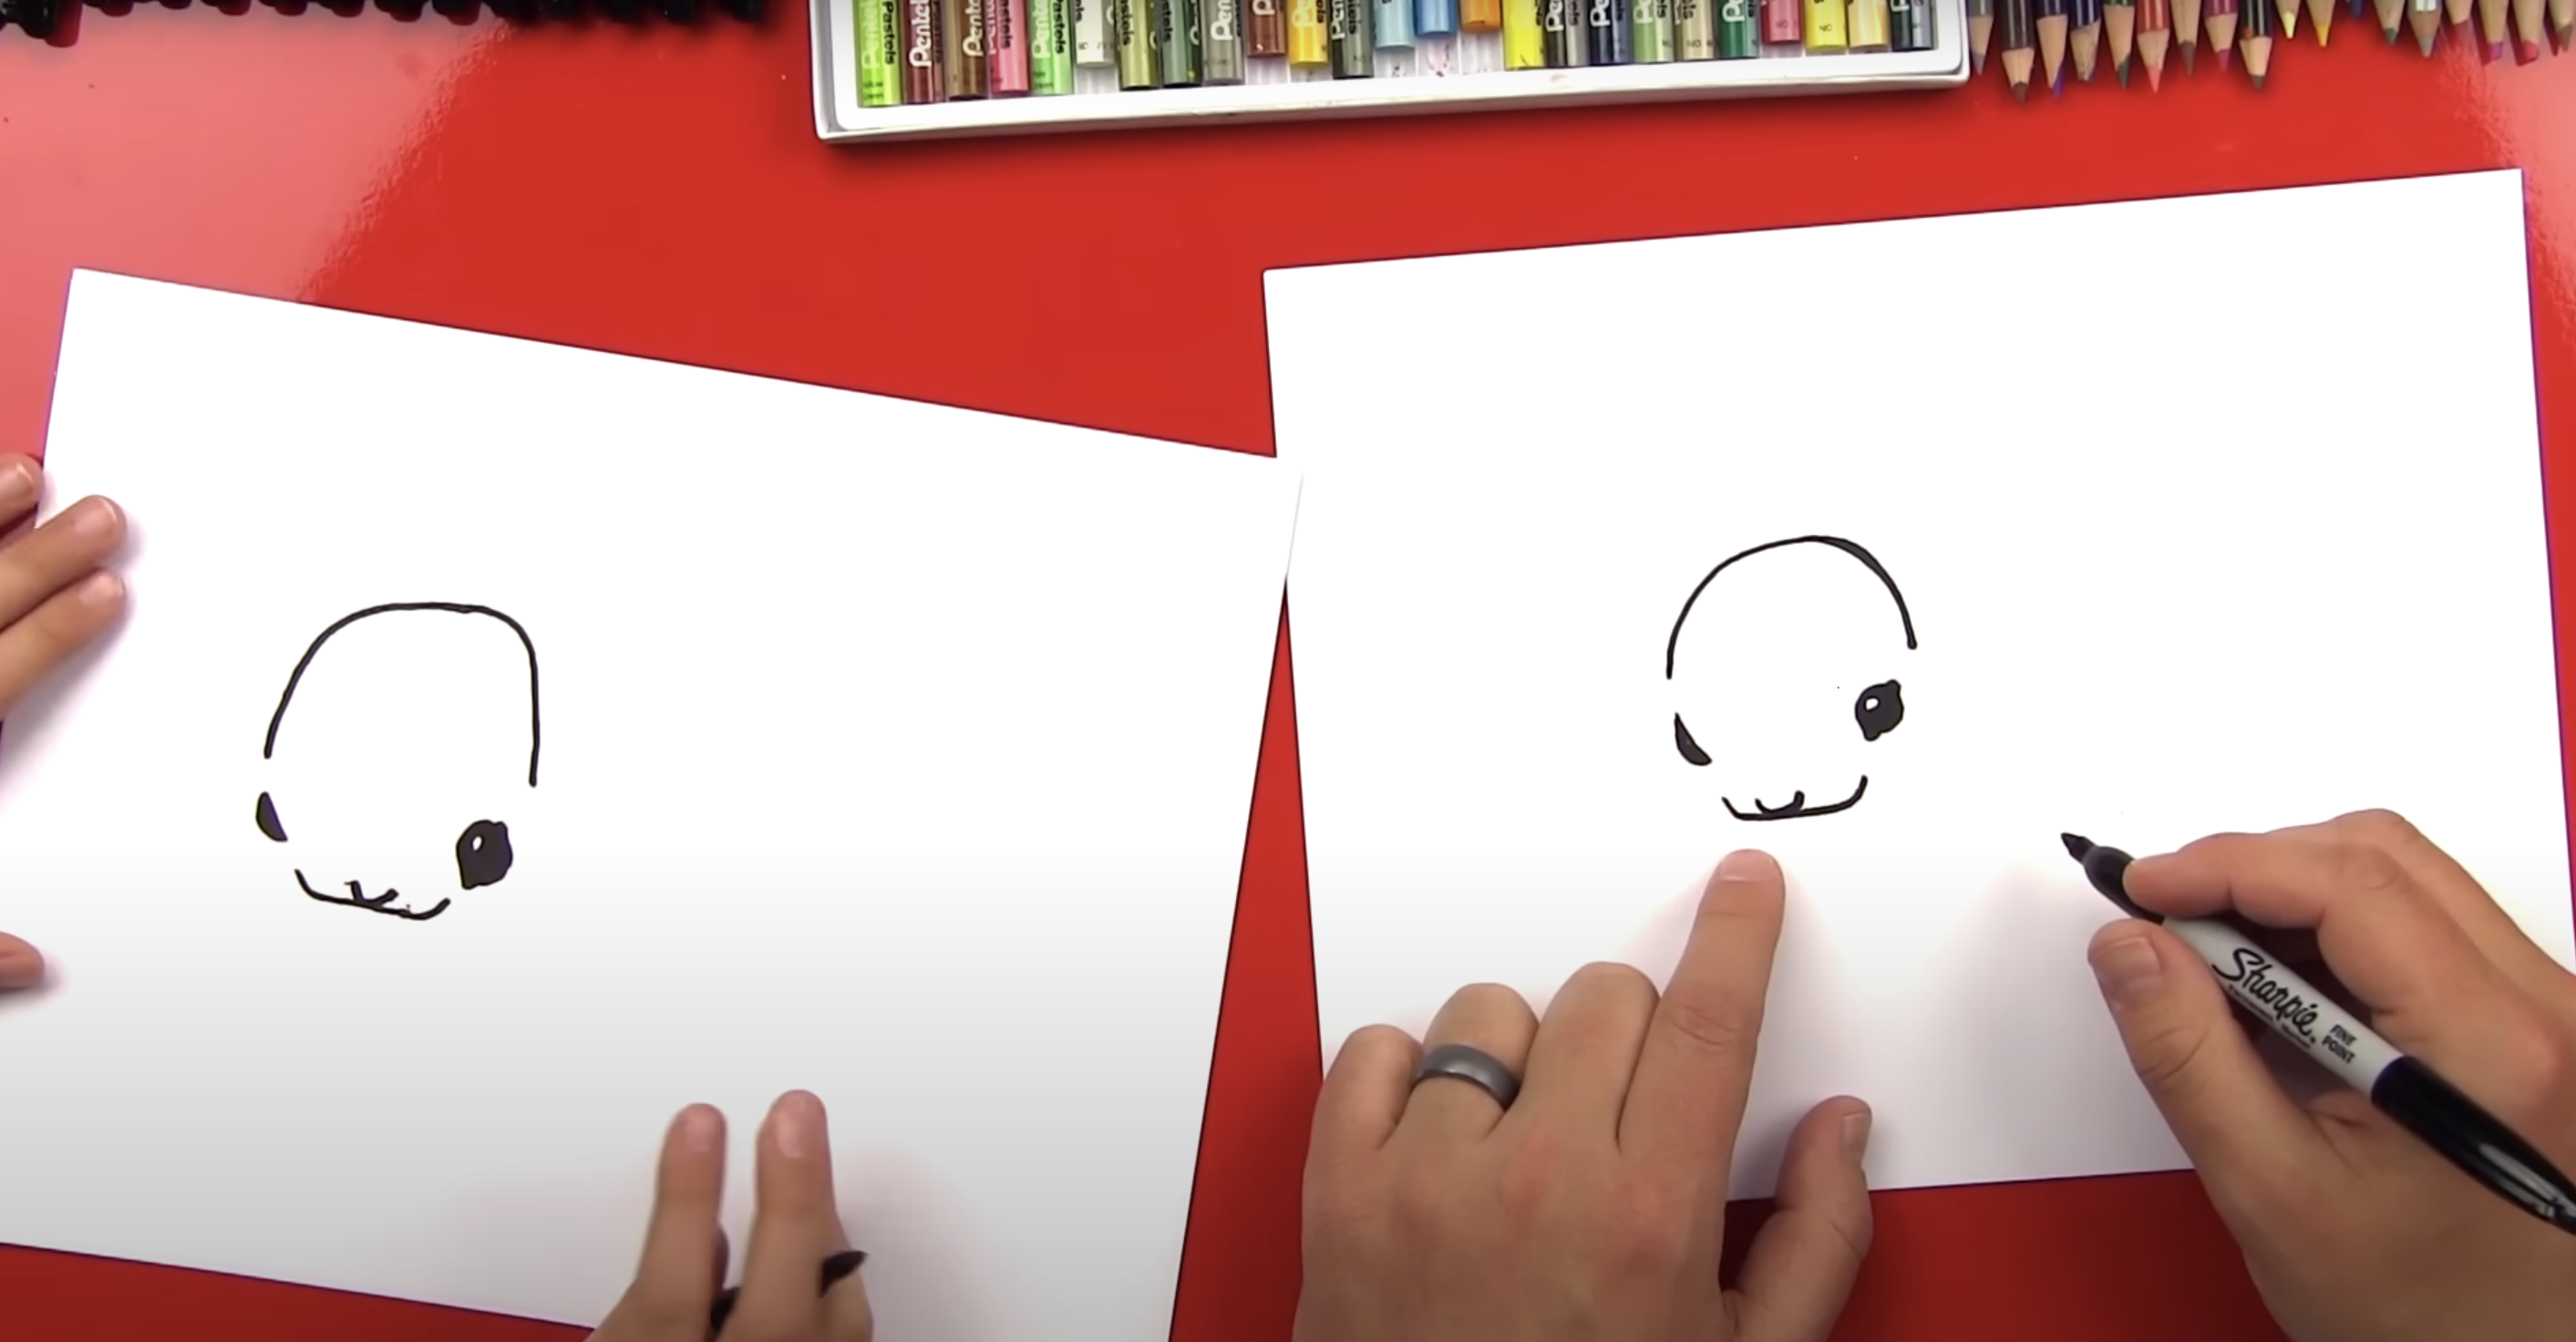
She begins by lightly drawing an upside-down U shape near the middle-left of the paper to form the top of the bunny’s head.
The curve should be wide, not narrow, for a chubby appearance.
Next, she draws two small eyes: one is a slanted oval on the left, and the other is a full circle on the right side of the head. Each eye has a tiny circle inside for the highlight, left white, while the rest is shaded in black.
Step 2: Add Facial Details
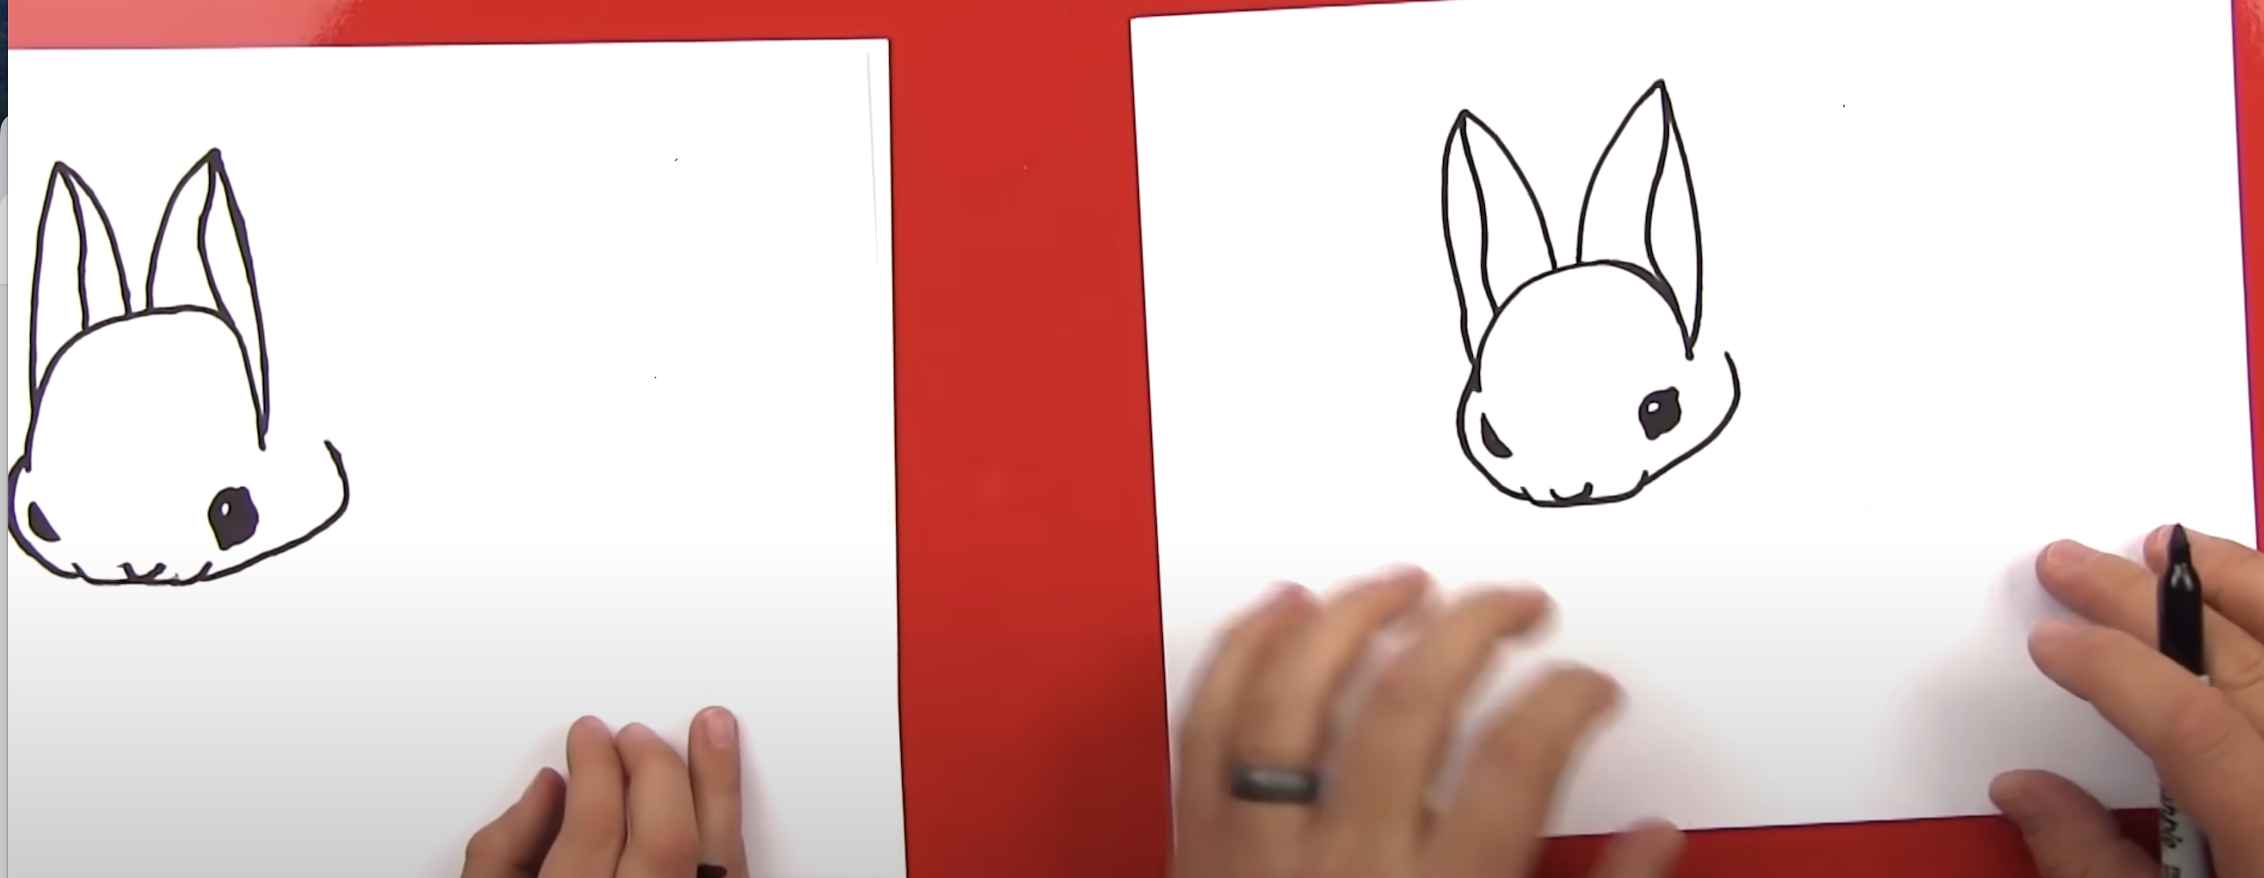
She connects a small curved line downward from the left eye to form the start of the nose and cheeks. A soft U-shape is added to the inside of the nose tip in that space.
Then, she curves lines around the eyes to give them a more 3D bunny-like appearance, adding tear ducts and soft bumps to make the eyes appear rounded and expressive.
Step 3: Draw Chubby Cheeks and Tall Bunny Ears
Starting just above the eyes, she draws the cheeks as rounded curves sweeping out and upward. On the left, the line wraps around and reconnects; on the right, it flares outward and curves upward. Two vertical curves rise from dots above the nose to begin the ears, spaced just a little apart.
Each ear has a gentle bottom line that curves into the head, and inner ear lines mimic a soft sine wave for a realistic touch.
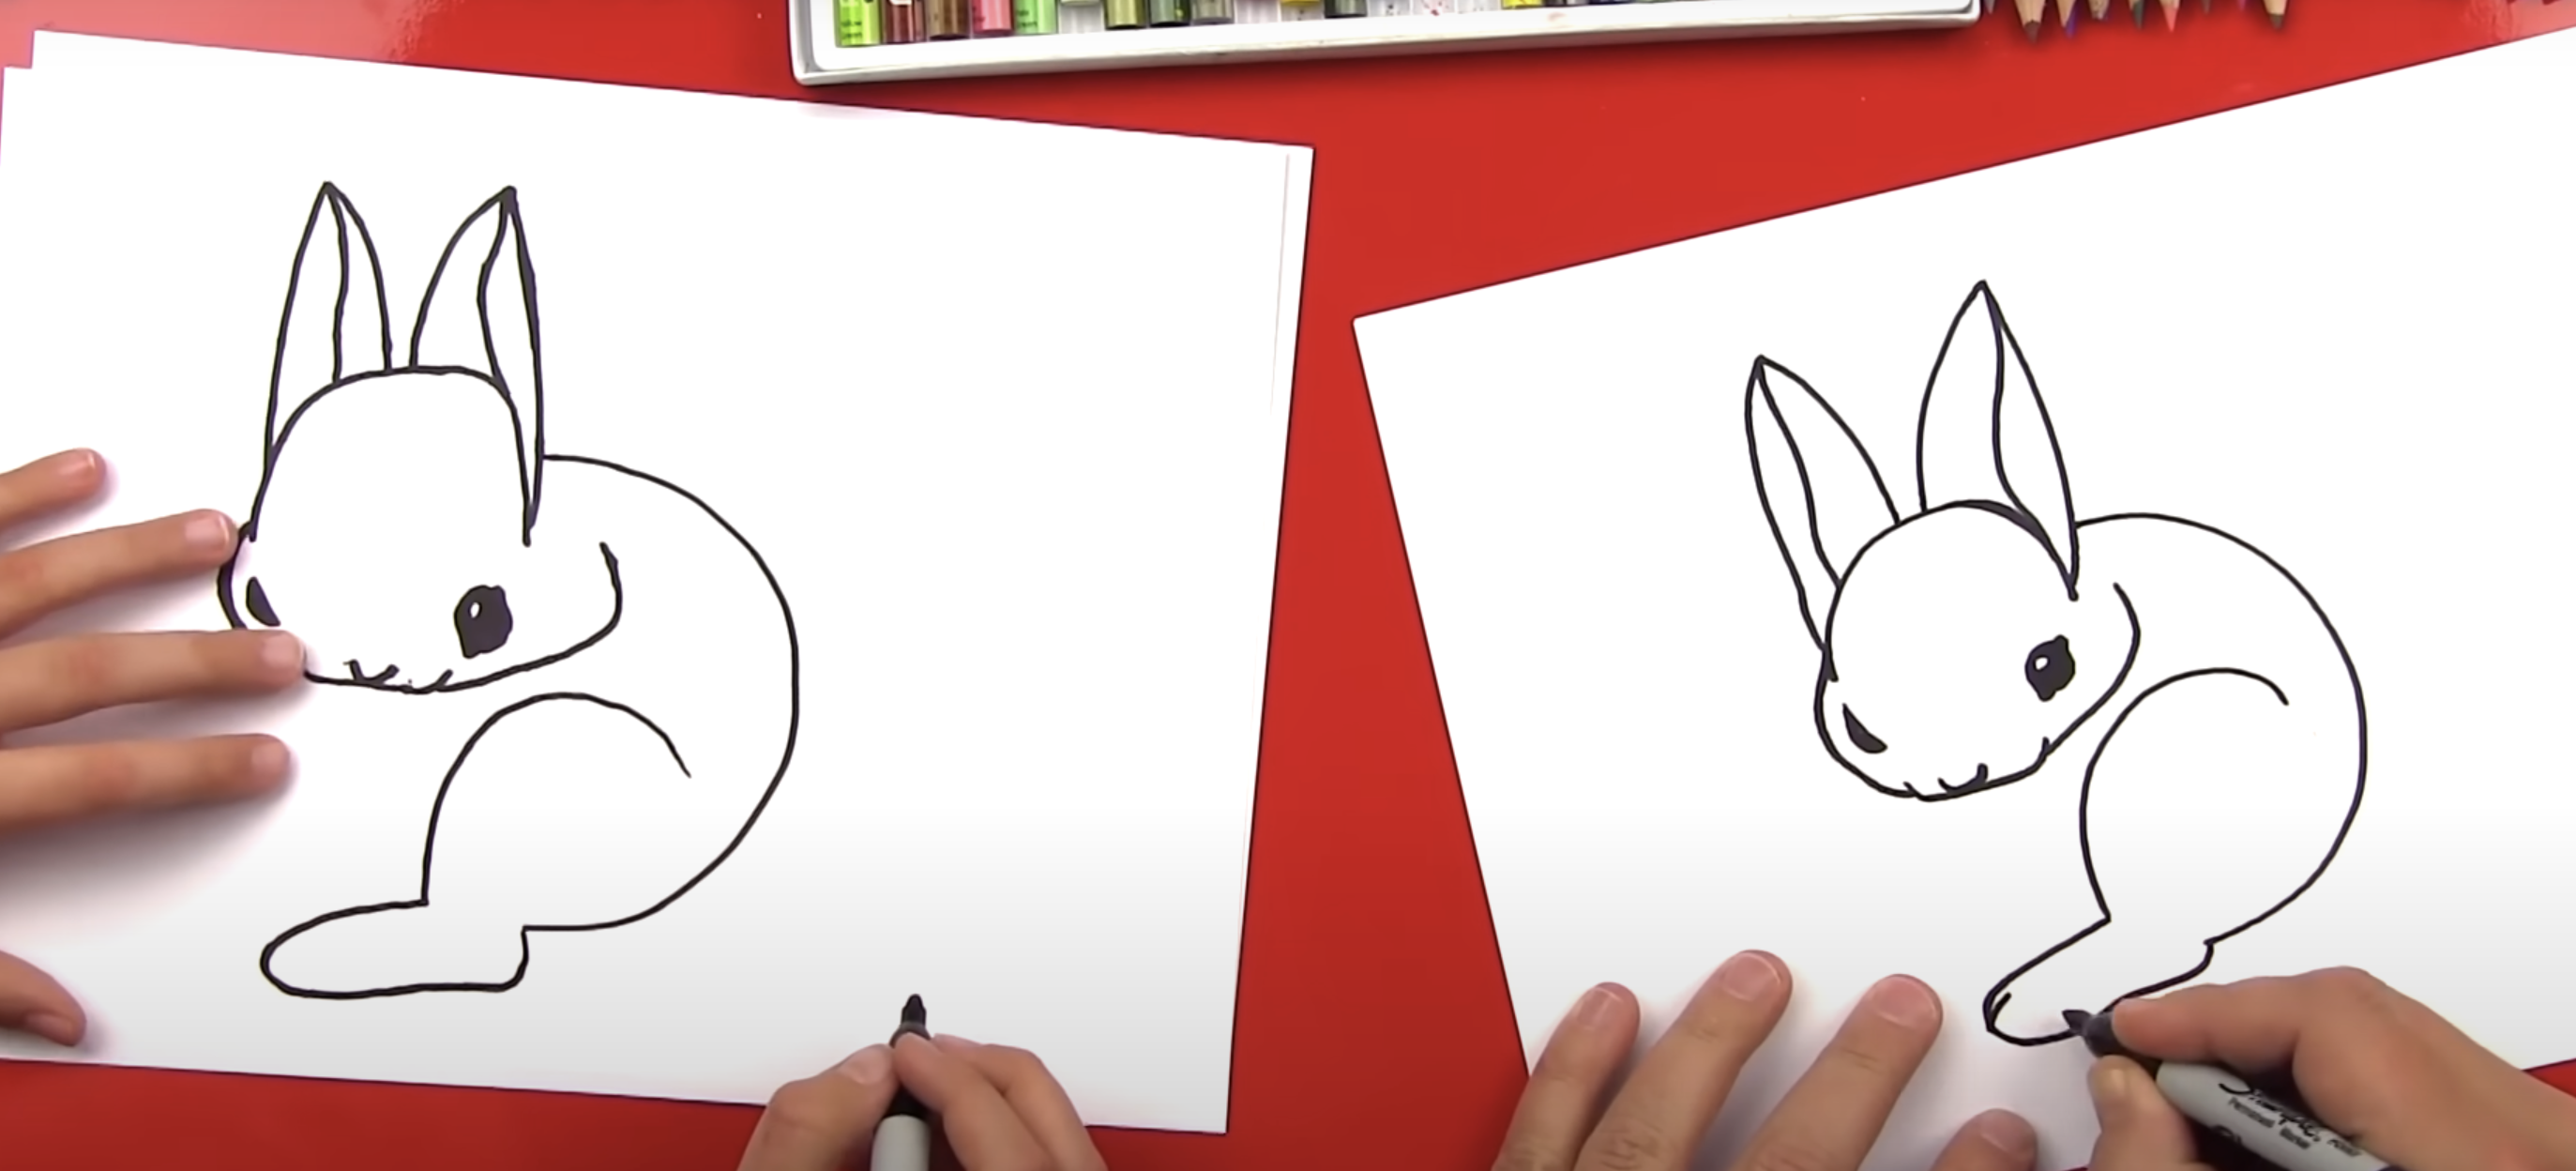
Step 4: Outline the Body and Hind Legs
From the base of the right ear, she draws a backward “C” shape to form the bunny’s back. Below that, she adds a large, rainbow-shaped curve to represent the back leg. The foot is drawn extending outward from the leg with rounded toes marked by small lines.
Step 5: Front Paws, Chest, and Tail
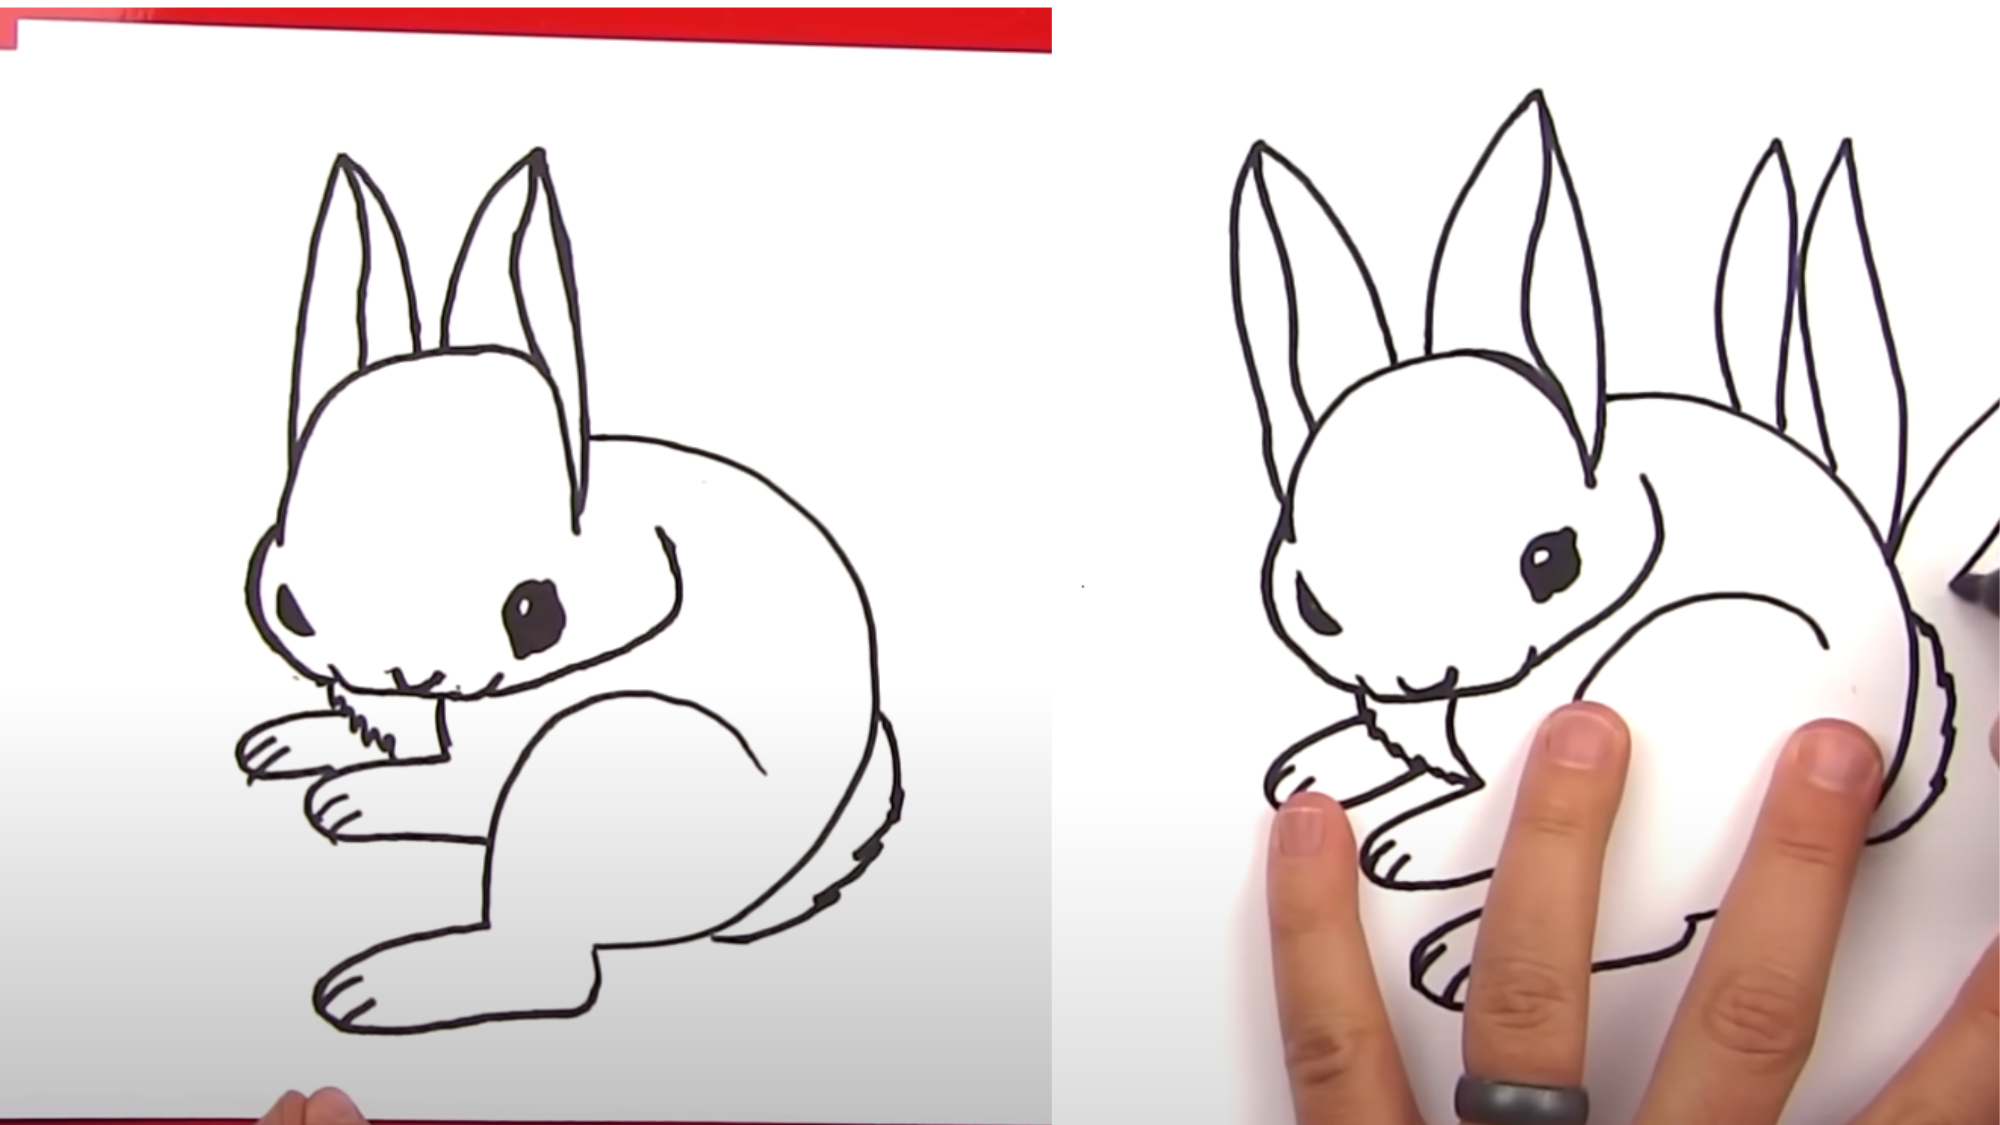
She sketches the chest line curving down from below the head, and then adds a front foot poking out gently, curved back toward the body.
A second foot lies beneath the chest as if the bunny is lounging. She uses short zigzag lines for fur texture around the chest. A tail is added to the far side of the body, created using soft, jagged lines to appear fluffy but not overly wild.
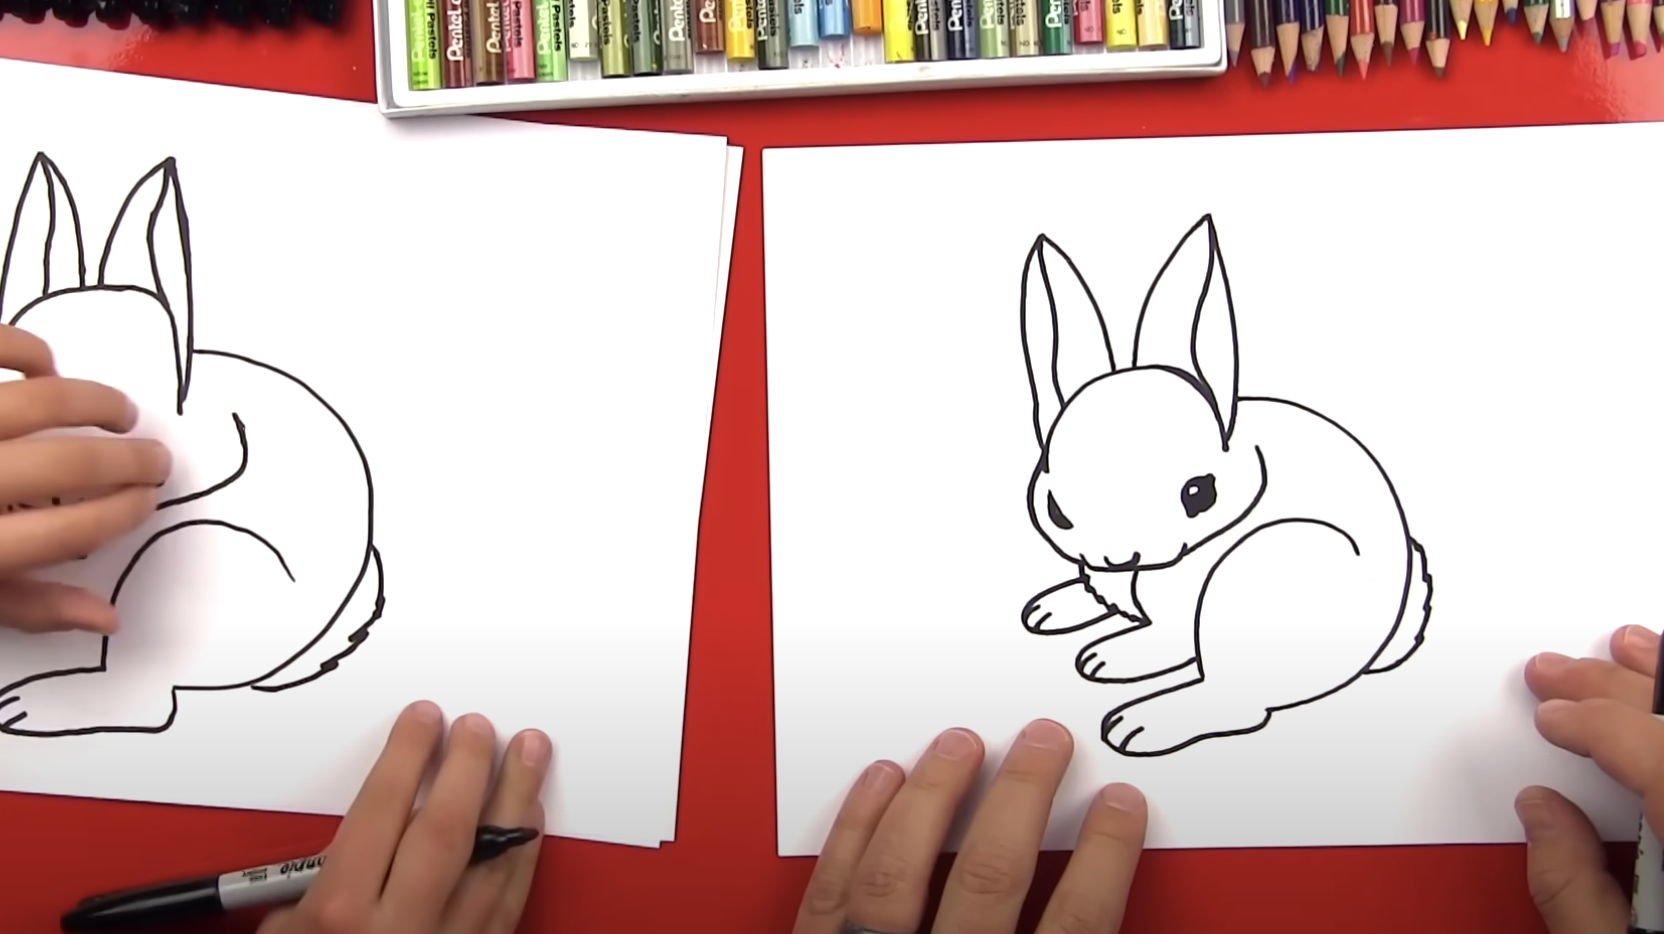
Step 6: Add Light Background Details

To place the bunny in its natural setting, she draws simple lines of grass and plants behind it.
These are added using vertical strokes, spaced out to avoid clutter. It creates the feeling of a bunny resting in a meadow or garden. She uses greens to fill in the plant shapes.
Step 7: Add Shading and Texture
She begins by coloring a light layer of “Ginger Root” over the bunny’s fur, following the direction of the body for a rounded look. The inner ears and chest are left white. Then, she uses “Light Umber” to deepen the areas around the ears, forehead, eyes, and legs. With short, delicate strokes, she shades in the creases and contours to make the fur appear soft and luxurious.
Lastly, she uses a white pencil to blend all the colored layers, smoothing out lines and adding a polished finish.
Easy Tips for Making Your Rabbit Look Real
How to draw a rabbit is easy, but getting your rabbit drawing to look real doesn’t have to be hard as well. Here are six simple tips that will help your artwork come to life:
- Start with basic shapes – Begin with circles and ovals to form the rabbit’s body and head. This creates the right structure before adding details.
- Pay attention to proportions – Ensure the head, body, and ears have the correct size relationship to each other. Rabbits have distinct body ratios that make them look like rabbits.
- Study real rabbits – Look at photos of real rabbits to notice how they sit, how their fur lays, and their facial features. This helps you capture what makes rabbits unique.
- Add fur texture with light strokes – Use short, gentle pencil strokes in the direction the fur grows. Don’t draw each hair – suggest the texture instead.
- Focus on the eyes and nose – These features bring life to your drawing. Make the eyes shiny and alert, and get the nose shape right for that rabbit look.
- Create depth with shading – Add shadows where the light wouldn’t reach, like under the chin and belly. This makes your rabbit look three-dimensional.
Common Mistakes When Drawing a Bunny and How to Fix Them
When drawing rabbits, even skilled artists can slip up. Here are the most common mistakes when drawing a rabbit and how to correct them:
- Making the ears too short – Rabbit ears are typically longer than the head. Fix this by extending the ears to about 1.5 to 2 times the length of the head for most rabbit breeds.
- Drawing a cat-like face – Rabbits have a distinct face shape with a shorter muzzle. Fix this by keeping the nose area shorter and more rounded than a cat’s face.
- Incorrect body proportions – Rabbits have large back legs and a rounded body. Fix this by making the hindquarters larger and more powerful than the front legs.
- Flat-looking fur – Many artists draw fur that lacks depth and dimension. Fix this by varying your pencil pressure and stroke direction to create layers of fur texture.
- Missing the distinctive tail – The small, round, cotton-like tail is often forgotten. Fix this by adding this small but important feature to complete your rabbit.
- Over-detailing the fur – Too many individual hair lines can make the drawing look messy. Fix this by suggesting fur with grouped strokes rather than drawing each hair.
- Forgetting the whiskers – Rabbits have prominent whiskers that add character. Fix this by adding long, thin lines extending from the muzzle area.
- Making eyes too round – Rabbit eyes are slightly oval-shaped, not perfectly round. Fix this by studying real rabbit eyes and their almond-like shape.
To Conclude
Drawing a rabbit that looks real takes practice, but it’s totally worth it. In this guide, it is shown how to create a lifelike bunny, from basic shapes to adding those final details that bring your artwork to life.
Remember to start with simple forms before moving to more complex features. Pay careful attention to the body shape, ears, and face – these are the parts that make a rabbit look like a rabbit. Watching out for common mistakes, such as incorrect proportions or flat-looking fur, will help you avoid the pitfalls many artists face.
The more you practice, the better your rabbits will look. Try drawing them in different poses and from various angles to build your skills.
Take your time with each part of the process and don’t rush the details.
What’s next? Grab your pencil and paper and try drawing your rabbit today! If you encounter any issues, refer back to this guide for assistance.