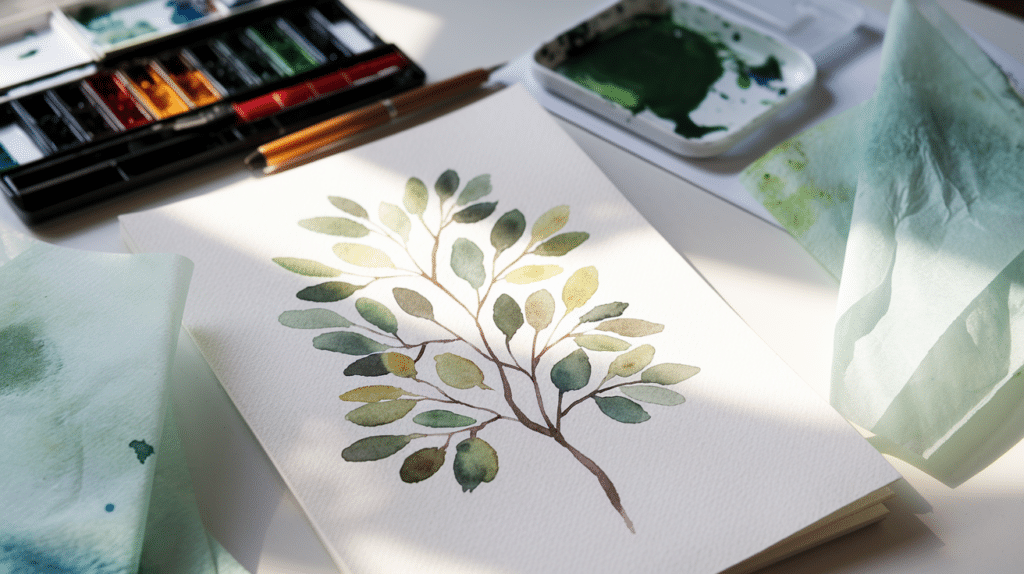
Watercolor leaf paintings catch the eye with their soft colors and natural feel. Many artists struggle to create these simple yet stunning images on paper.
The right techniques make all the difference between flat, lifeless leaves and ones that seem to float off the page.
Good news! You can learn to paint beautiful watercolor leaves without years of practice. This guide shows you how to create lifelike leaves using basic methods anyone can master.
In this blog, you’ll find must-know watercolor tips, clear step-by-step instructions to paint watercolor leaves, and fresh design ideas to spark your creativity.
By the end, you will have the skills to confidently add lovely leaf elements to your art projects.
Watercolor Basics: Must-Know Tips for Beginners
Starting with watercolors can feel tricky, but a few basic tips can help you succeed right from the start. These points will make your leaf painting path much smoother.
Quality matters with watercolor supplies. You don’t need expensive items, but mid-range papers and paints will give you better results than the cheapest options. Here’s what helps most beginners:
- Use actual watercolor paper (140lb/300gsm); it holds water without warping.
- Start with a small set of 8-12 colors rather than dozens.
- Get 2 to 3 brushes in different sizes instead of a full set.
- Keep clean water nearby and change it when it gets murky.
- Practice wet-on-wet (applying paint to damp paper) and wet-on-dry techniques. Both create different effects that work well for leaves.
Remember that watercolors dry lighter than they appear when wet. Test colors on scrap paper first to avoid surprises. With these basics, you’ll be ready to start painting lovely leaves without common beginner mistakes.
Step-by-Step Instructions to Paint Watercolor Leaves
Now that you understand the basics, let’s put them into practice. The following steps break down leaf painting into manageable parts, making it easy for anyone to follow along.
Even if you’ve never held a paintbrush before, these instructions will guide you through creating beautiful watercolor leaves from start to finish.
1. Gather Your Materials and Get Ready
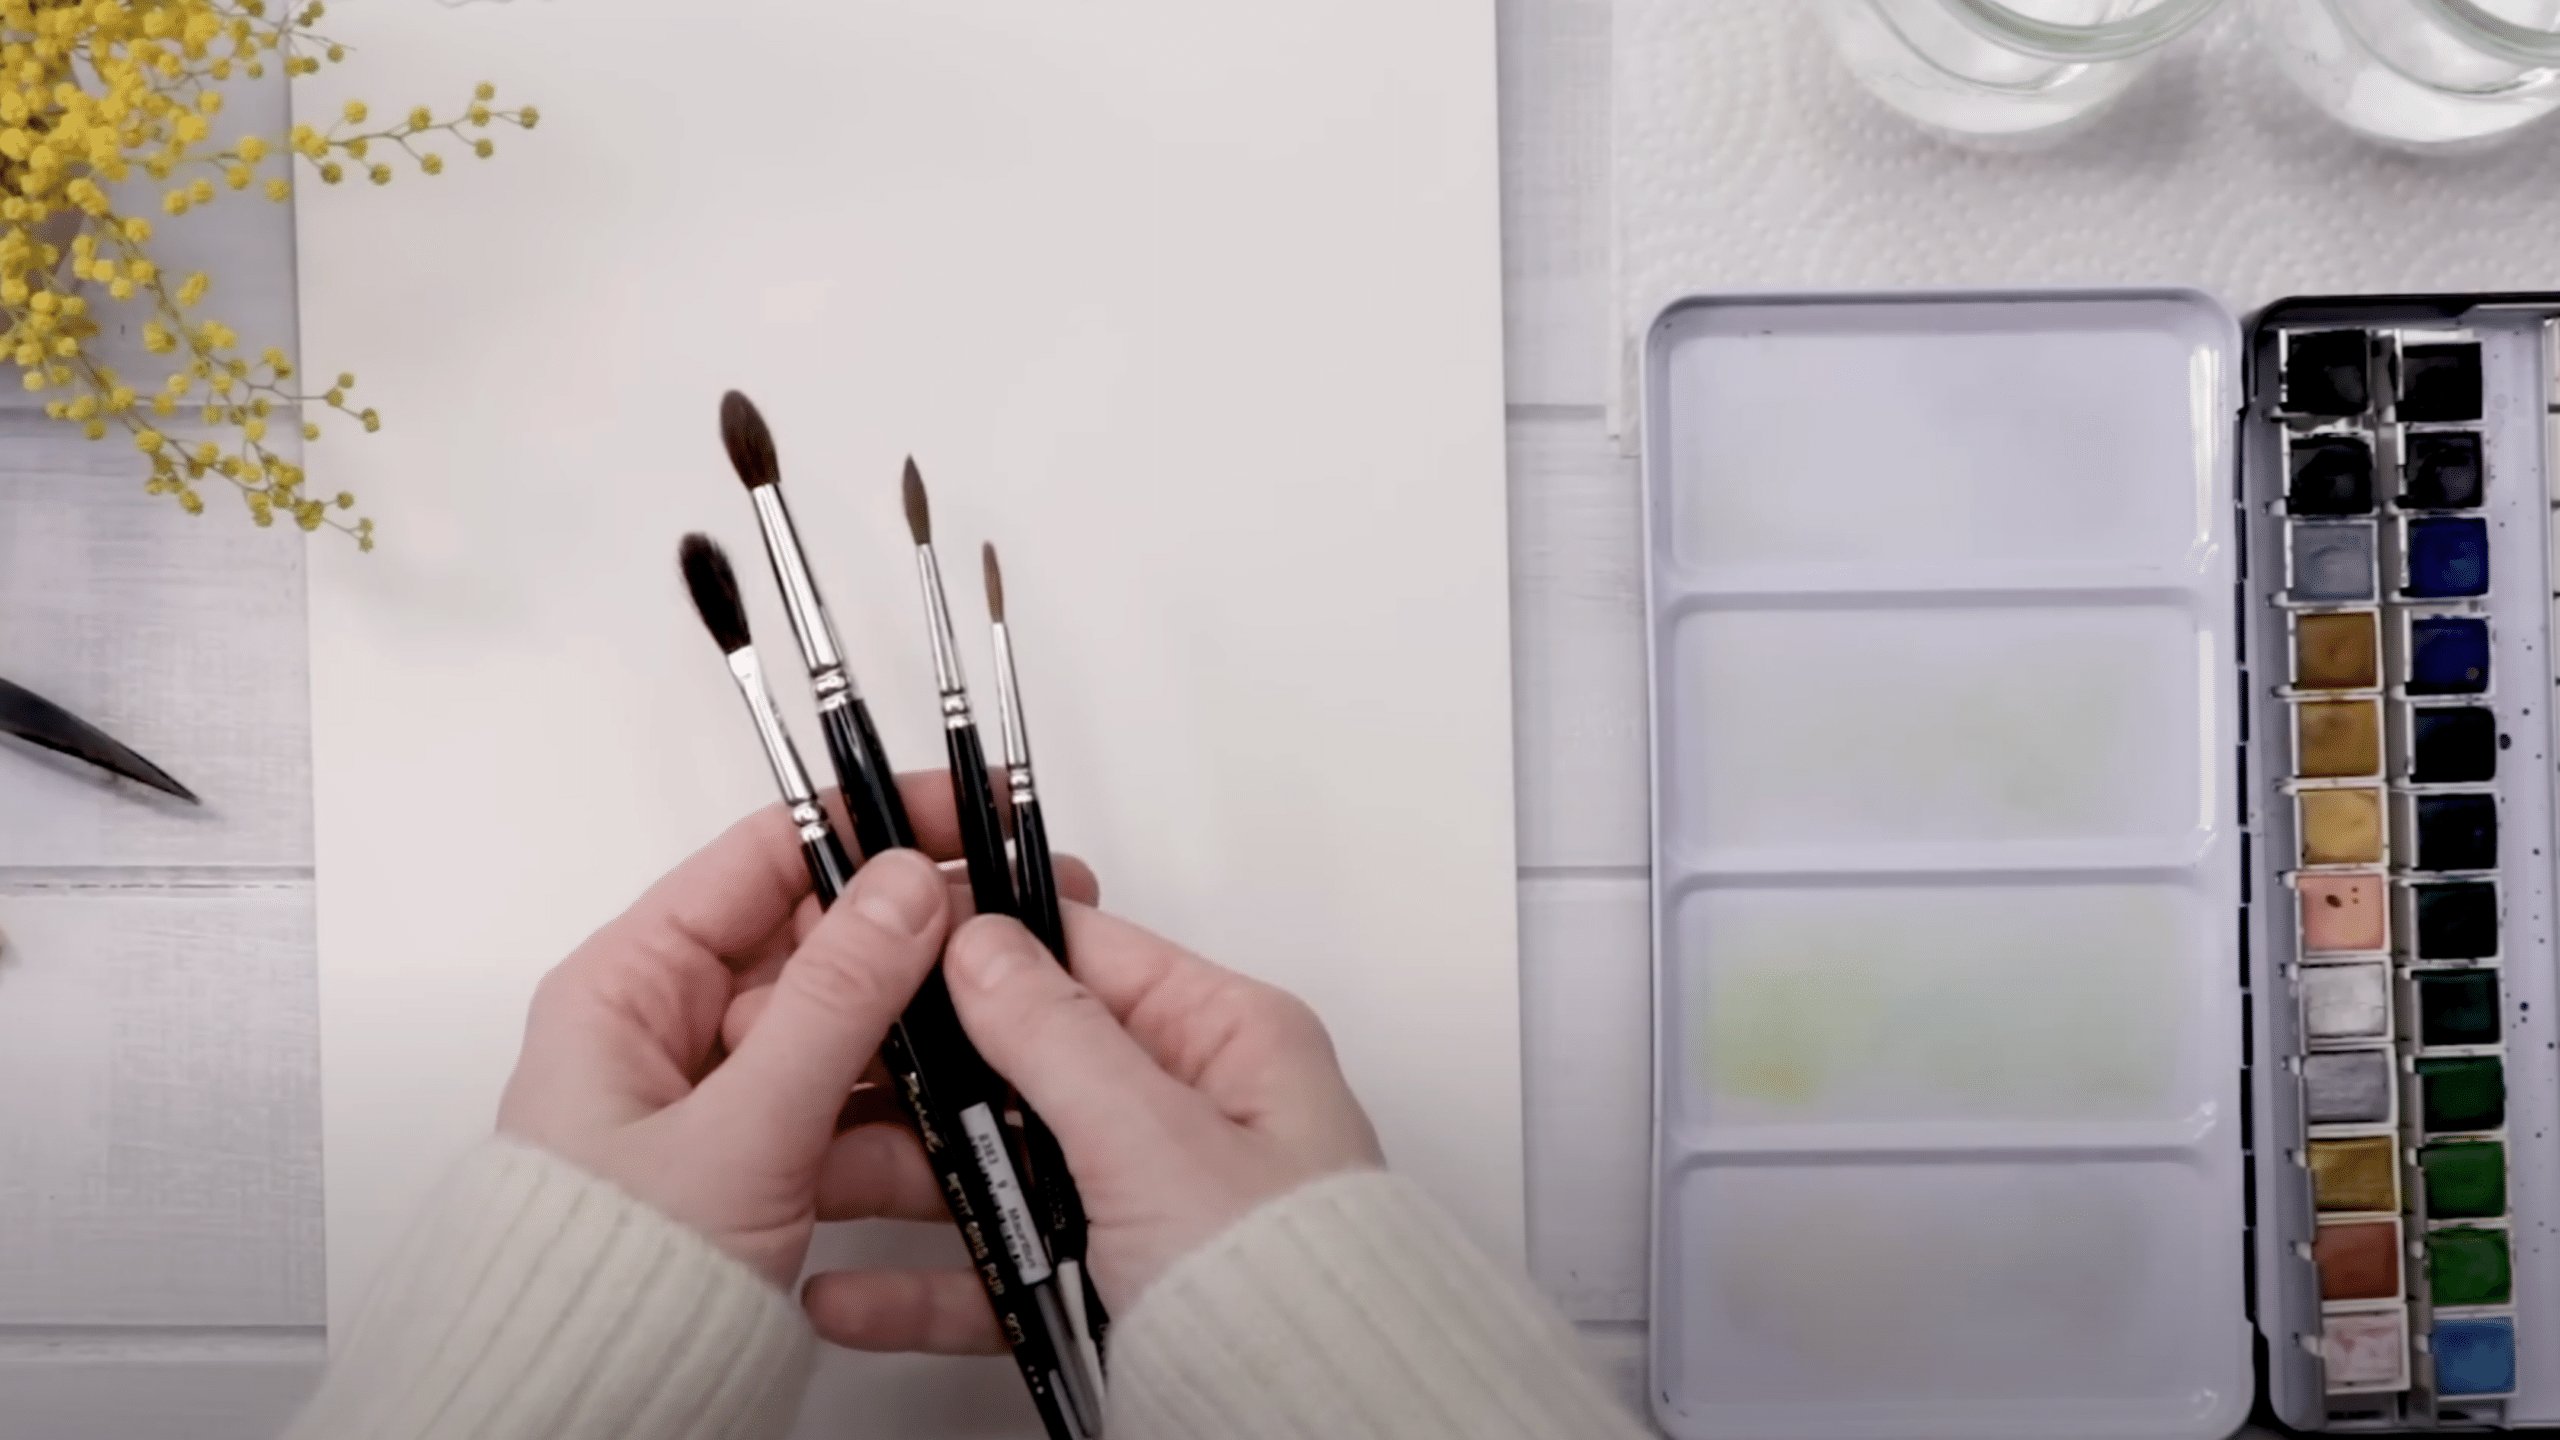
To get started with painting watercolor leaves, it’s important to gather all the necessary materials for the best results. Here’s what you’ll need:
- Cold-Pressed Watercolor Paper (140 lb): This texture helps absorb the paint and gives your leaves a natural, vibrant look.
- Watercolor Palette: A set like the Moneo 48-pan set offers a wide range of colors for mixing and experimentation.
- Clean Water: Have two glasses of water, one for rinsing your brushes and another for mixing colors.
- Paper Towel: Essential for blotting your brushes and controlling the paint consistency.
- Brushes: Small round brushes (sizes 2 and 3) with a large belly for smooth strokes and a pointed round brush for fine details and precision.
2. Mix Your Paints
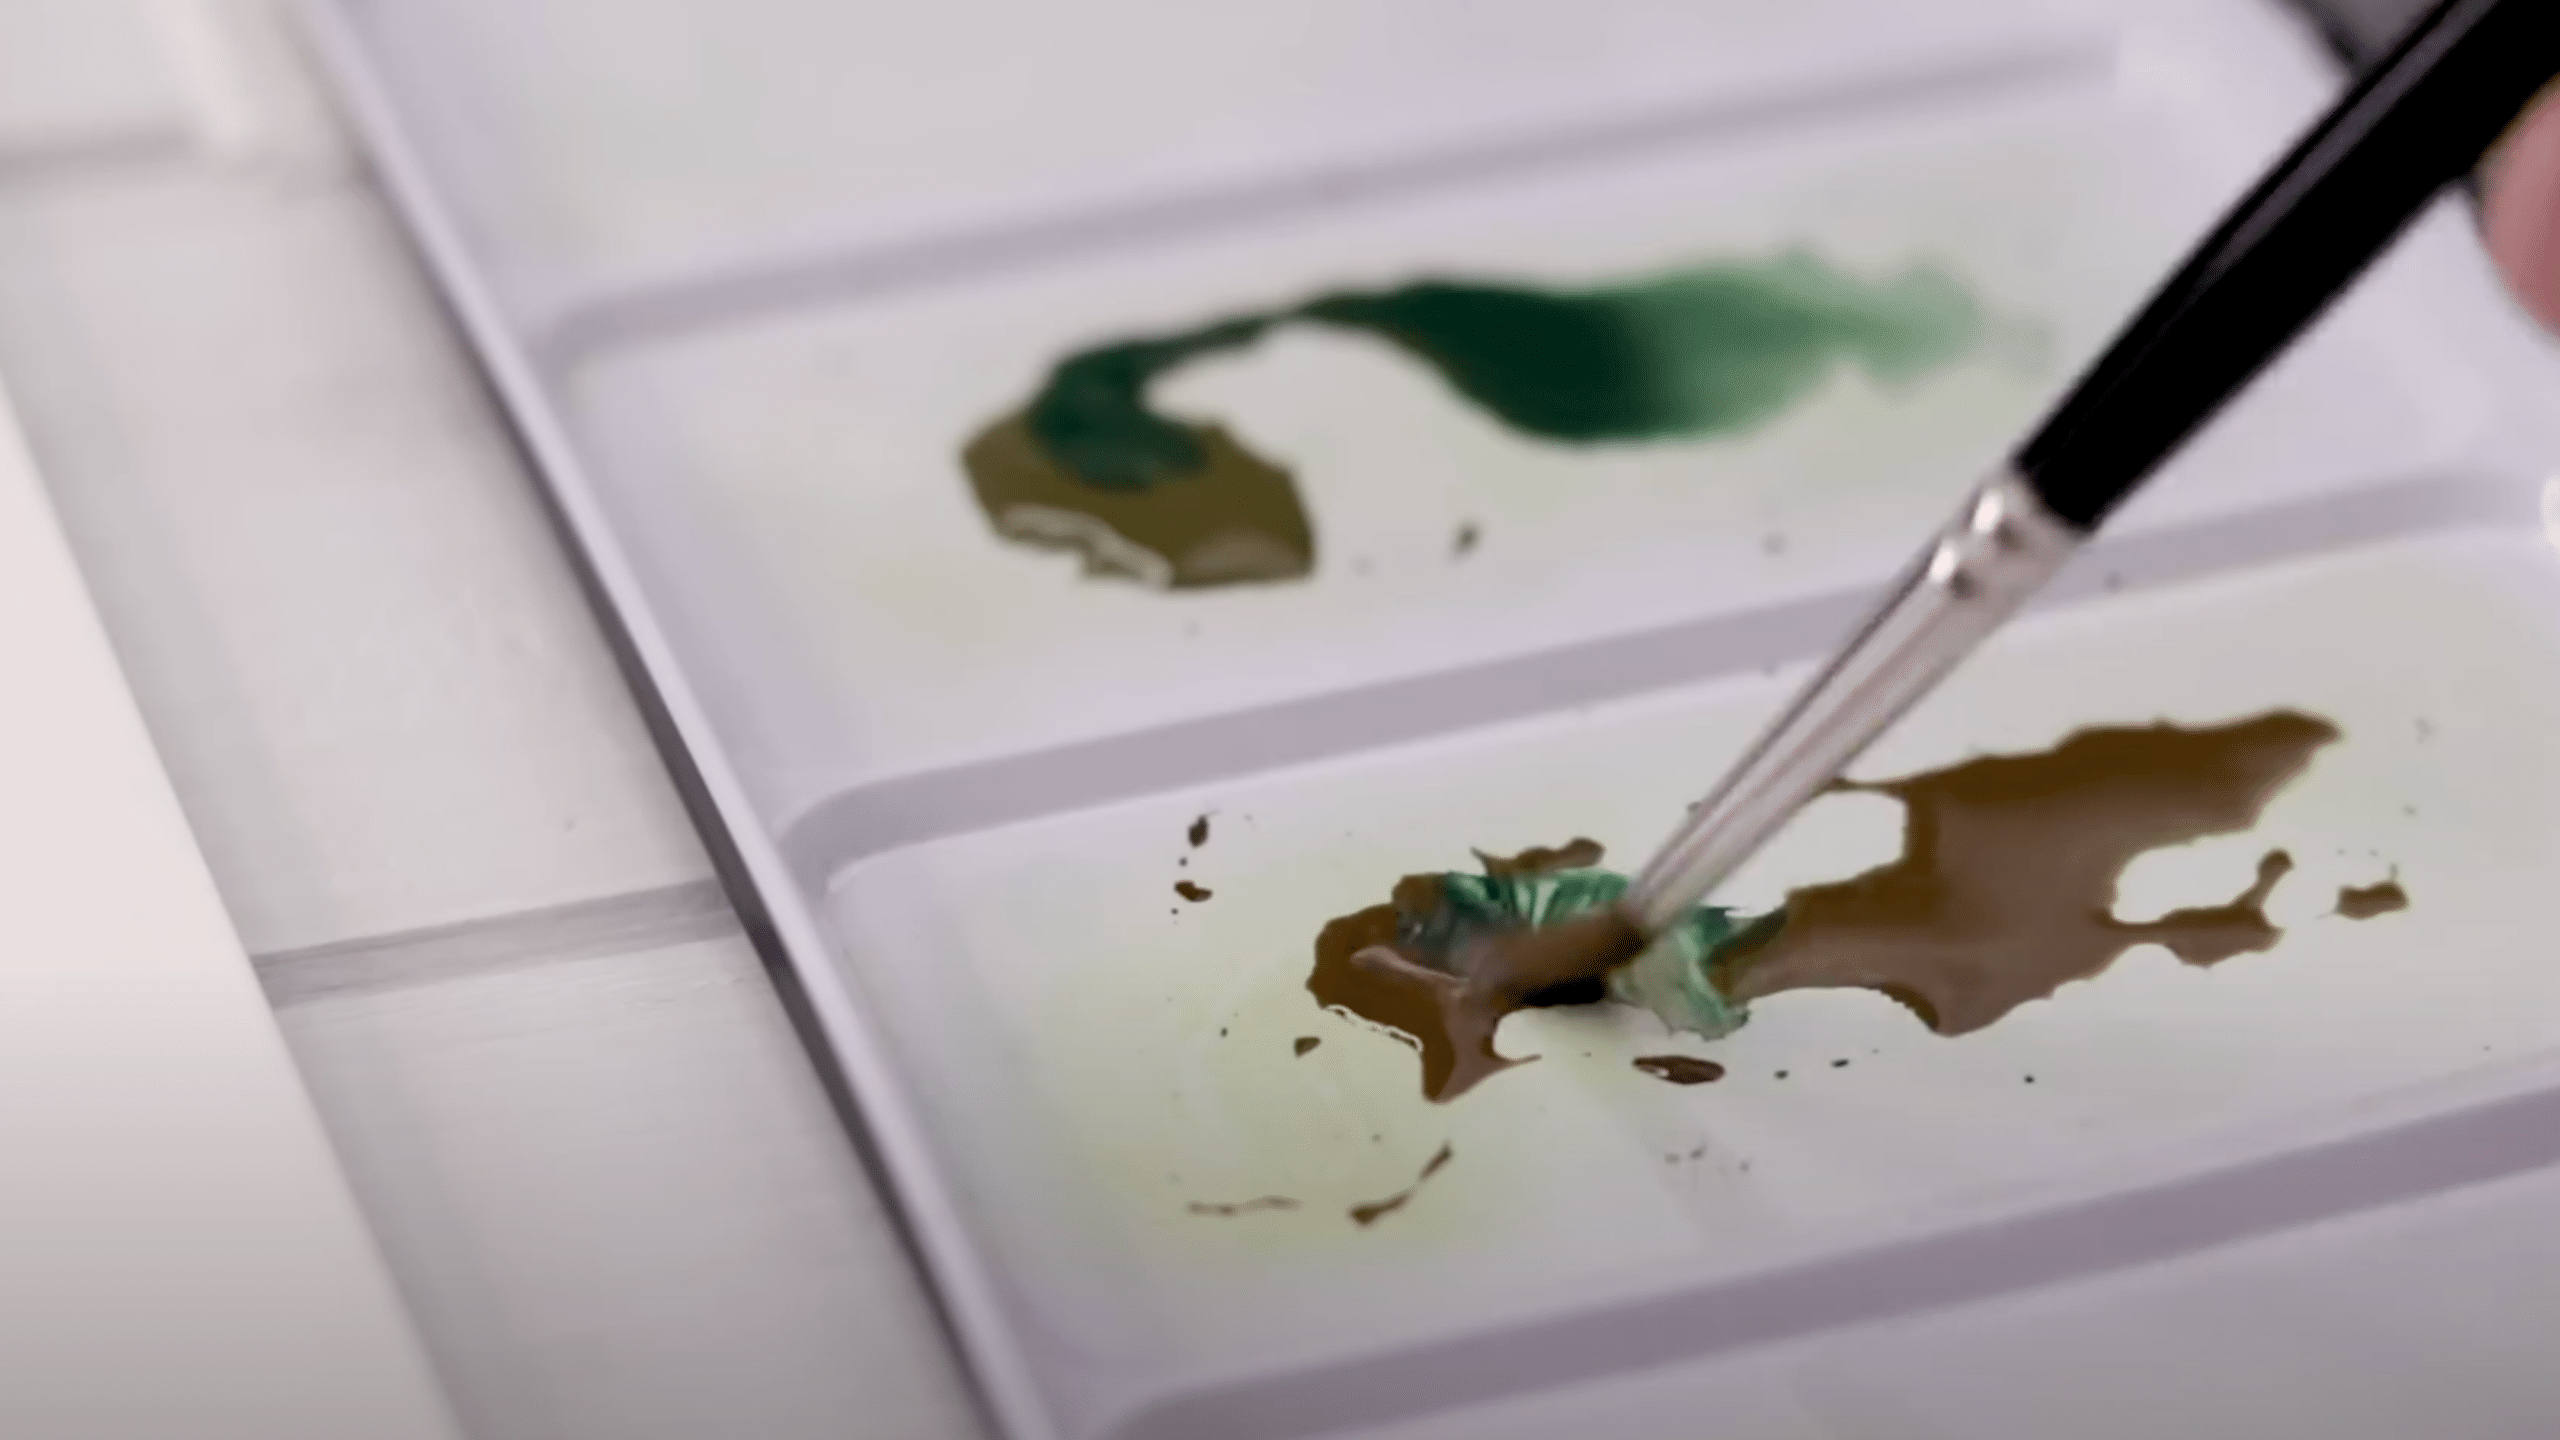
To mix your paints for watercolor leaves, start by selecting the right colors. Here are the key shades you’ll need:
- Green: Choose a variety of greens, such as olive green, sap green, or a mix of light and dark greens.
- Brown: A warm brown (like raw umber) will give your leaves a natural, earthy tone.
- Yellow: A touch of yellow ochre can help create a softer, warmer hue.
- Blue: Adding a small amount of blue (like ultramarine) will deepen the green for shading.
- Grey: A subtle mix of grey can add depth and realism.
Once you’ve selected your colors, use a wet brush to scrub the paint from the pan, then transfer it to your palette.
Add water until the mixture reaches a smooth, watery consistency, and remember to mix on the palette to avoid excessive saturation on your paper.
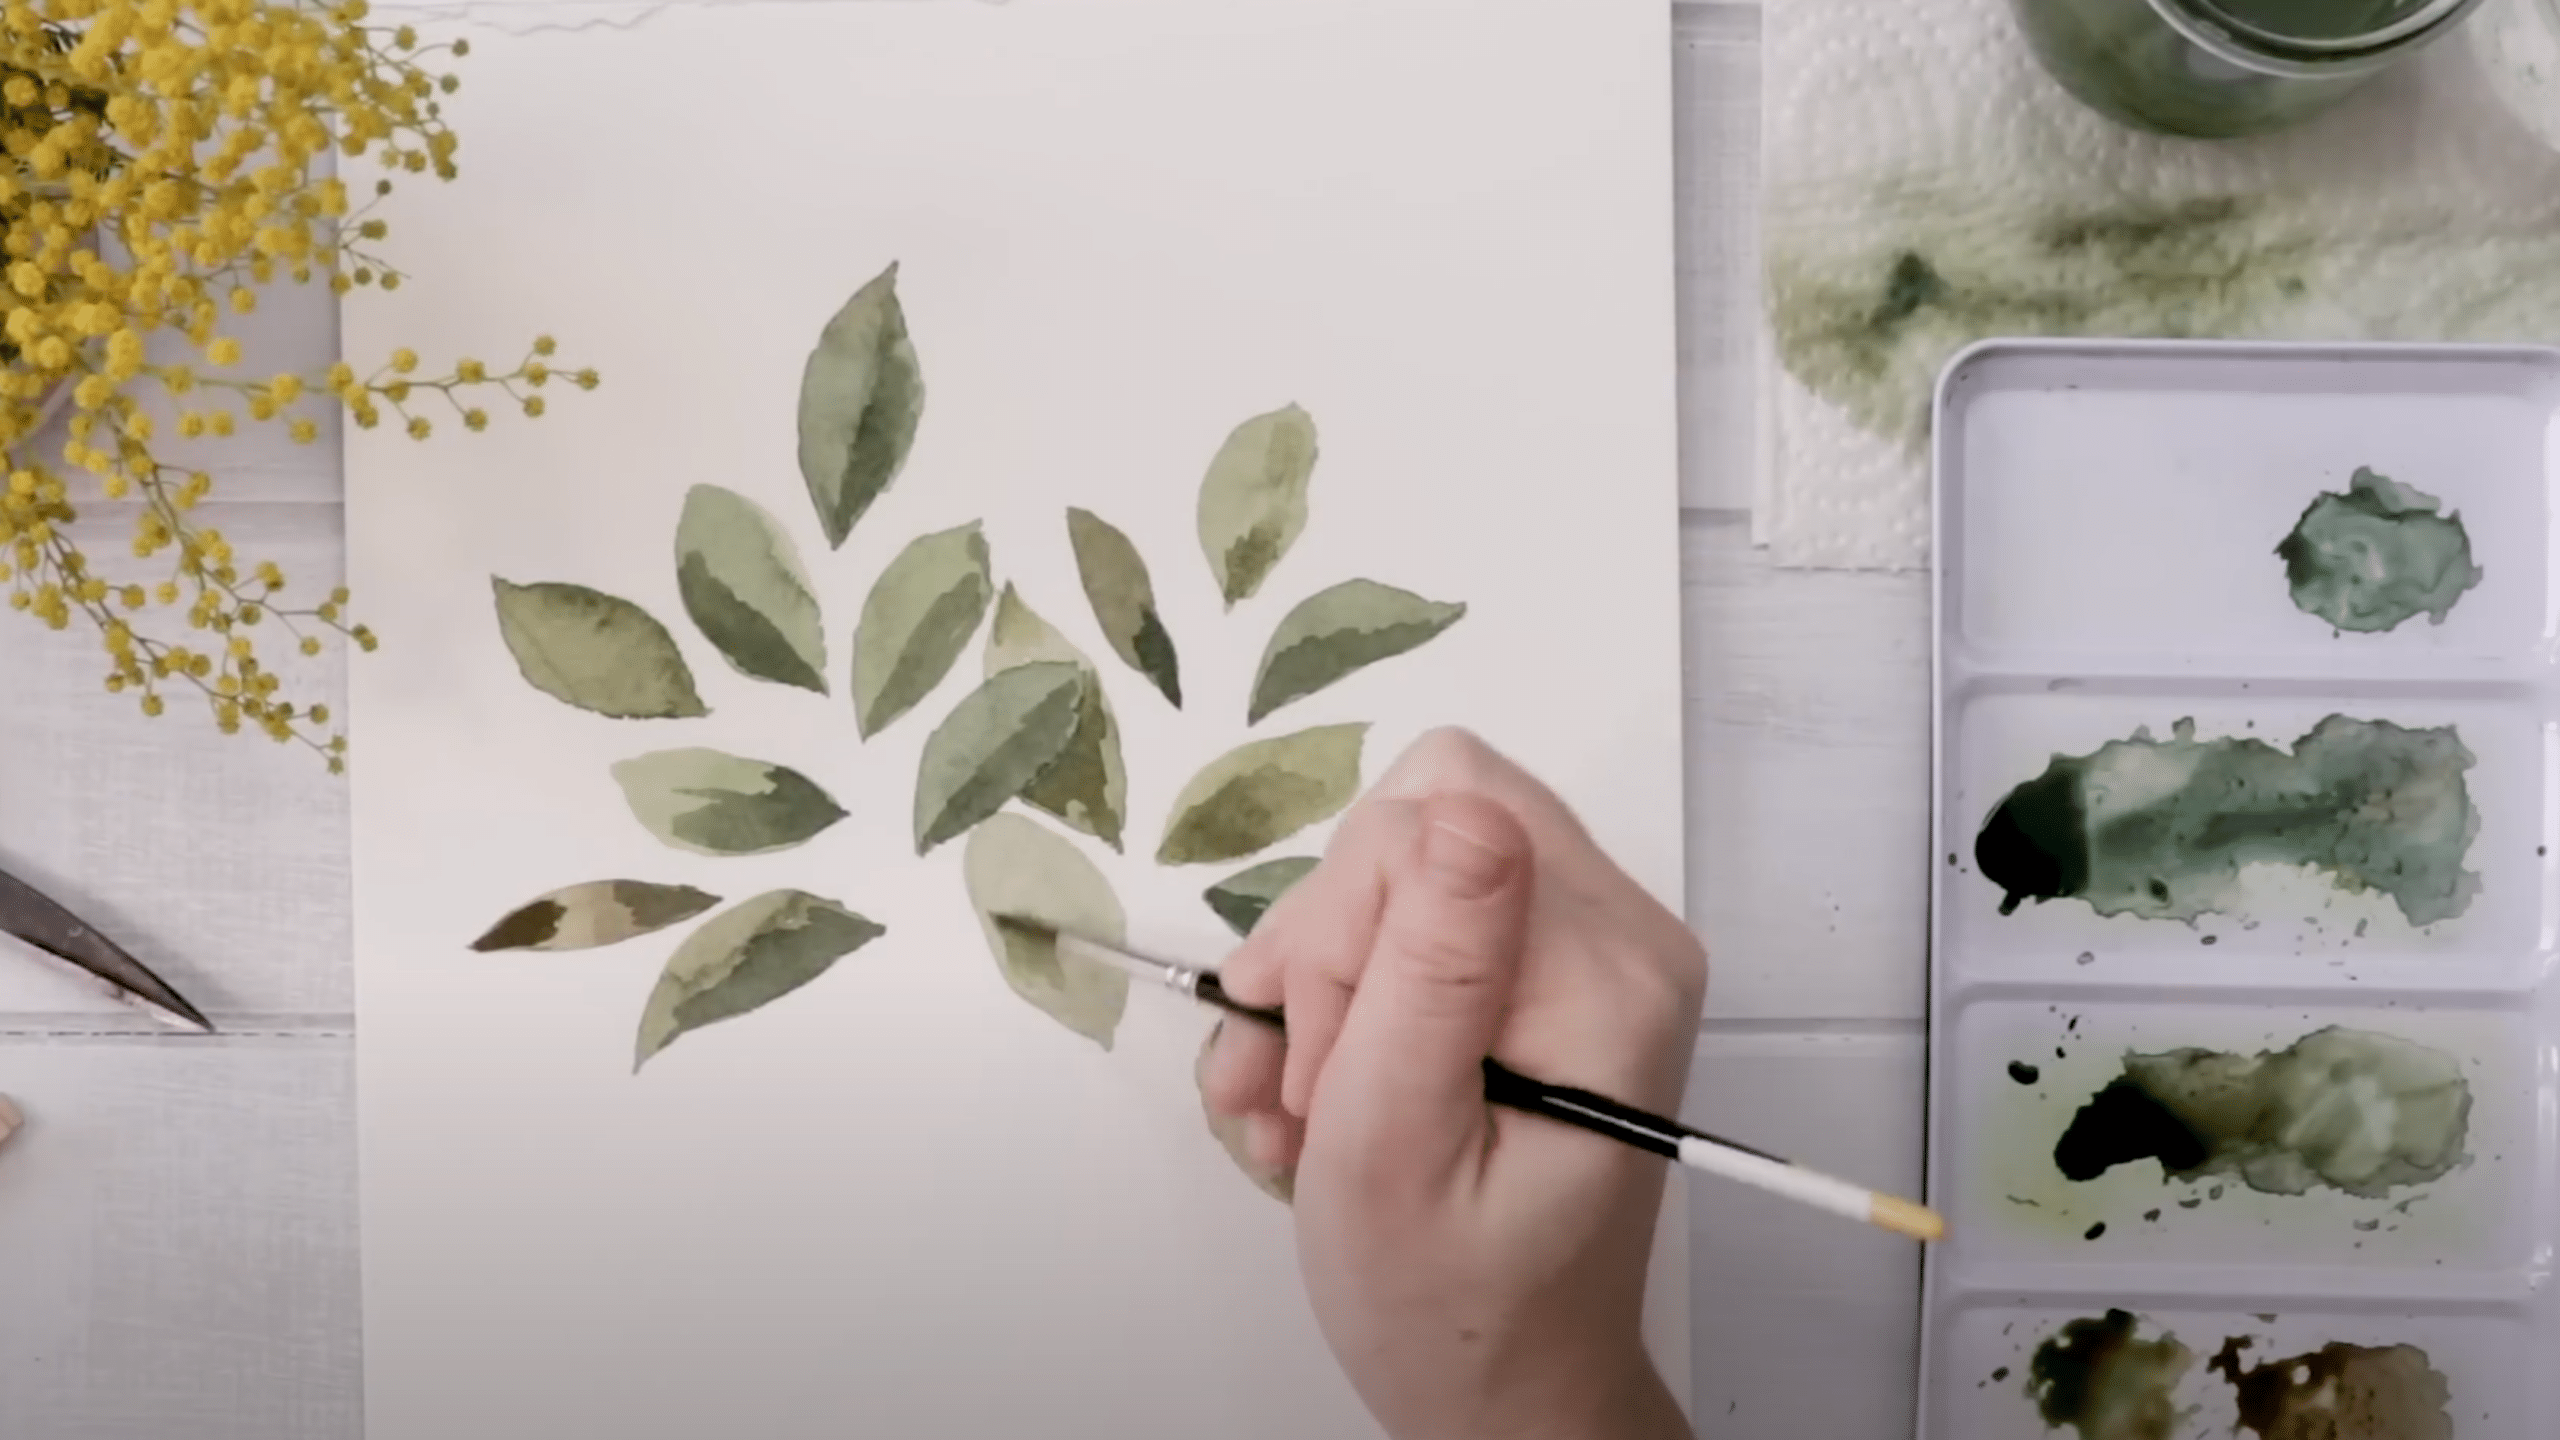
3. Paint the Leaves
Use the belly of your round brush to create the basic leaf shape. Gently drag the brush across the paper in a random, fluid motion.
For more organic, imperfect shapes, let the brush wiggle slightly.
Once the main shape is down, switch to the tip of the brush to refine the edges and add finer details, such as points or curves at the end of each leaf.
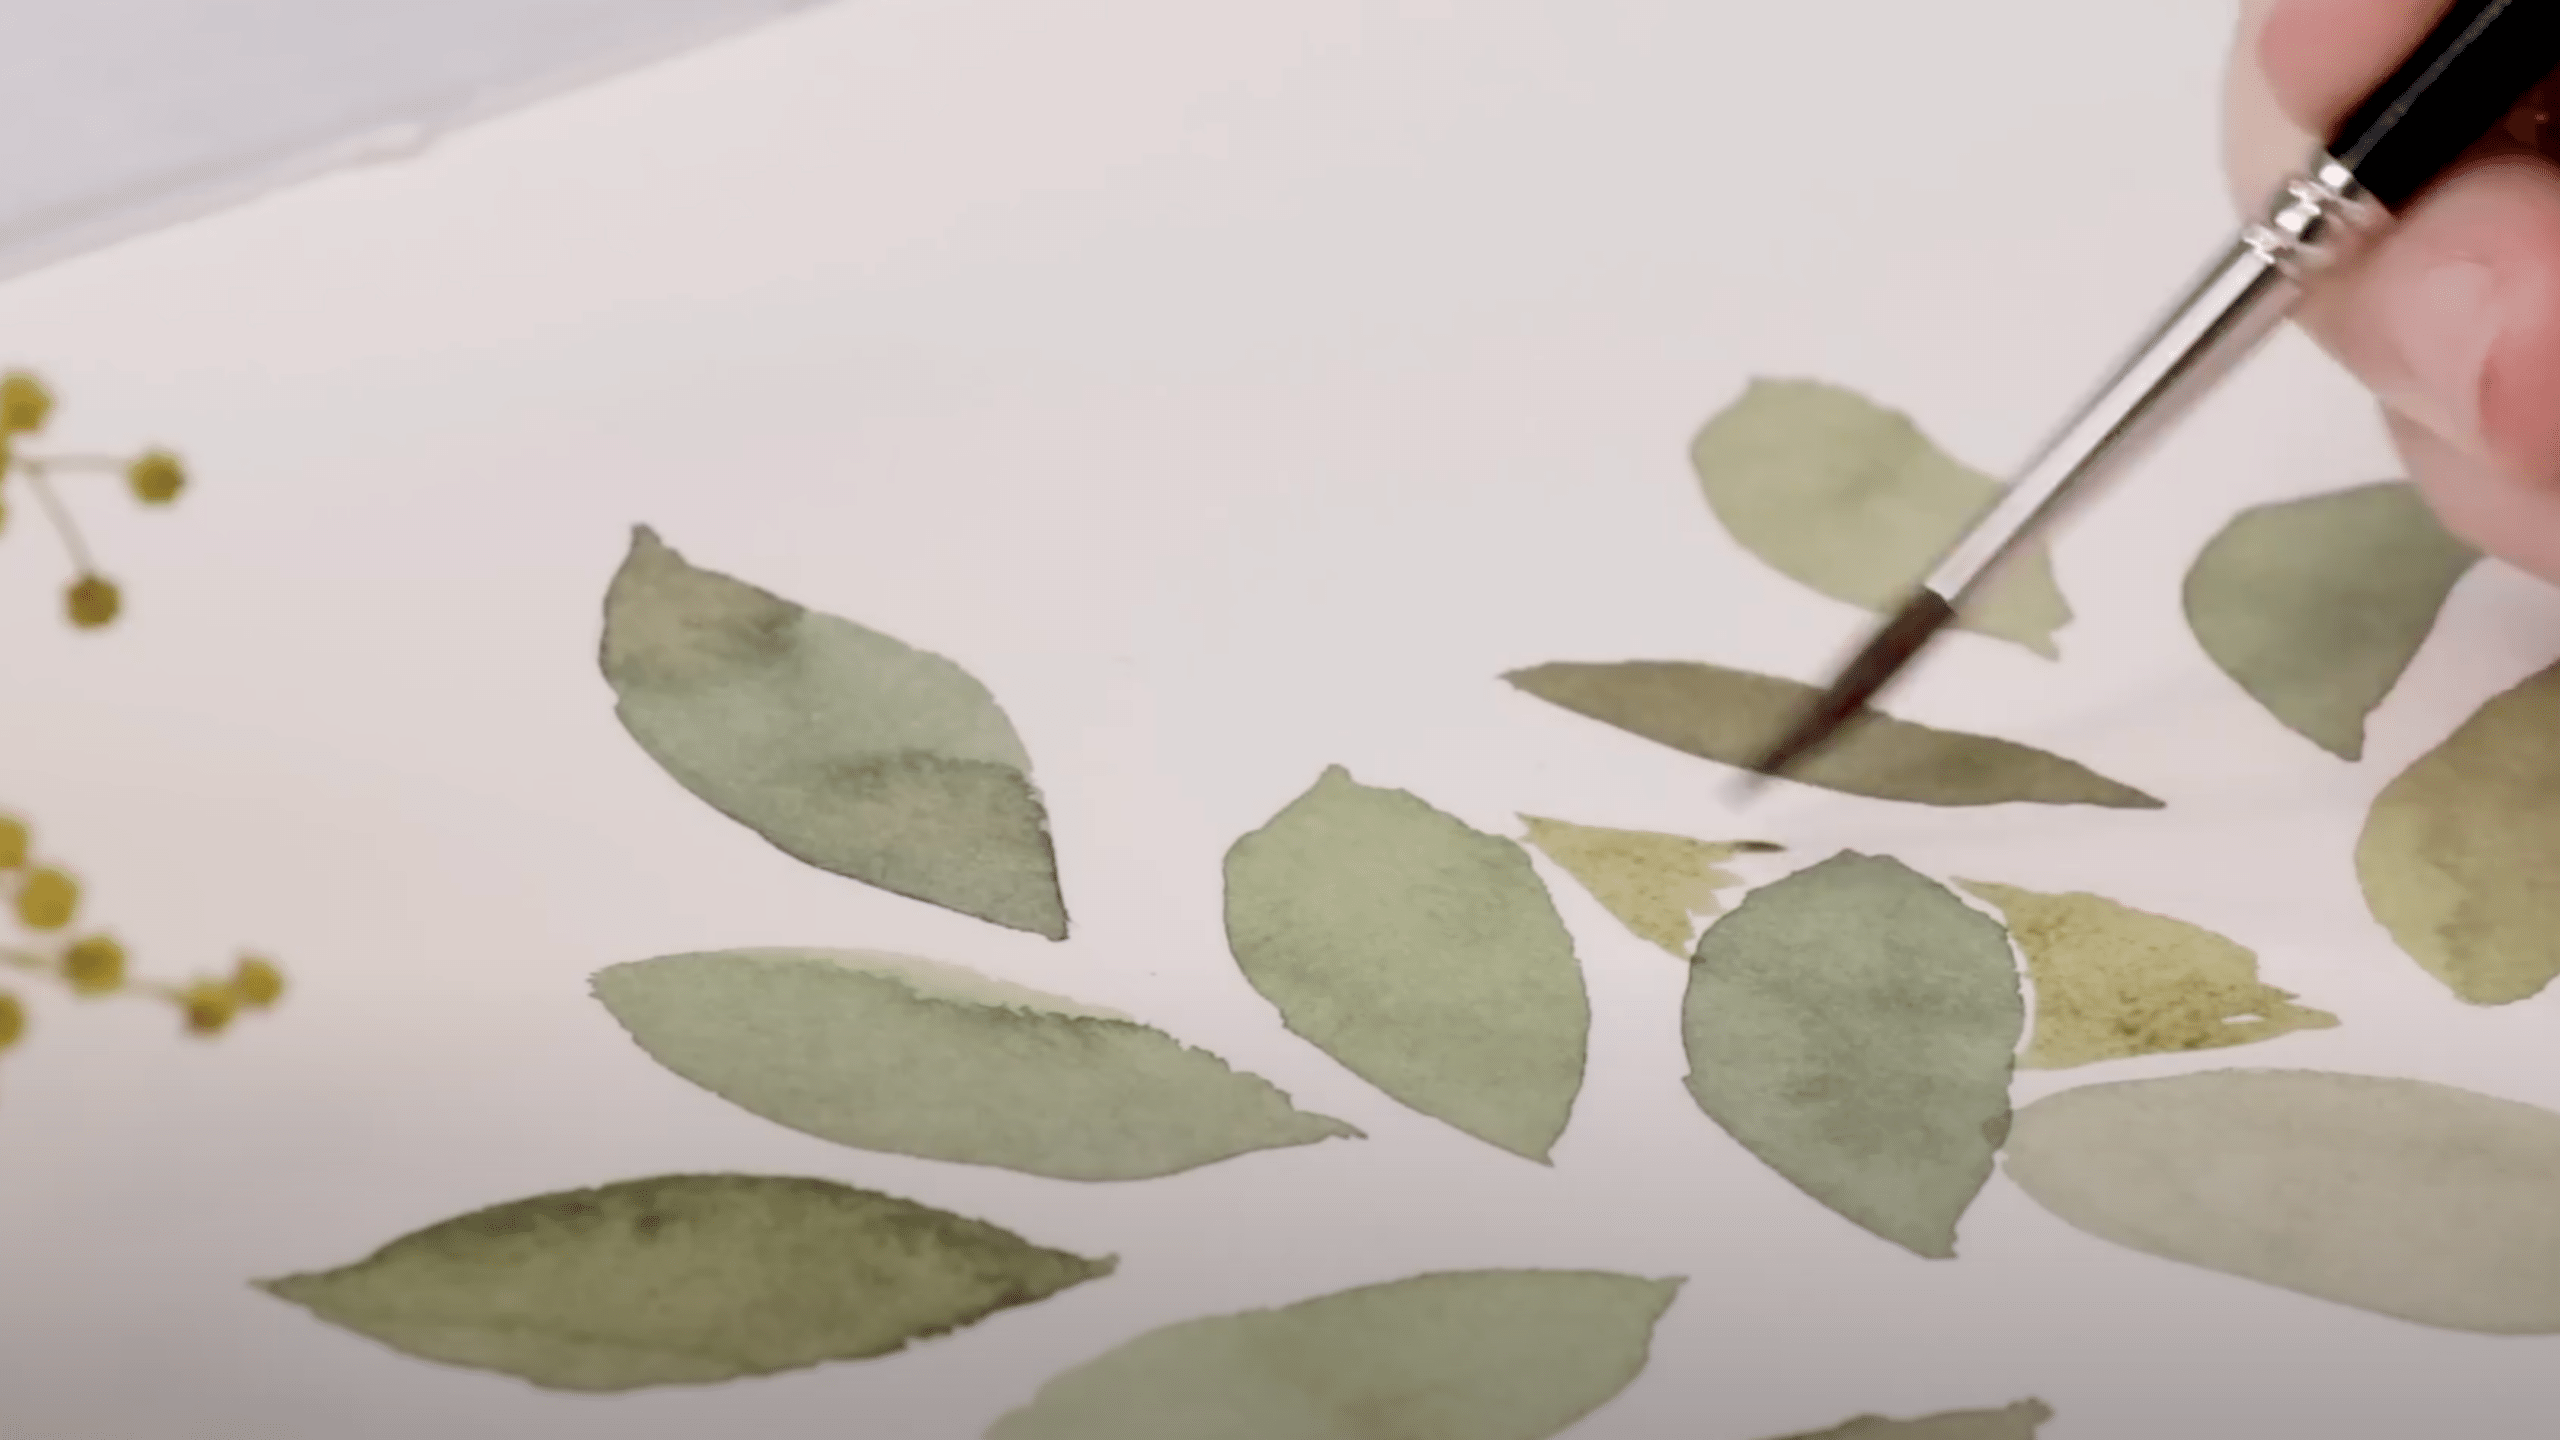
4. Add Depth with Blending
Once your leaves are dry, it’s time to add depth. Mix a darker green by blending a bit of blue-grey, brown, or purple with your green.
Using a light, watery mixture, add shading to one side or along the edges of the leaves. This step gives your leaves a more natural, three-dimensional look by suggesting light and shadow without overcomplicating things.
5. Add Stems and Branches
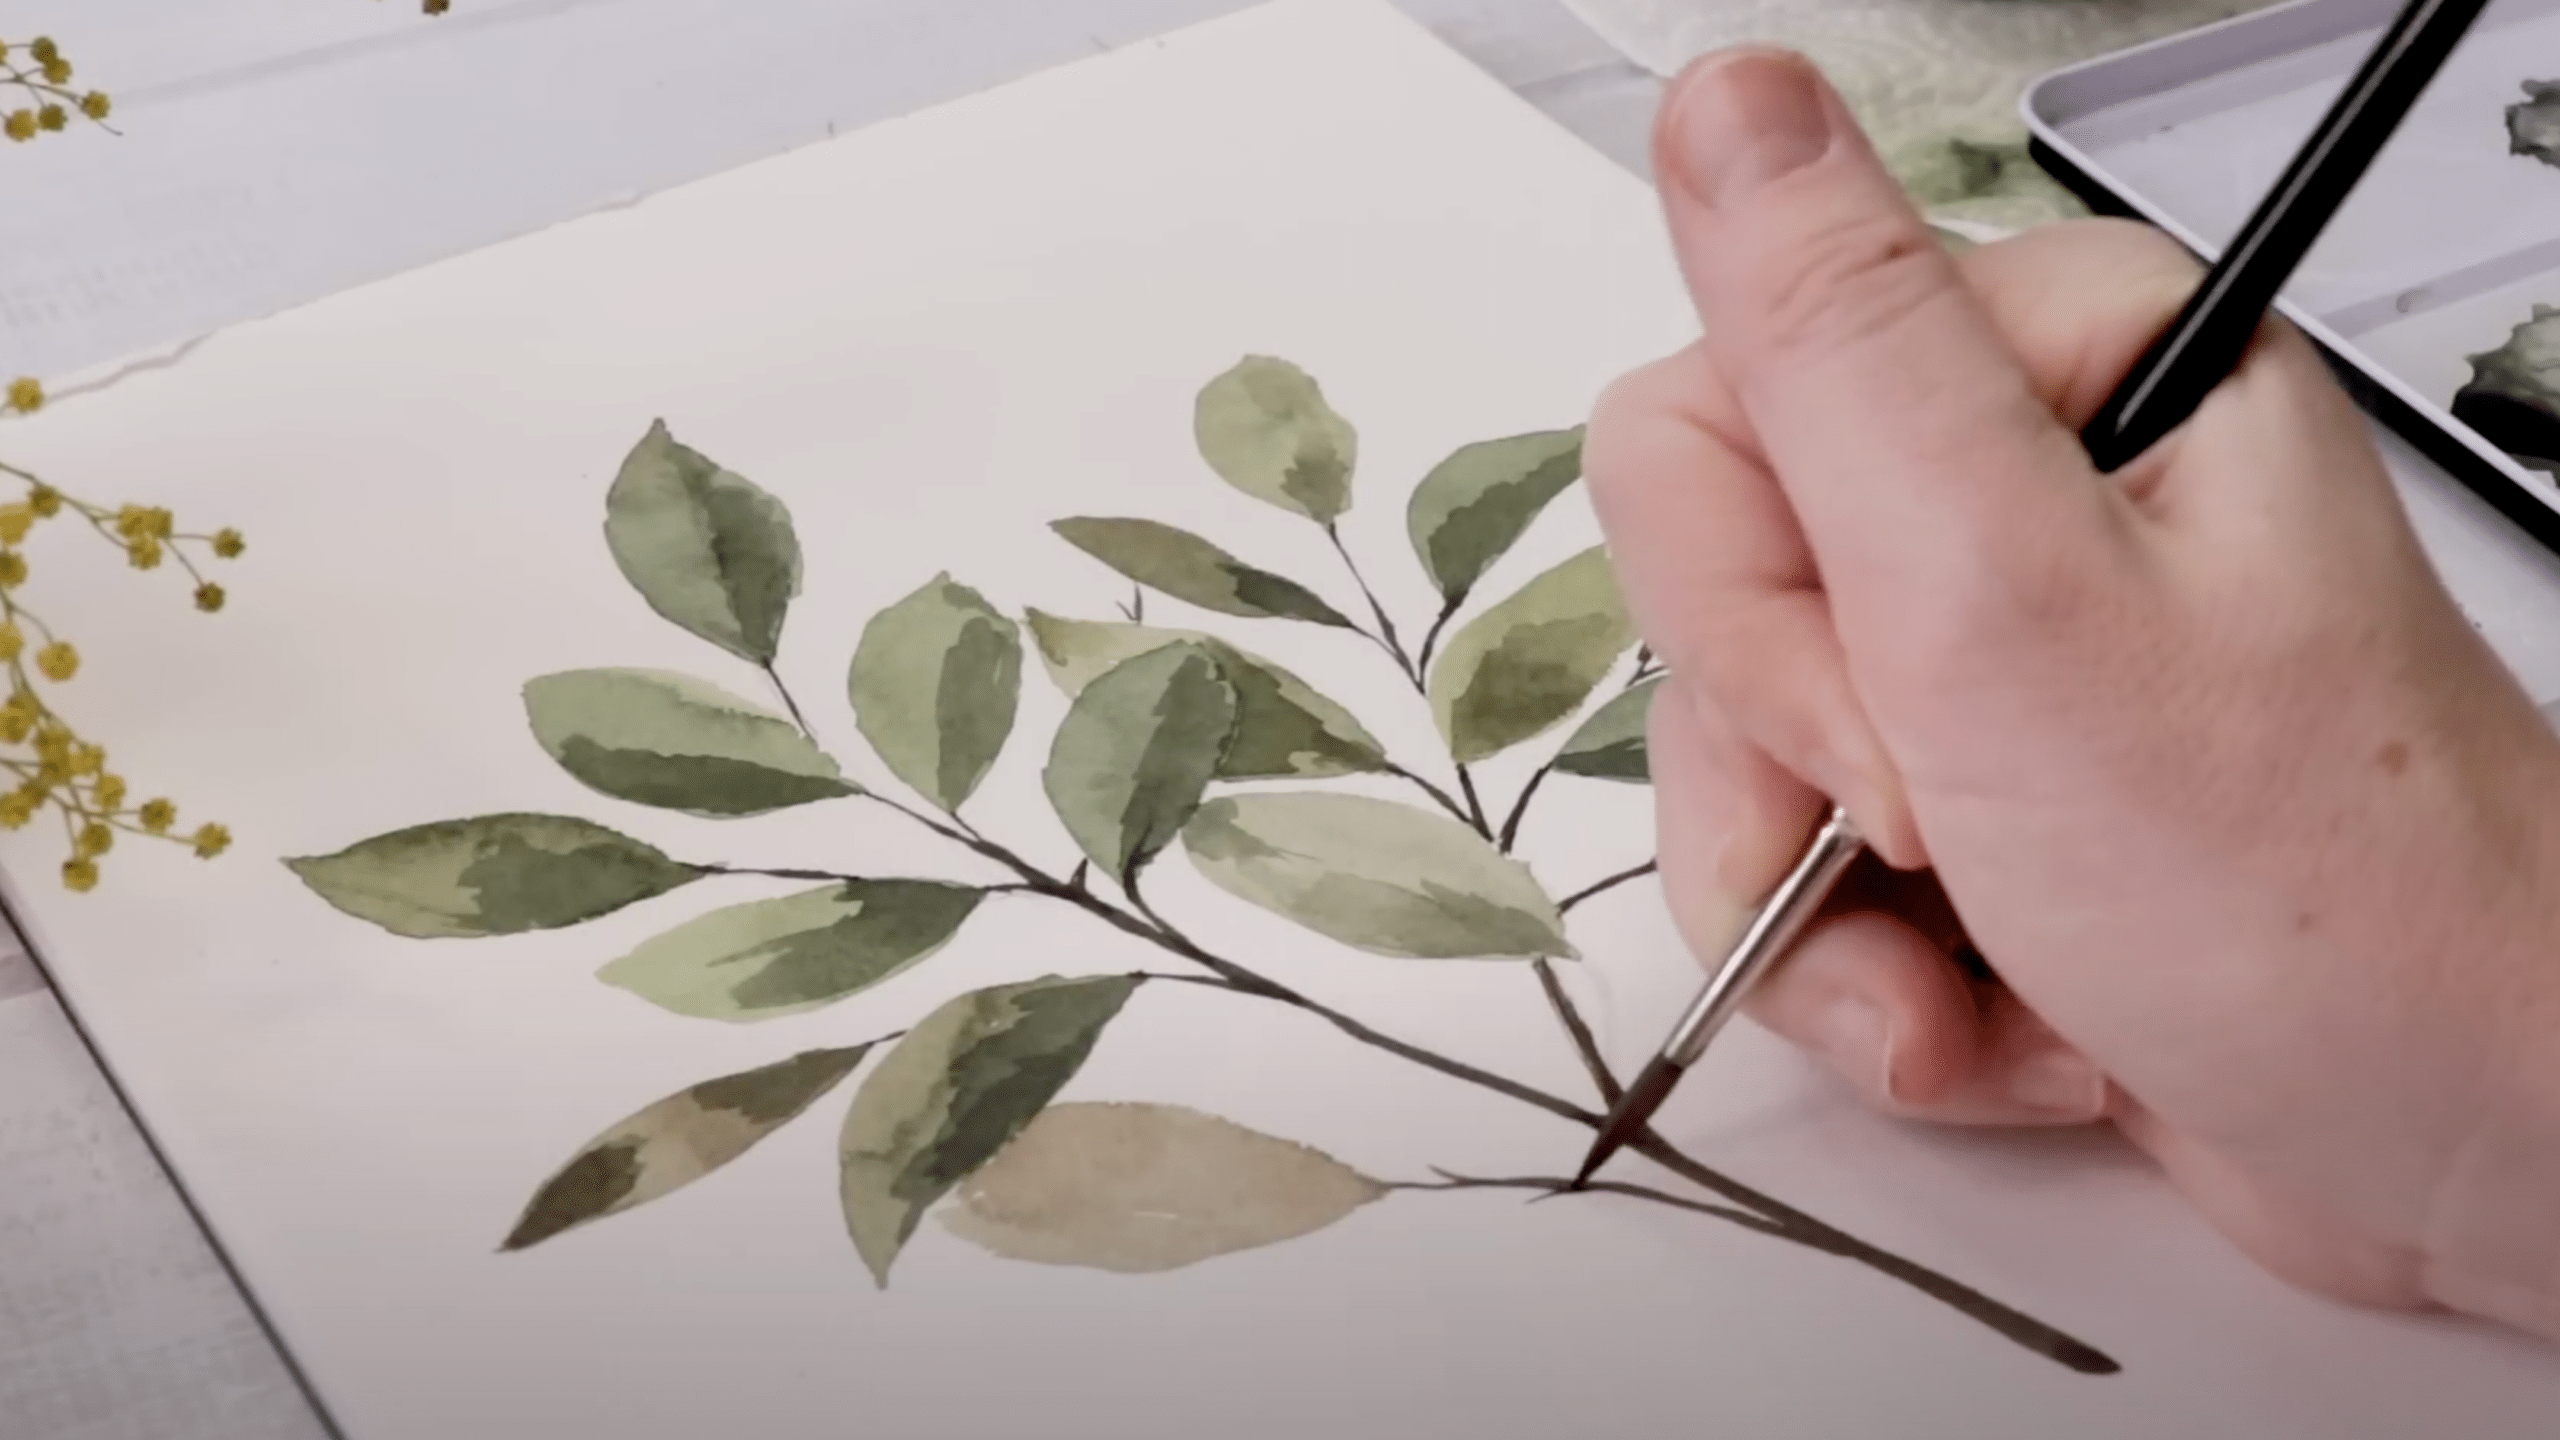
Once the leaves are in place, join them with the stems. Sketch where you’d like the stems to go using a pencil, then paint them in with a darker green or brown.
A loose, wiggly motion with the brush will create a more realistic, imperfect branch effect. Overlapping the stems and leaves will help your design feel natural.
6. Define Veins for More Perfection
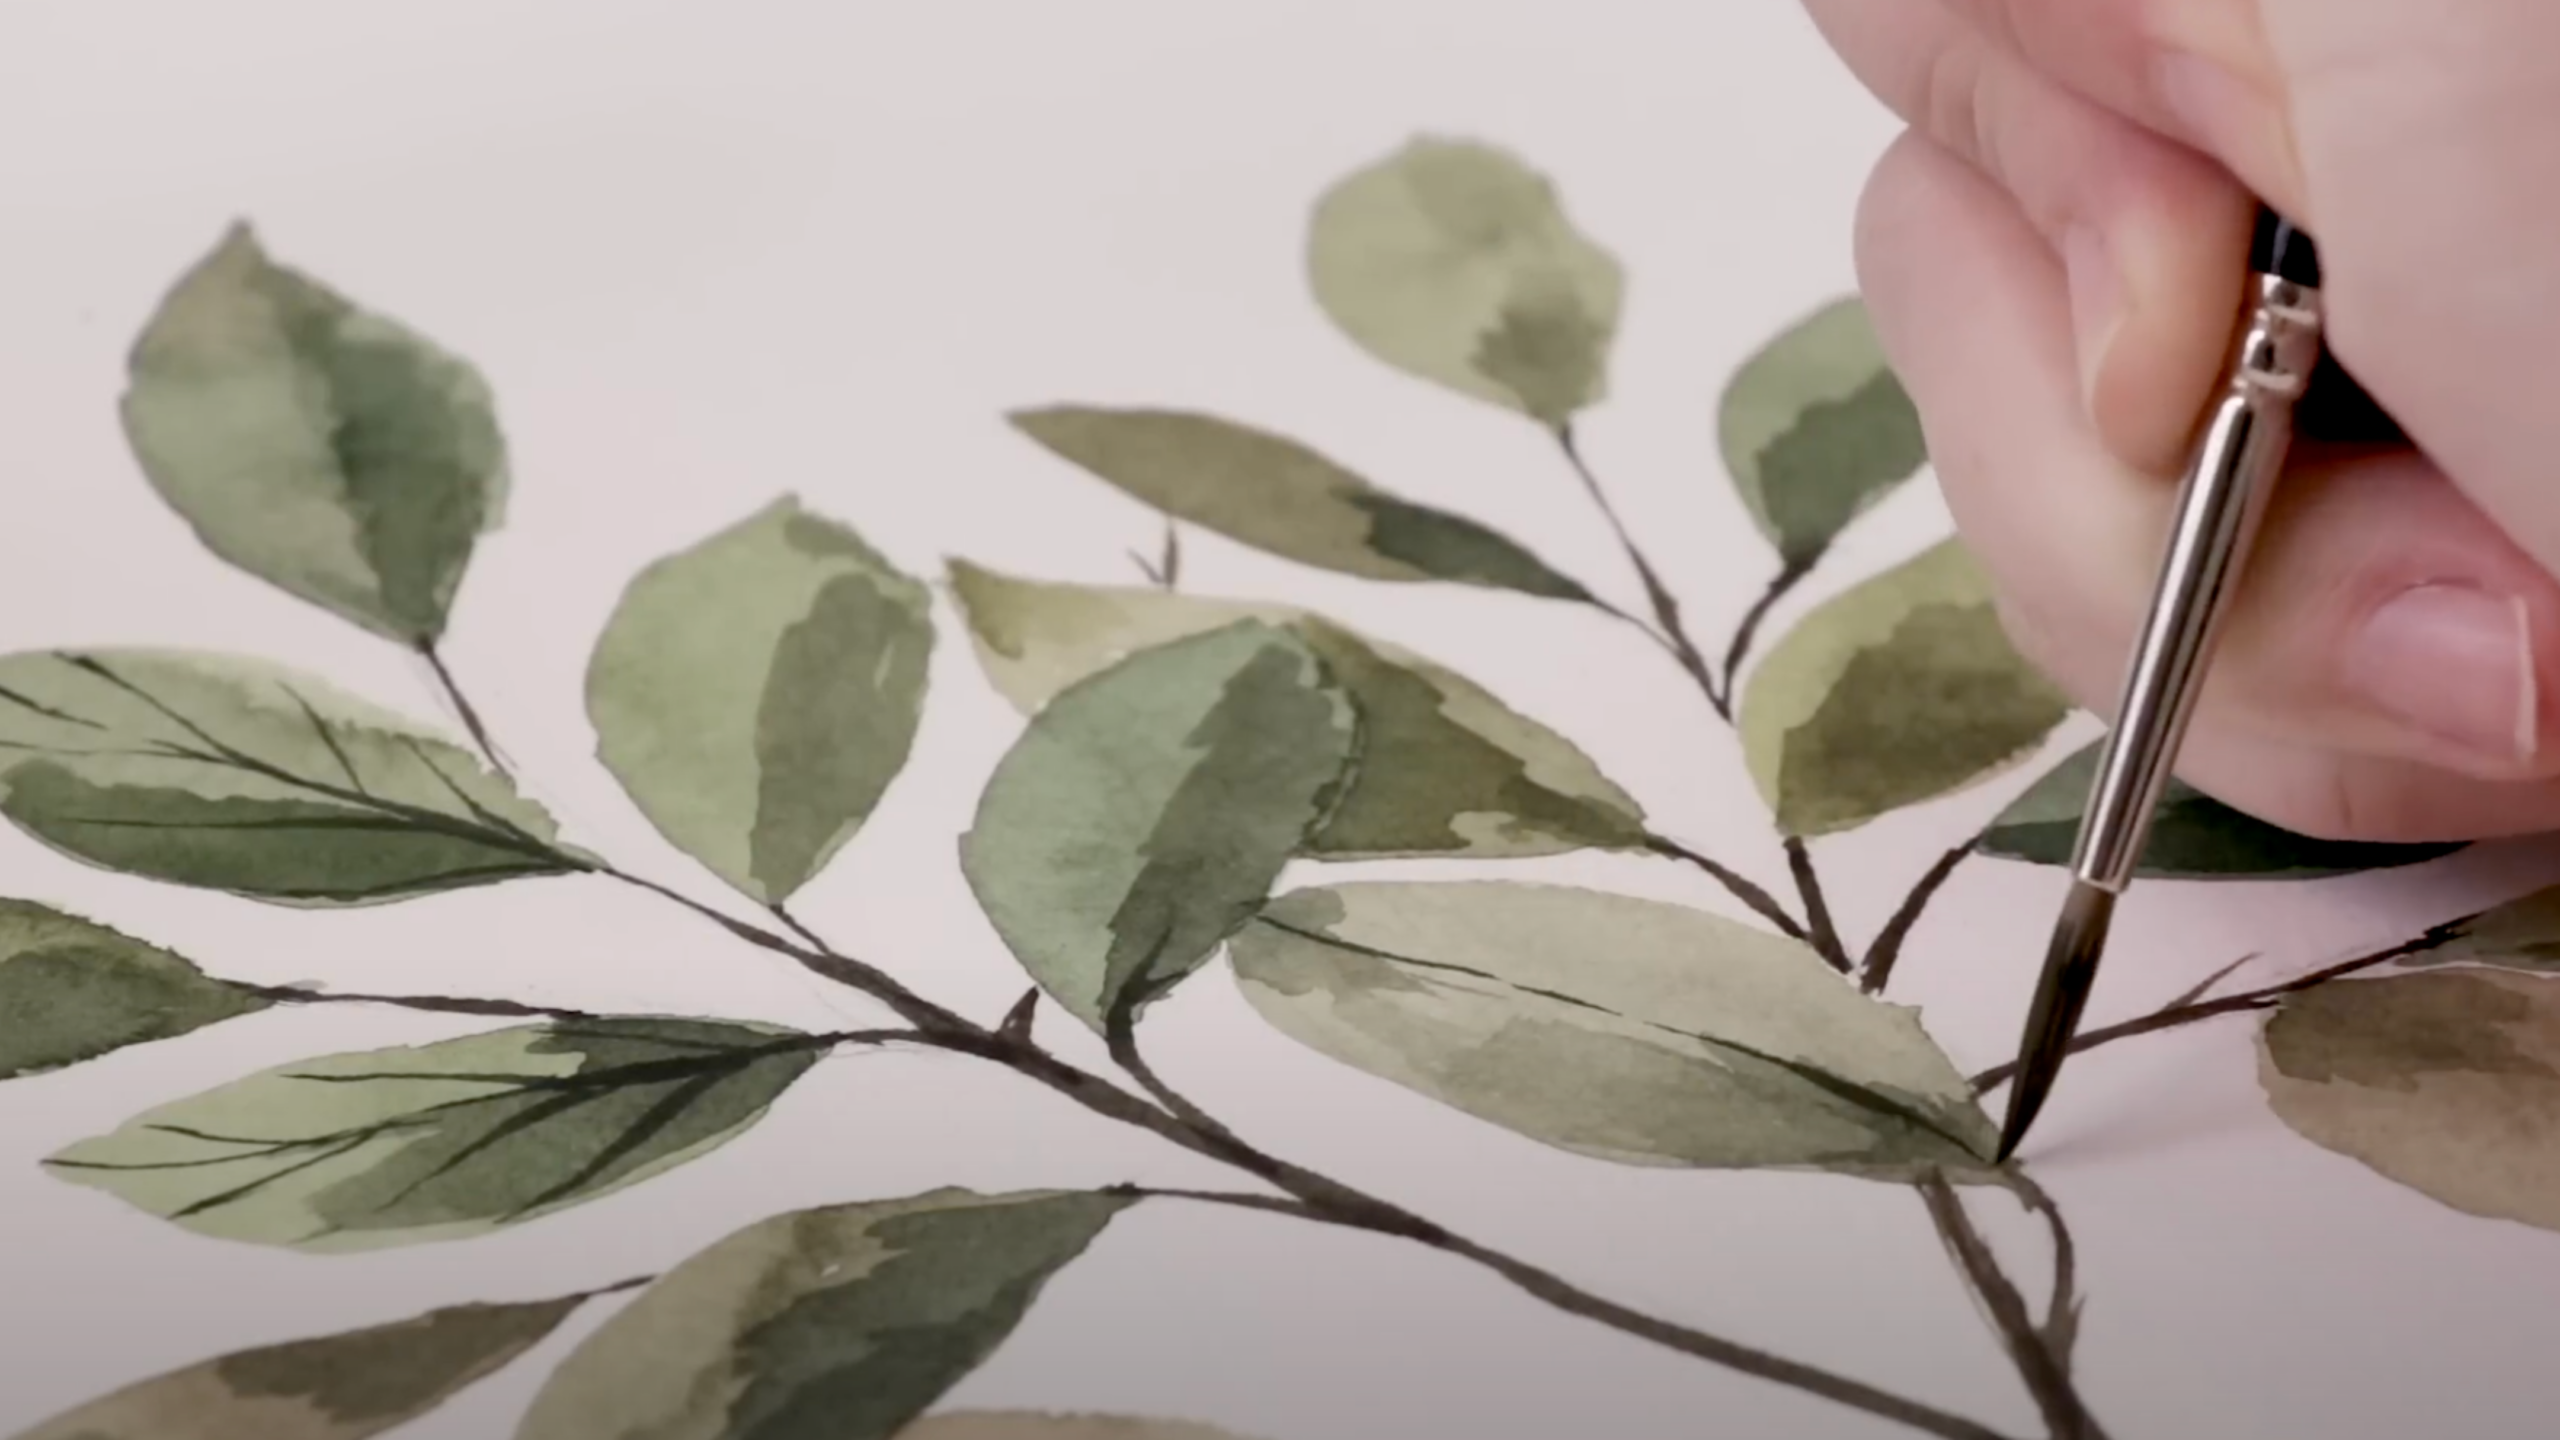
For the final step of detailing, use a small, pointed round brush to add veining to the leaves. Make sure your shading is dry before doing this.
Paint a thin line down the center of each leaf and add several curving, broken lines branching out from it.
Don’t worry about perfection; the natural, imperfect feel is key to making your leaves appear lifelike.
7. Final Touches and Adjustments
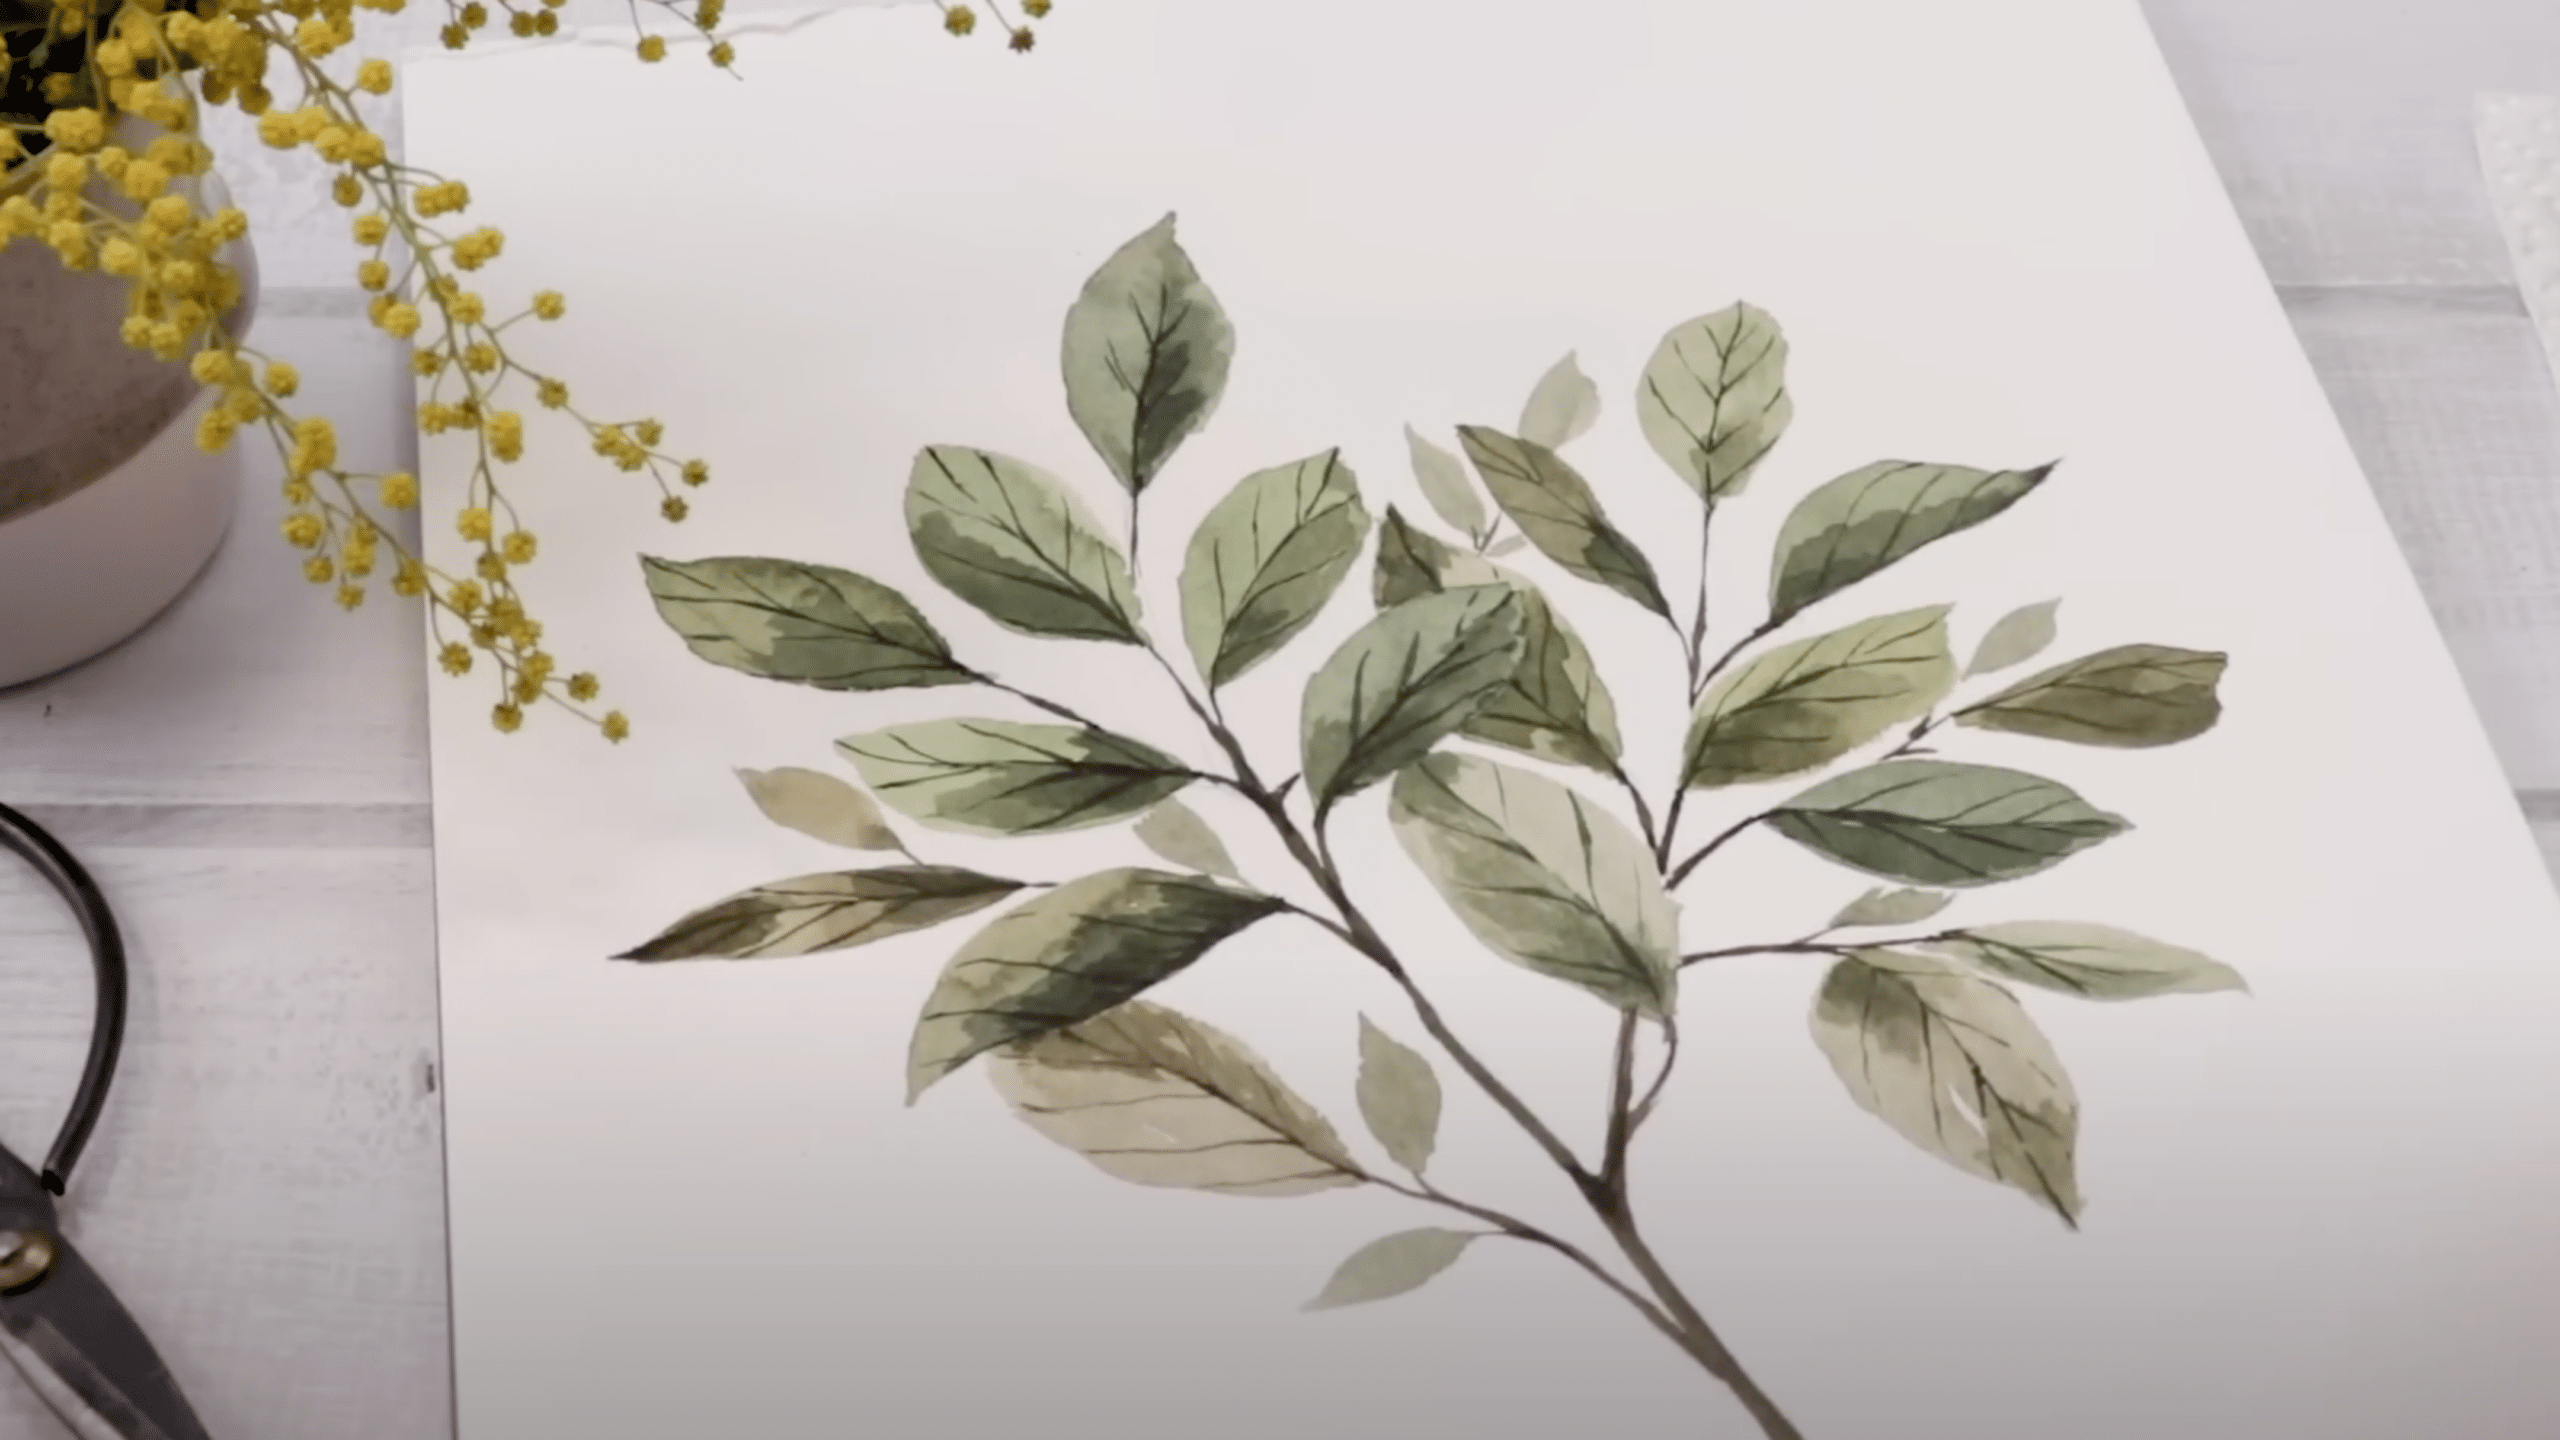
After adding the veins to your leaves, step back and carefully assess the overall composition. This is your opportunity to make adjustments:
- Add More Shading: If any leaf areas seem too flat, mix a darker green or brown and apply shading where needed for depth.
- Improvise the Veins: If the veins need more definition, use your small, pointed brush to add darker lines along the central vein or branches carefully.
- Add Small Leaves: Incorporating a few smaller, simpler leaves can balance the composition and give it a more organic, natural feel.
- Final Touches: Once you’re satisfied with the adjustments, let the painting dry completely, allowing the colors to set for a polished finish.
Artistic Watercolor Leaf Design Ideas to Try
Once you’ve mastered the basic leaf painting techniques, it’s time to get creative. Here are some fun and attractive ways to use your new skills in various projects.
These ideas will help you apply your leaf painting abilities in fresh, interesting ways that go beyond just single leaves on paper.
Painting Watercolor Leaves
Realistic 3-D Dried Watercolor Leaf Painting
Beautiful Autumn Leaves Painting
Watercolor Monstera Leaves Painting
Shining Watercolor Leaf Branch in Vibrant Colors
Subtle Watercolor Leaves Wall Painting
Wrapping Up
Painting watercolor leaves doesn’t require special talent, just practice and the right approach.
We’ve covered the basic supplies you need, step-by-step methods, and design ideas to help you create beautiful leaf art.
Remember that each leaf you paint improves your skills. The key is to start simple and gradually try more complex designs as you gain confidence.
So what’s next? Grab your brushes, set up your workspace, and try painting your first leaf today.
Start with basic shapes before moving to detailed veins and textures. With each attempt, you’ll notice improvement in your technique and style.
What’s Your Favorite Leaf to Paint? Have you tried watercolor leaves before? We’d love to see your creations!
Share your watercolor leaf designs in the comments below, or let us know which one you found the most fun to paint! If you have questions about any of the techniques we covered, feel free to ask!