Creating smooth, well-blended colored pencil art can be tough for beginners. Many artists struggle with harsh lines and uneven colors when they first start working with colored pencils.
These issues can be fixed with the right methods and a bit of practice.
This blog will show you how to blend colored pencils like a pro, even if you’ve just picked up your first set. You’ll learn simple techniques that transform basic sketches into rich, layered artwork without spending years mastering complex skills.
We’ll cover colored pencil techniques, the most useful blending methods for beginners, which supplies work best, and step-by-step instructions to try right away.
These tips will help you create smooth color transitions and add depth to your drawings, making your art look more polished and professional.
How to Start with Colored Pencil Techniques: Tips and Tricks
Creating smooth, well-blended colored pencil art can be tough for beginners. Many artists struggle with harsh lines and uneven colors when they first start working with colored pencils. With a few basic methods and consistent practice, anyone can improve their colored pencil skills.
The following are a few tips that will help you start with colored pencil techniques:
1. Start With Quality Pencils
Good colored pencils make a huge difference in your results. You don’t need the most expensive brands, but artist-grade pencils contain more pigment and less wax than cheaper options.
Brands like Prismacolor, Faber-Castell offer great options for beginners. A set of 12-24 colors gives you enough range without being too costly.
2. Use the Right Paper
The paper texture greatly affects your blending results. Smooth, heavyweight paper (at least 80 lb) works best for colored pencil art. Bristol board, hot-pressed watercolor paper, or papers made for colored pencils give you the right surface to build up colors and blend without tearing.
3. Master Basic Pressure Control
Light touch is key when working with colored pencils. Start with gentle pressure and build up colors slowly in thin layers.
This layering method creates depth and makes blending much easier. Try making a pressure scale from very light to heavy to practice your control.
4. Practice Circular Motions
Small, circular motions help create smooth, even coverage. This technique stops harsh lines and helps colors mix better on the paper. Keep your circles small and consistent for the best results. This motion comes in handy for creating smooth backgrounds and even skin tones.
5. Try Different Blending Methods
Test various blending techniques to find what works for your style. Options include layering (placing one color over another), burnishing (pressing hard with a light pencil over existing layers), using colorless blenders, or trying solvents like baby oil for smooth results.
6. Build a Basic Color Theory Knowledge
Understanding how colors work together makes your blending more effective. Learn which colors make good pairs, how to make shadows with complementary colors, and how to create depth with warm and cool tones. This knowledge helps you plan your artwork better.
7. Practice Gradual Transitions
Create color exercises showing gradual shifts from one color to another. Start with similar colors (like blue to green) before trying harder combinations (like red to blue). These exercises train your eye and hand to create subtle color shifts in your actual artwork.
Colored Pencil Techniques: Blending for Beginners
Colored pencils aren’t just for kids’ sketchbooks; they’re powerful tools in the hands of creative artists. If you want to level up your colored pencil game, mastering a few blending techniques is essential.
Here are six game-changing methods to make your artwork pop with depth and professionalism:
1. Glazing
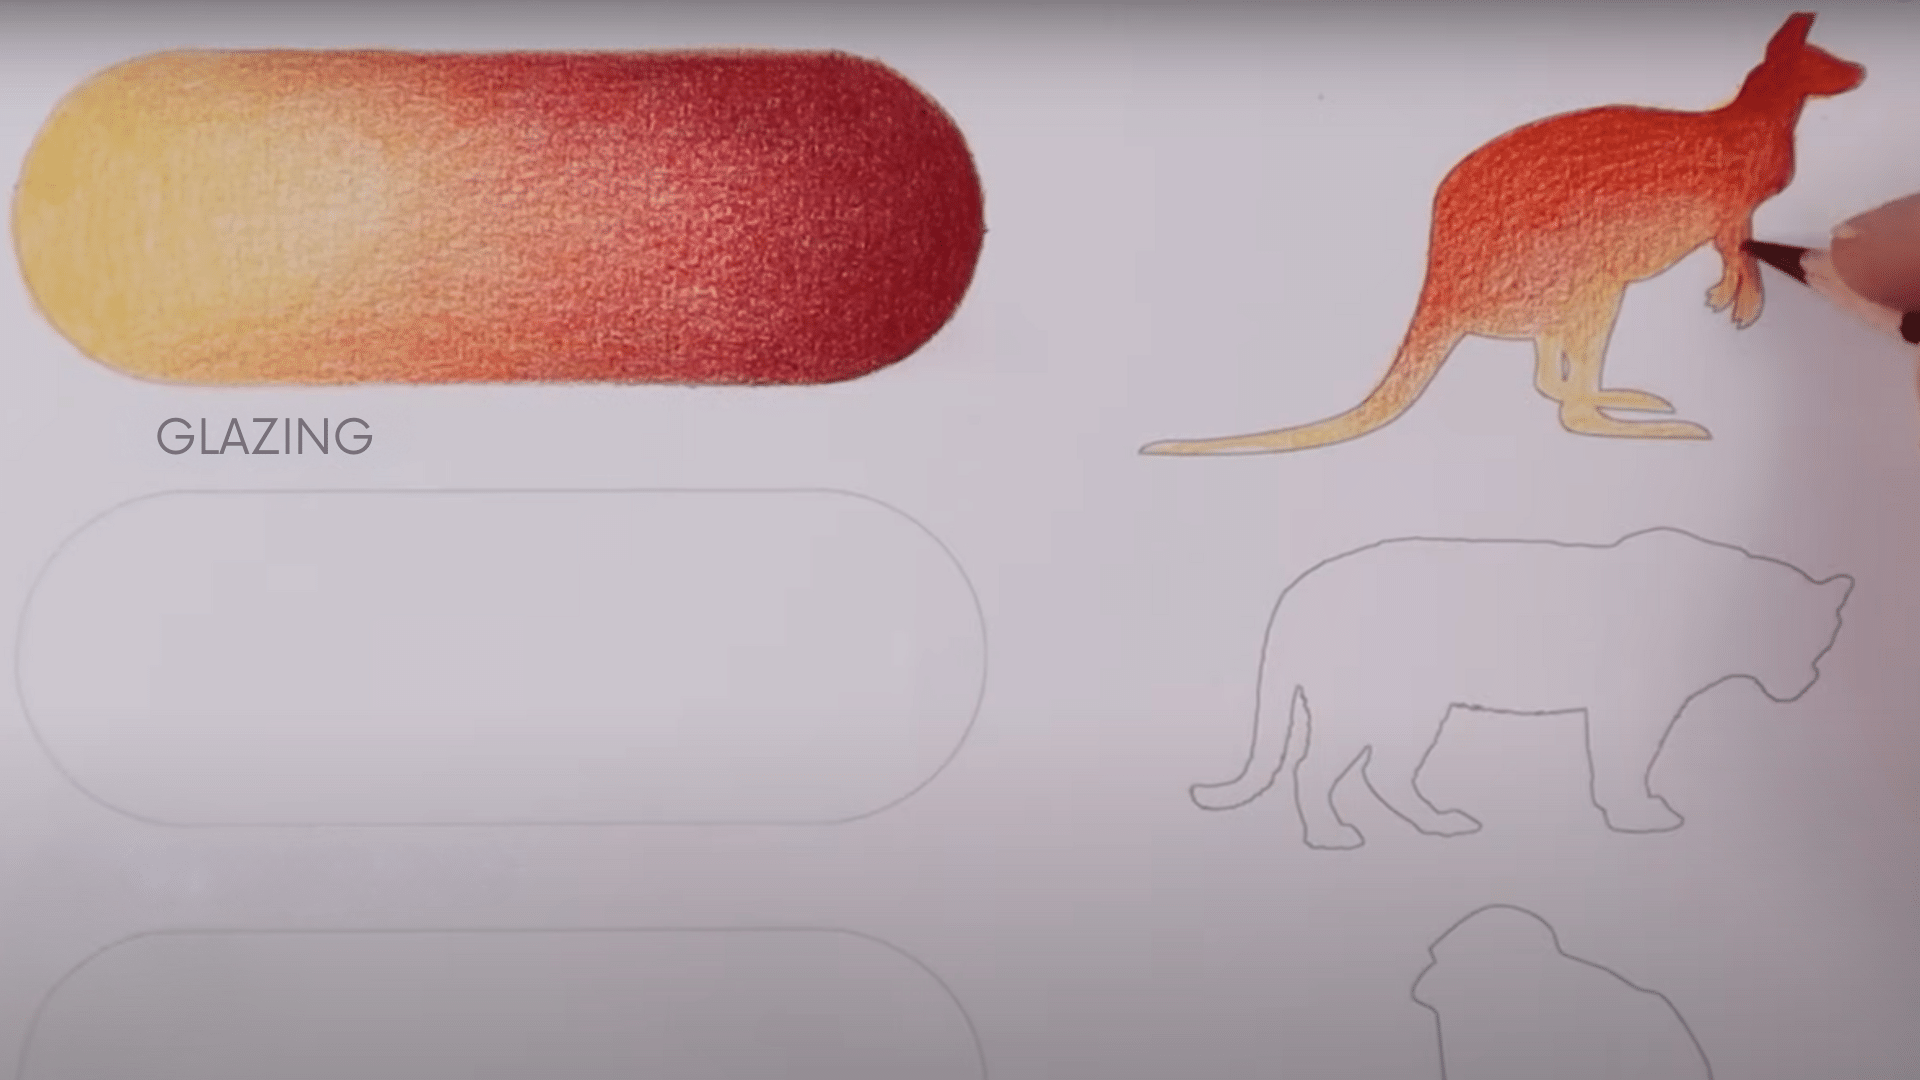
Glazing involves layering transparent hues over one another using extremely light pressure. This technique allows the base color to shine through, creating luminous effects and subtle transitions.
By starting with a foundation color and slowly building up layers, you maintain a soft, delicate look. The key is to be gentle with your pencil strokes and patient with your buildup. Glazing is ideal for capturing light and atmosphere in portraits or landscapes.
Pro Tip: Use less than “pressure level 1” to keep your layers see-through and rich in depth.
2. Burnishing
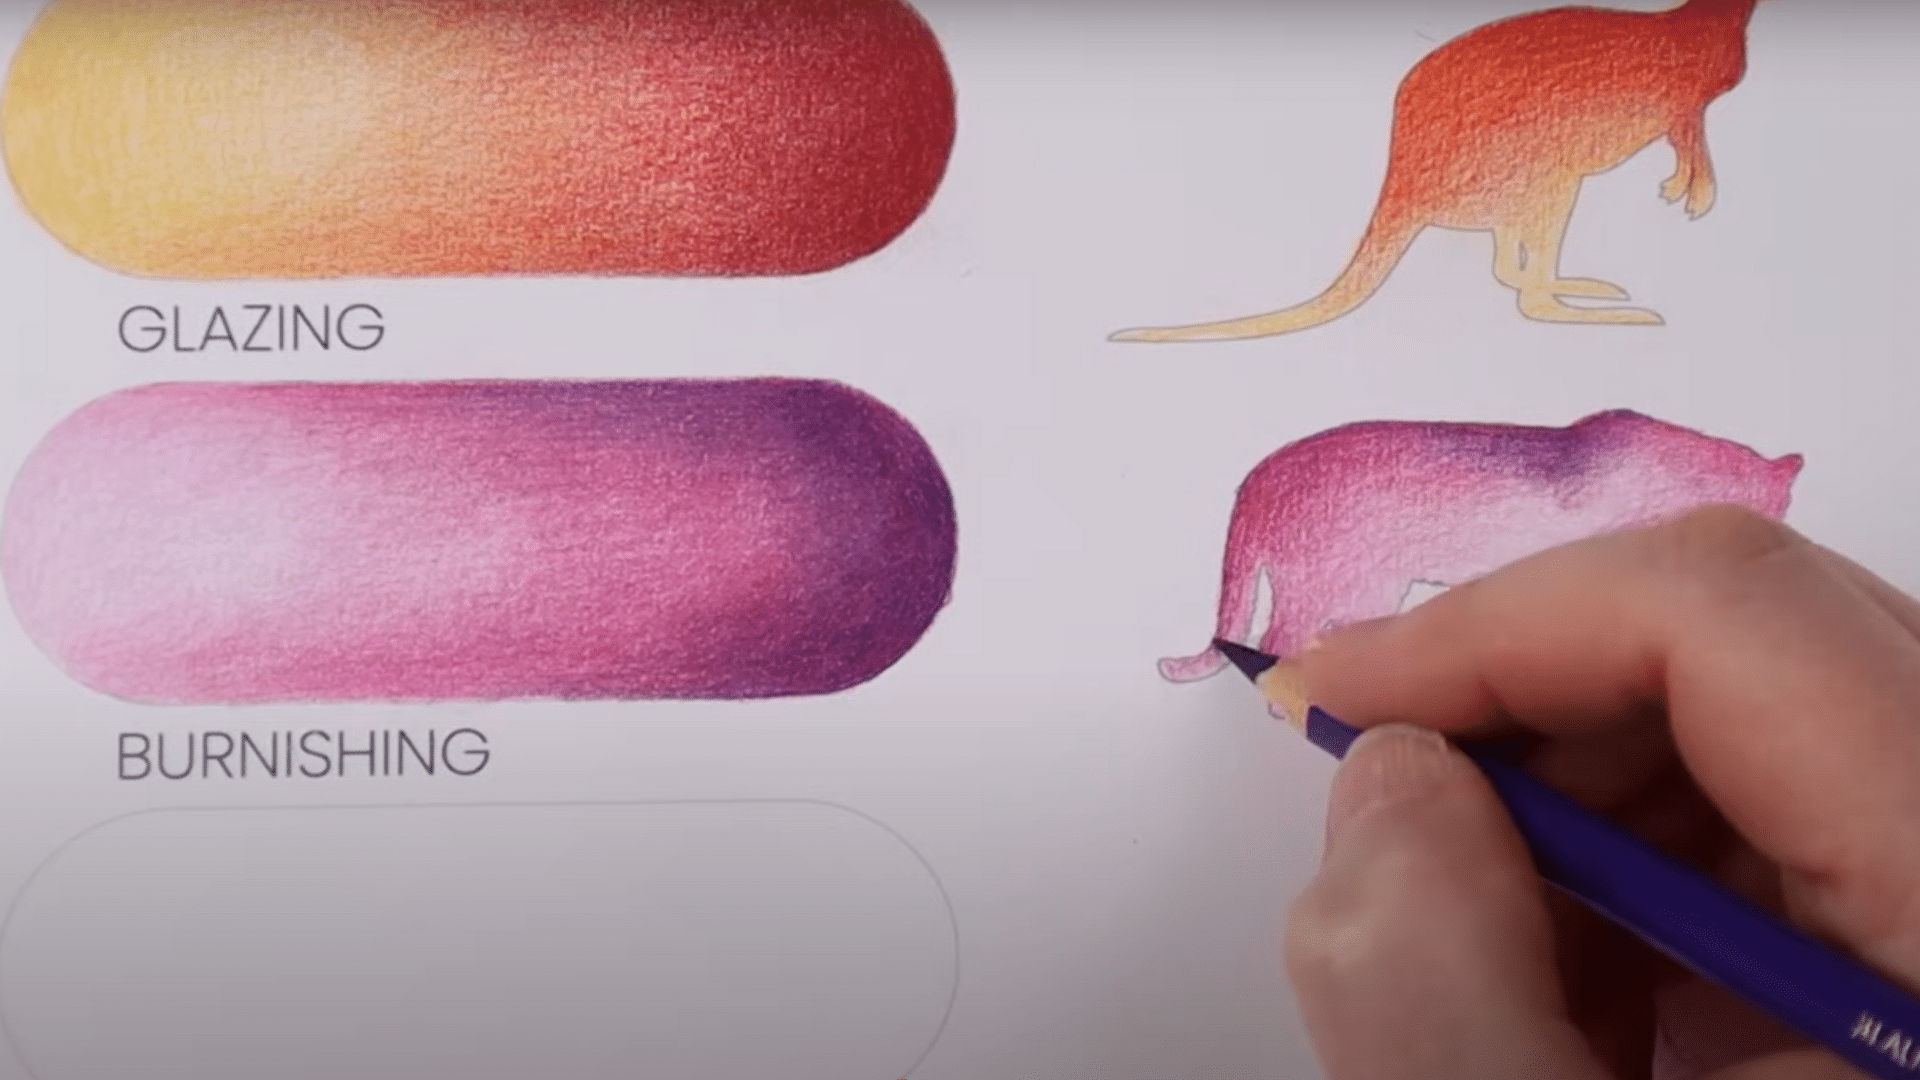
Burnishing is all about applying heavy pressure to blend layers into a smooth, polished finish. You can use regular colored pencils or specialized burnishing pencils to push pigment into the paper’s tooth.
It’s best saved for the final layers as it flattens the texture of the paper, making further layering difficult. With different pressure levels, light, medium, and have, you can control the sheen and intensity. Burnishing is perfect for glassy surfaces, eyes, and anything shiny.
Pro Tip: Always stack multiple color layers before burnishing to avoid damaging the paper with premature pressure.
3. Blender Markers
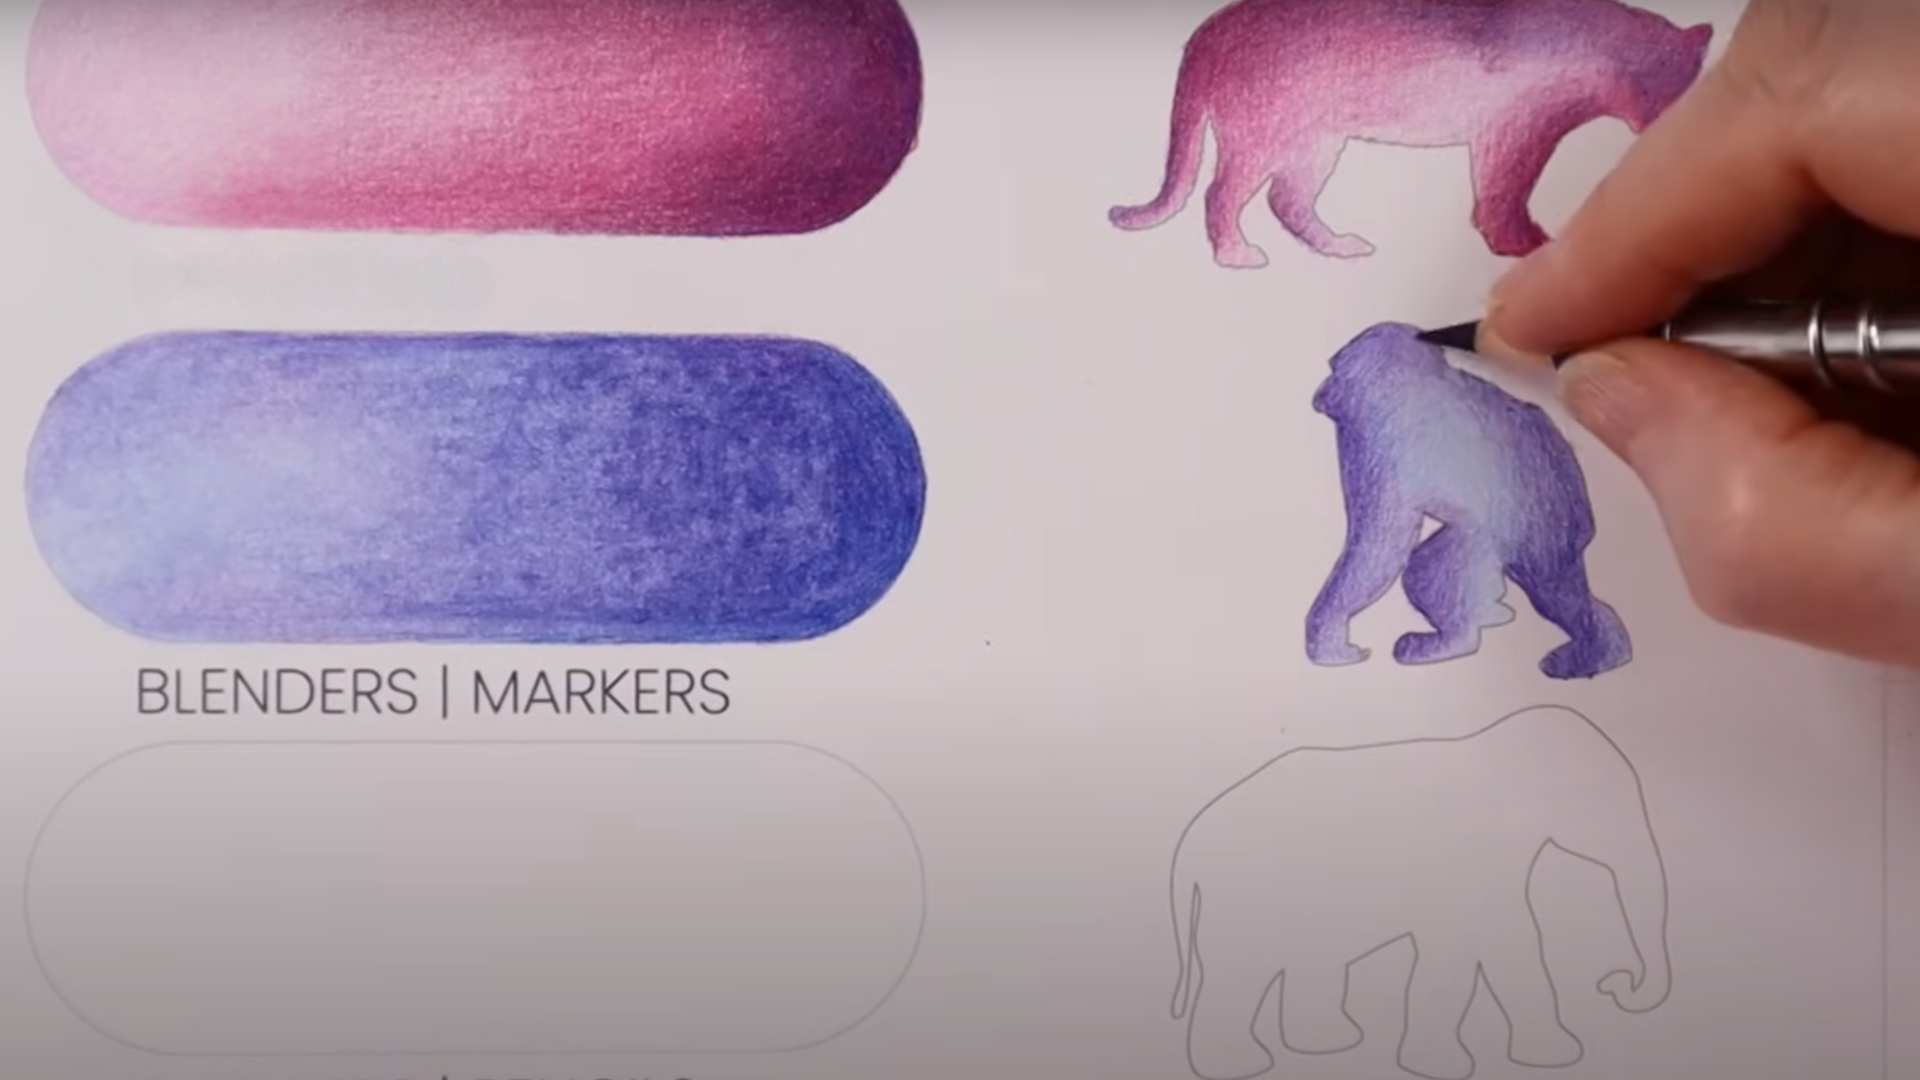
Blender markers contain a solvent that breaks down the wax or oil binder in colored pencils, making it easier to blend hues. After applying your colors, you can use the marker to melt and merge pigments with minimal effort.
These markers work best in tight areas where precision blending is needed. While fast and convenient, they may cause bleeding if overused.
Pro Tip: Blend from light to dark to avoid muddying your brighter areas.
4. Blender Colored Pencils
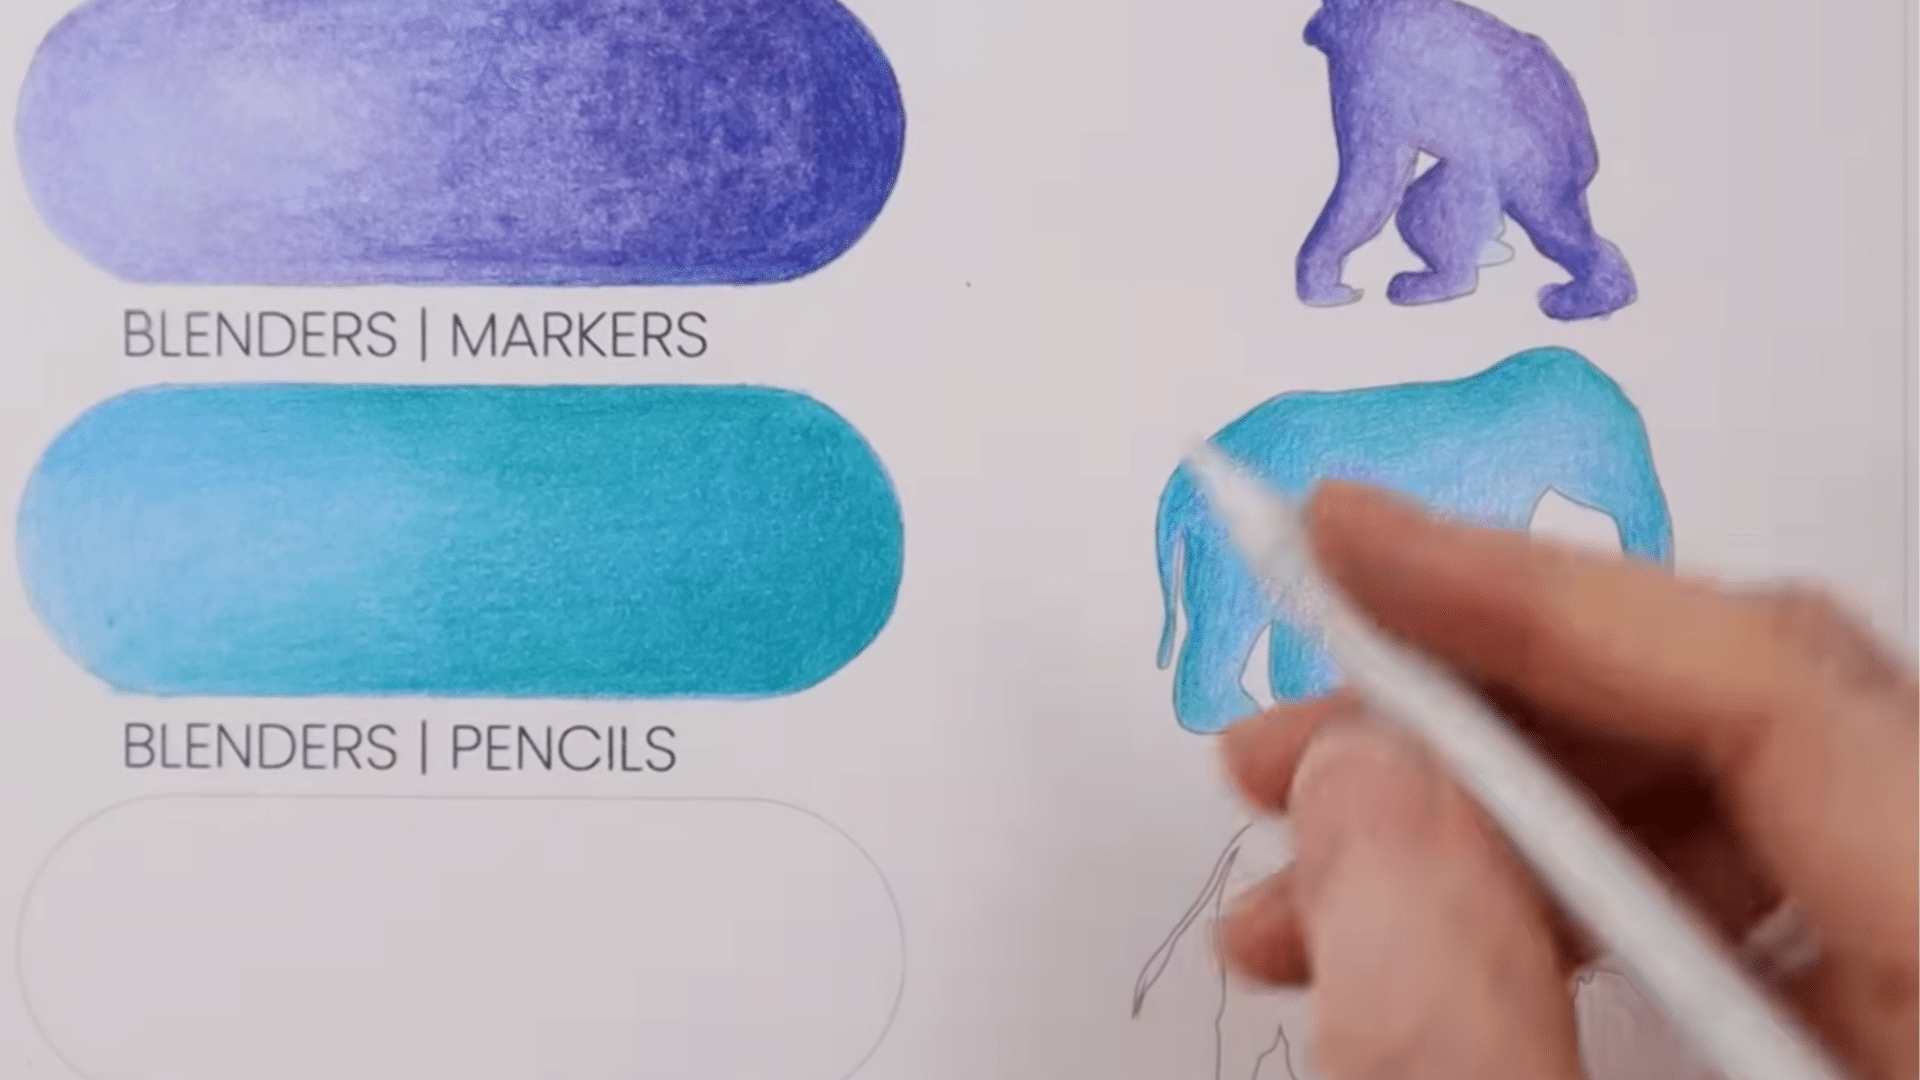
Blender pencils are pigment-free and made to smooth and unify layered colored pencil work. Softer than burnishing pencils, they don’t crush the paper but still mix the hues beautifully.
You use them like a regular pencil, making them beginner-friendly. They’re fantastic for soft transitions and creating natural gradients without damaging the artwork. They’re also a handy tool in coloring books and illustrations.
Pro Tip: Use small circular motions for smoother transitions and better control over blending.
5. Blender Liquids or Solvents

These are typically odorless mineral spirits that dissolve the colored pencil binder, creating a wash-like effect. Used correctly, they deliver painterly blends and fluid color shifts.
They’re great for layering and achieving watercolor-style finishes. However, once applied, they’re tough to erase, so commit carefully. Apply only after you’re sure about your color placement and saturation.
Pro Tip: Test your solvent with your paper and pencils beforehand. Some brands don’t mix well!
6. Using Neutrals for Blending
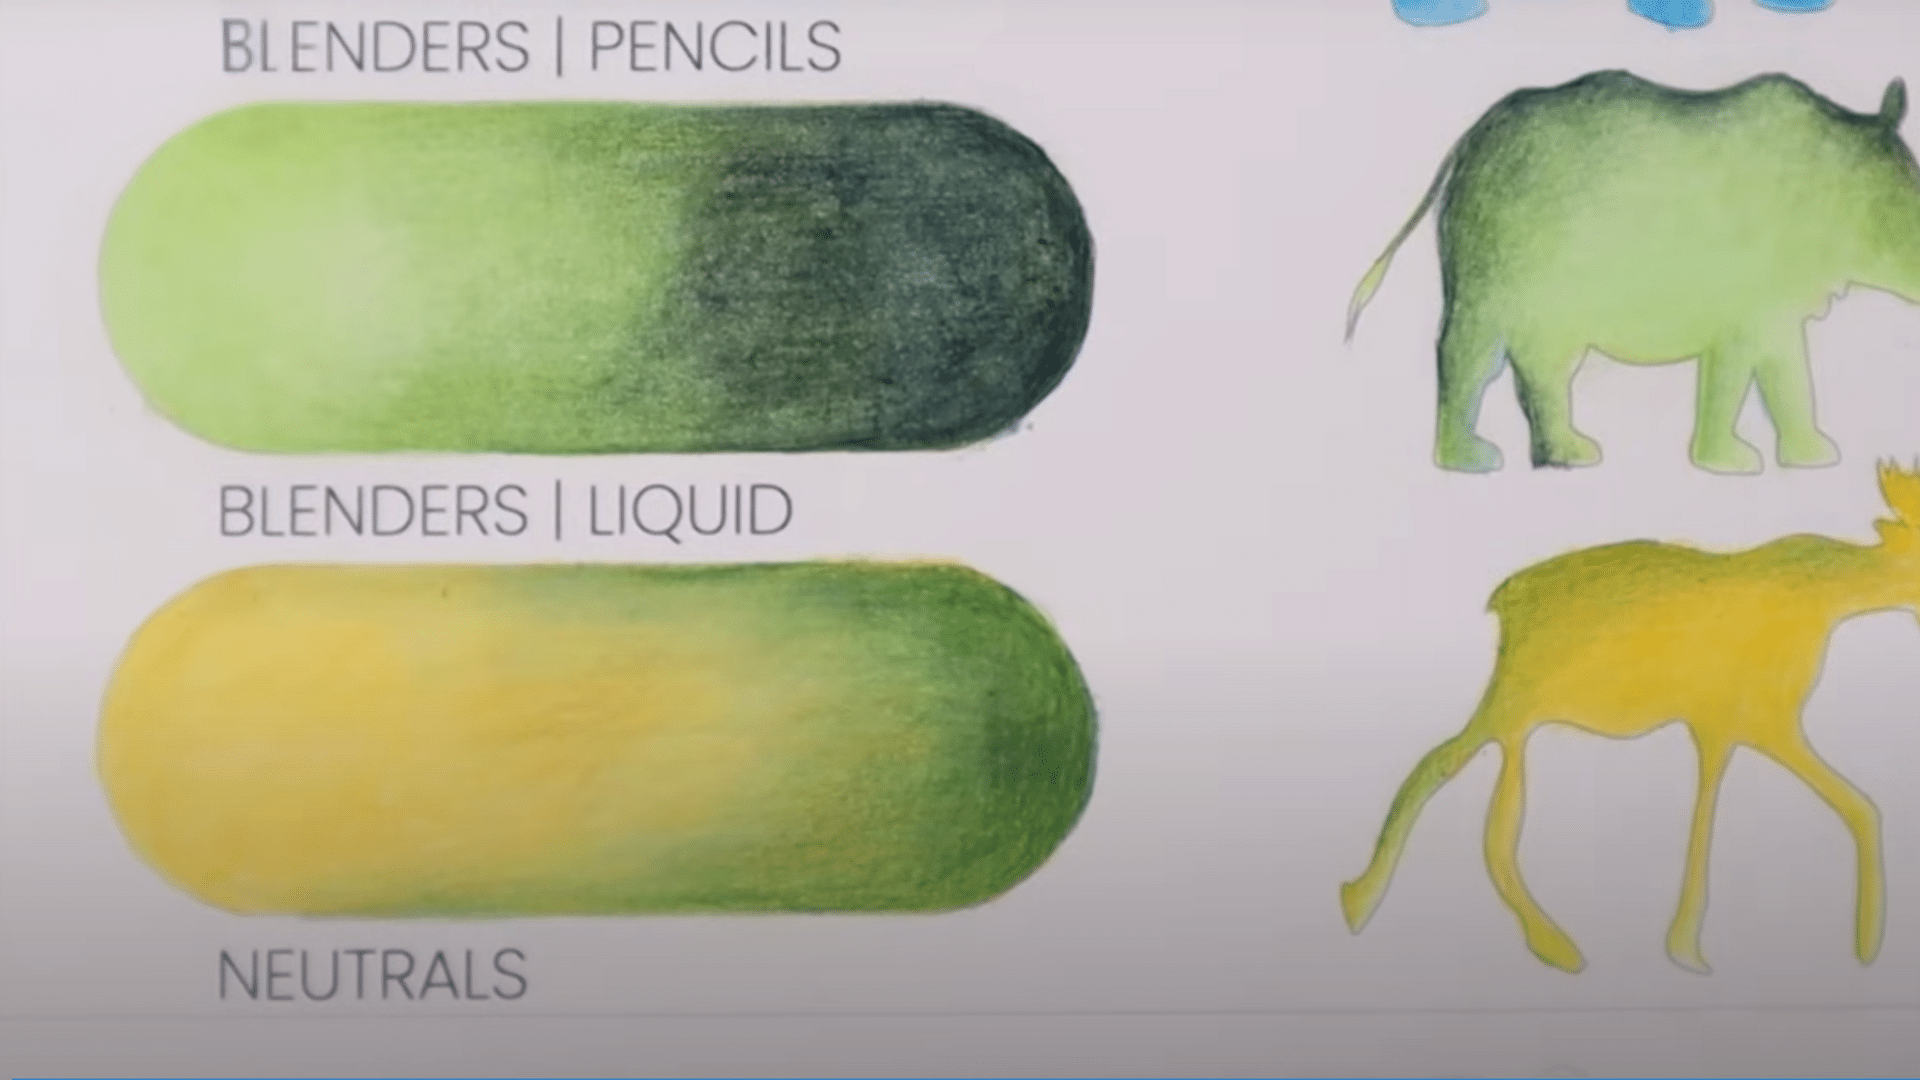
Neutrals like white, black, and gray pencils can be layered over colors to blend tones or soften transitions. A white pencil can lighten areas while subtly merging hues, and black can pull shadows across tones.
This technique is especially effective in skin tones or background transitions, giving your artwork a more cohesive and tonal balance. It’s simple yet powerful.
Pro Tip: Use neutrals to blend in harmony with your overall palette. Don’t overdo it, or your drawing can lose vibrancy.
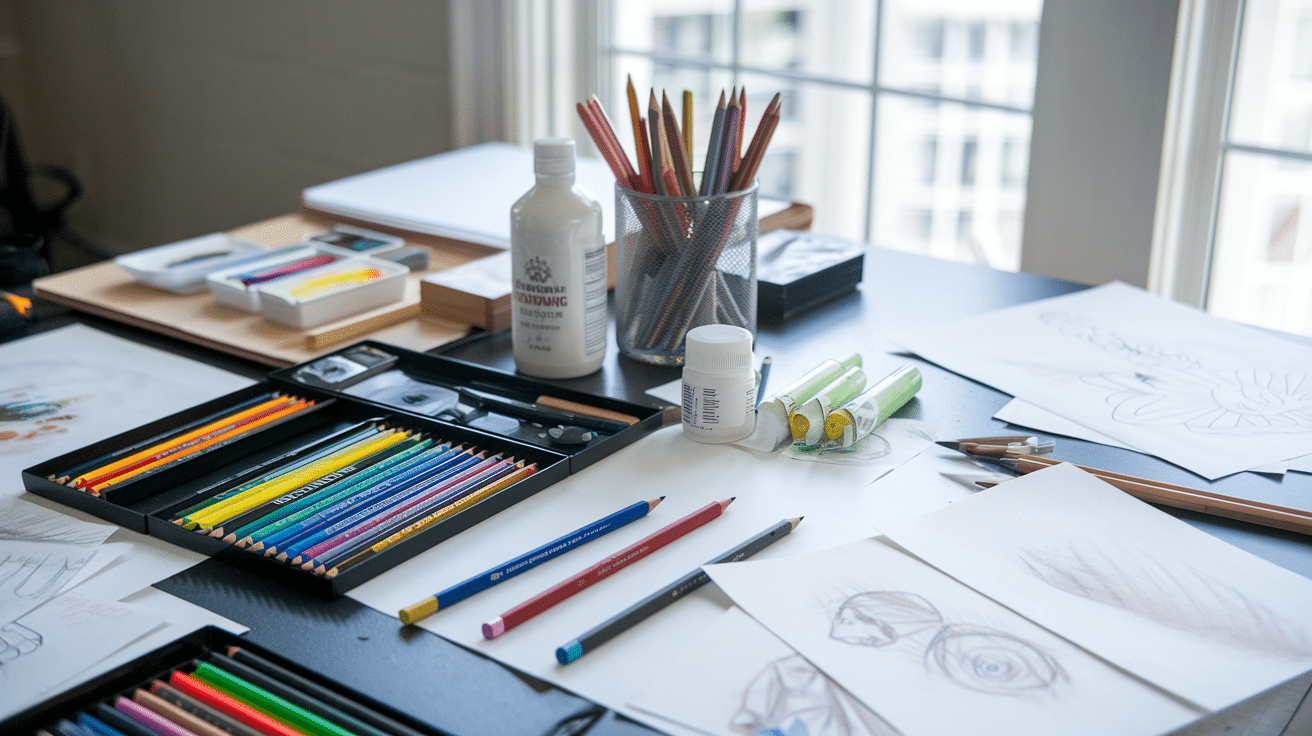
Essential Tools for Colored Pencil Techniques
Colored pencils can create stunning, professional-level art, but only when paired with the right tools. If blending, layering, or burnishing, having the correct supplies on hand makes all the difference.
Here’s a quick guide to the essentials and what each tool brings to the table:
| Tool | Purpose |
|---|---|
| Colored Pencils | The primary medium used for layering, shading, and blending colors. |
| Burnishing Pencil | Used for applying heavy pressure to smooth and polish layered colors. |
| Blender Pencil | Pigment-free pencil that softens edges and blends colors without flattening the paper. |
| Blender Marker | Solvent-based marker that melts and merges colored pencil pigments quickly. |
| Blending Solvents | Liquids like odorless mineral spirits that dissolve binder for fluid blending. |
| White/Black/Grey Pencils | Used for tonal blending and softening transitions with neutral shades. |
| Stonehenge or Bristol Paper | Heavy, smooth paper with enough “tooth” to hold multiple color layers. |
| Eraser (Kneaded or Vinyl) | Helps lift off pigment or refine details without damaging paper. |
| Sharpeners | Maintains a fine point for precision in detail work and layering. |
| Scrap Paper | Used to test colors, clean blender tools, and avoid marker contamination. |
Wrapping It Up
Getting good at colored pencil blending takes time and practice. Don’t feel bad if your first attempts don’t match your vision. Each drawing helps you build muscle memory and learn how colors interact.
Start with simple subjects and focus on one technique at a time. Small wins build confidence faster than taking on complex projects too soon. Keep samples of your work to track your progress; you’ll be surprised how quickly you improve.
The best part of colored pencil techniques in art is that it’s accessible to everyone. You can work anywhere, take breaks easily, and use basic materials to create beautiful results. No special studios or expensive equipment is needed.
Try the seven tips we shared, but remember there’s no “perfect” way to blend colored pencils. Your unique approach will develop as you practice. The most important step is simply starting and enjoying the process.
What technique will you try first? Grab your pencils and see where your creativity takes you!