Many artists stop in their tracks when attempting to capture the lively beauty of a cardinal on paper.
The striking red plumage and distinctive crest seem too complex to recreate.
Learning to draw a cardinal doesn’t have to be complicated, though. With the right techniques, anyone can modify a blank page into a lifelike representation of this beloved bird.
Anyone interested in drawing birds will benefit from mastering these methods. The step-by-step process breaks down the seemingly difficult task into manageable parts.
By following this blog on how to draw a cardinal, readers will develop skills that apply to drawing many other birds, too. They’ll soon create artwork they’re proud to display or share with friends and family.
New to Drawing? Start Your Cardinal Art with These Easy Tips
If you’re new to drawing, starting with a cardinal is a great way to practice. Follow these simple tips to help you master the process of drawing cardinals and improve your skills step by step.
- Use the Right Tools- Choose a medium-soft pencil like HB or 2B, and use smooth paper for easier sketching. Keep an eraser handy to clean up mistakes.
- Observe Cardinal Features – Cardinals have unique features like a pointed crest, bold red feathers, and a bright orange beak. Study a reference image to better understand the bird’s shape and texture.
- Break the Bird into Simple Shapes – Start with basic shapes: a circle for the head, oval for the body, and triangle for the beak. This will help you map out the proportions when learning to draw a cardinal.
- Draw Light and Refine Gradually – Use light lines at first and refine them as you go. Focus on the larger body shape and details like feathers and eyes.
How to Draw a Cardinal: Step-by-Step Guide for Remarkable Results
Drawing a cardinal is a fun and rewarding project, even if you’re a beginner or looking to improve your bird-drawing skills. With its lively red feathers and bold silhouette, the cardinal is not only a gorgeous subject but also a great way to practice form, proportions, and detail.
Follow these simple step-by-step instructions, and you’ll be surprised at what you can create with just a pencil and a bit of patience.
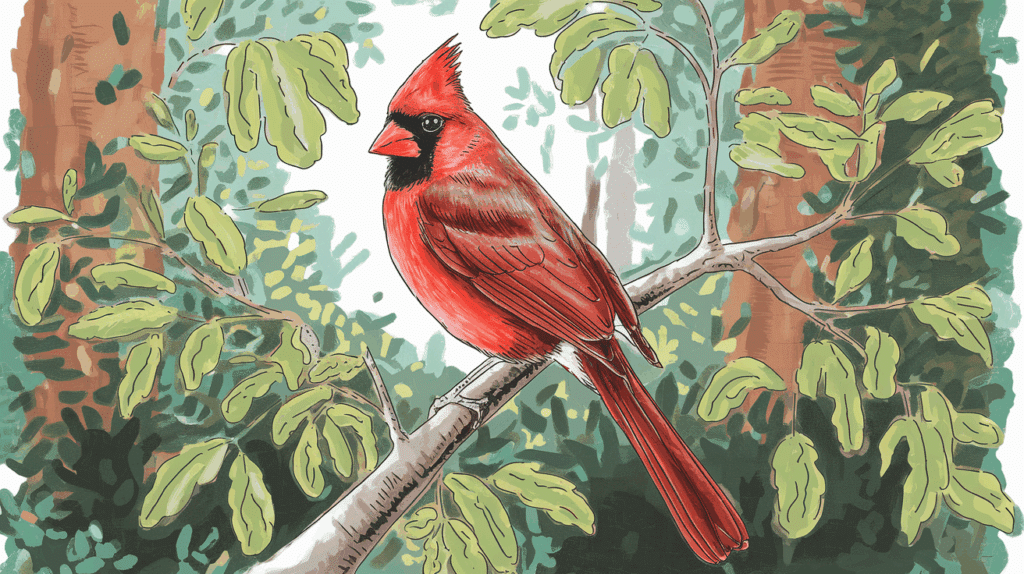
1. Start with the Eye

To begin learning how to draw a cardinal, sketch a soft lemon-shaped eye on the upper right of your paper. Add a curved lid line and leave a small white highlight within.
You can either outline the shine or fill in the eye and dab white on top using correction fluid or white gel pen. Add extra sparkles if you’d like.
2. Outline the Face and Feather Mask

When outlining the face, pay special attention to its black feather mask. This iconic feature gives the bird its expressive look.
- Lightly sketch around the eye, curving toward the forehead and down the cheek.
- Use short, sketchy strokes to mimic a soft, feathery texture.
- Blend the mask naturally into the head using wispy lines.
This soft shading gives the face a gentle, furry appearance, adding character and charm.
3. Shape the Beak and Its Detail
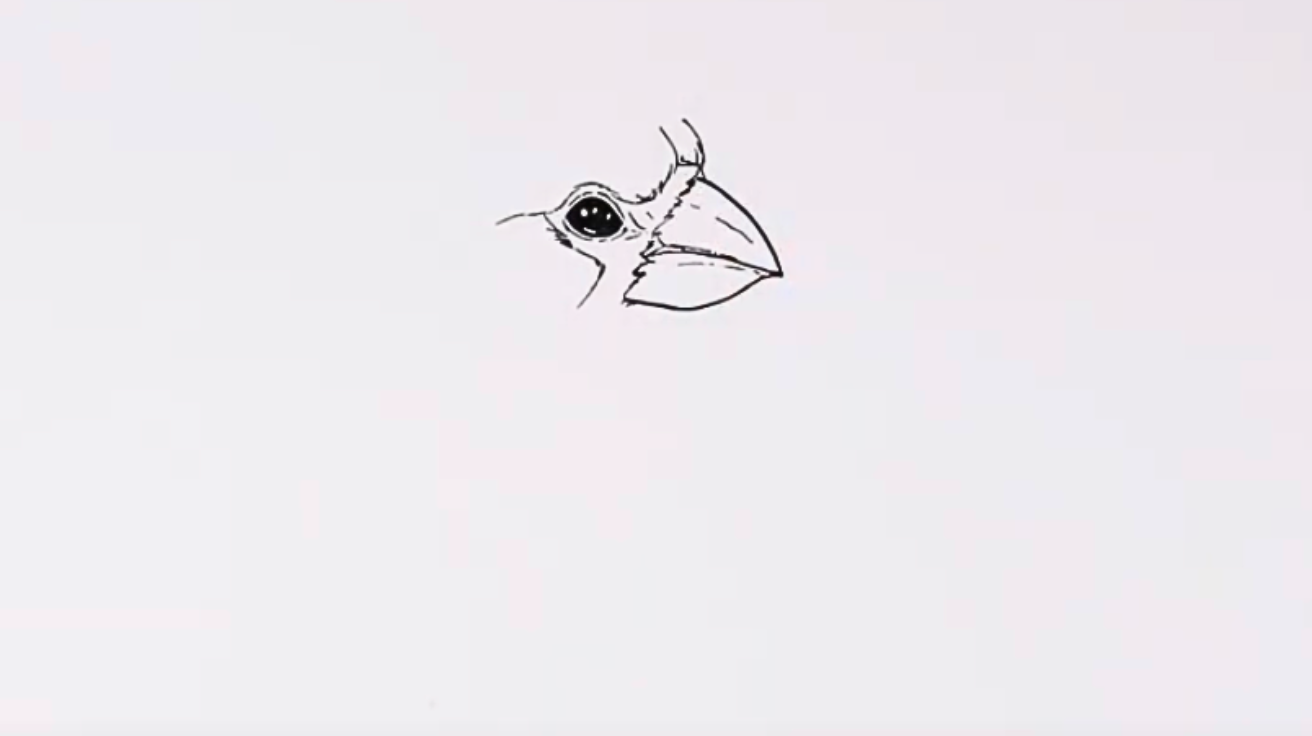
The next important step in drawing a cardinal is crafting its distinct beak. Start by sketching a sharp, triangular upper curve that juts out confidently from the edge of the black feather mask.
Let it gently slope downward under the chin to create the lower portion. Separate the two parts with a clean center line.
Where the beak meets the face, lightly shade the area to show soft feathers overlapping this adds depth and a more lifelike appearance.
4. Add the Signature Head Crest
A defining moment in how to draw a cardinal is crafting its head crest those upright feathers that give it a proud, spiky silhouette.
- Draw sharp, jagged lines extending from the back of the head.
- Vary the height and thickness to keep it looking natural.
- Add texture lines around the crown for realism.
These bold tufts create the cardinal’s unmistakable head shape and add a playful flair.
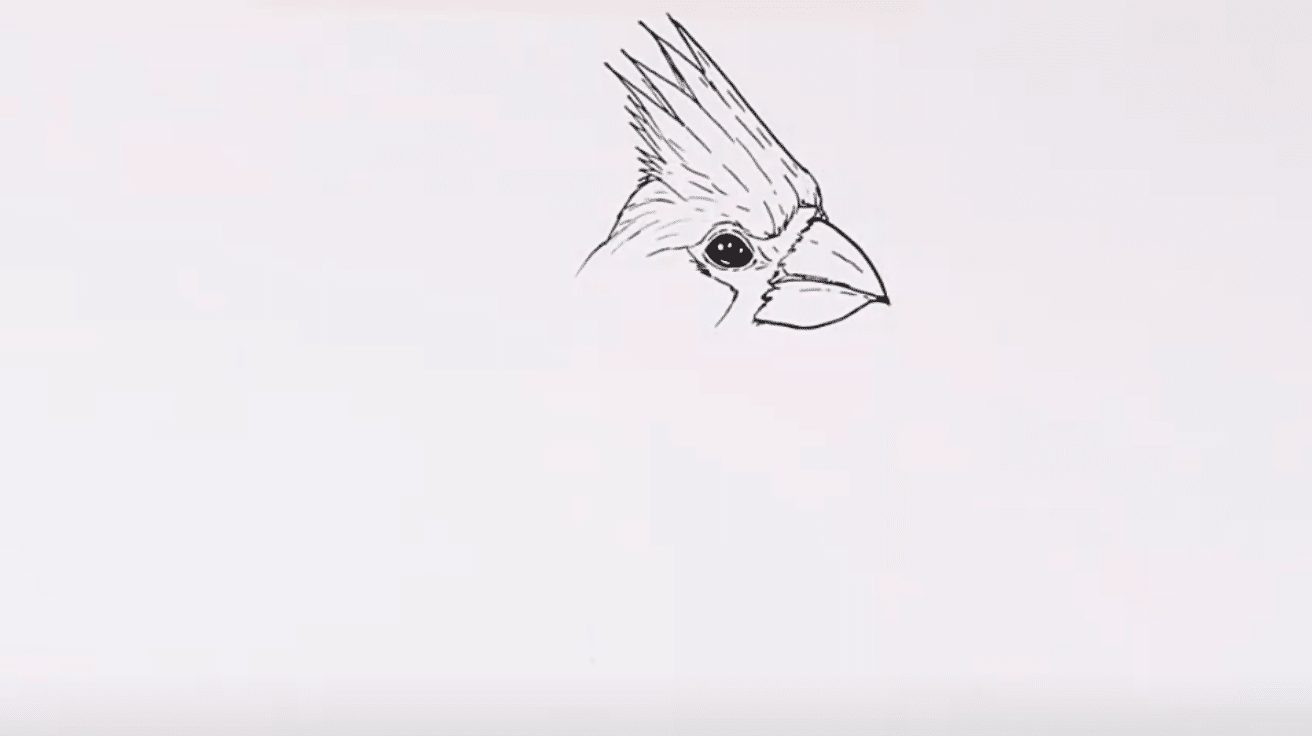
5. Sketch the Neck and Facial Feathers
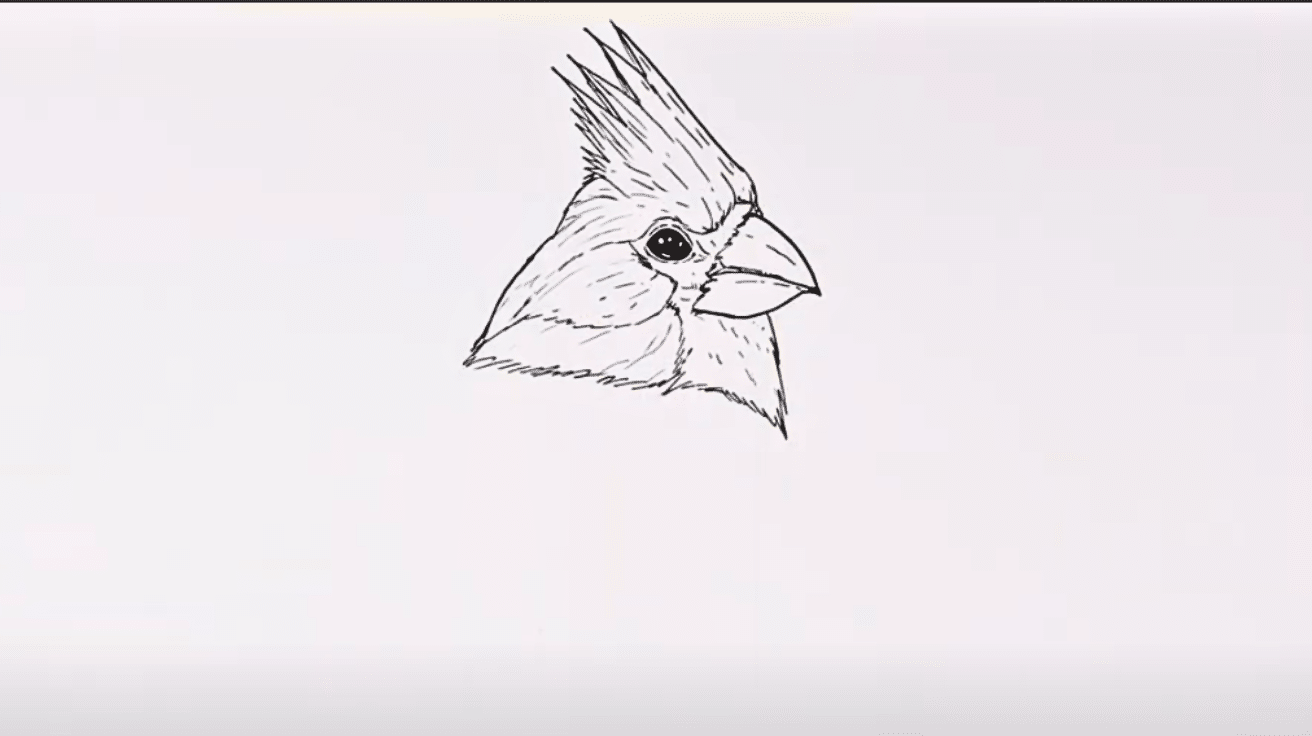
Now that the head is formed, the next focus in how to draw a cardinal is its neck. From behind the head, curve the neckline gently down.
Feather textures should remain soft and varied, some light and some slightly darker. Add small patches of red and black near the cheek to define the facial sections more distinctly.
6. Build the Body and Wing Curves
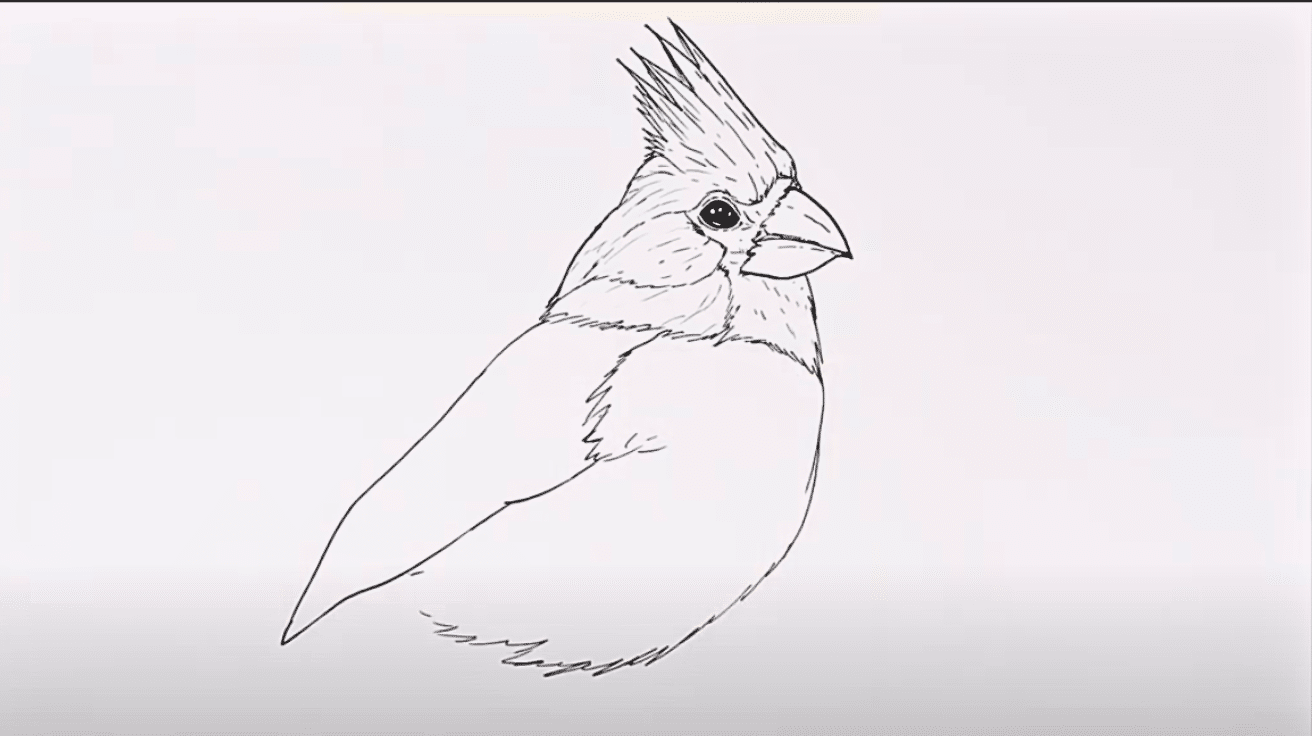
A lovely part of learning how to draw a cardinal is capturing its cozy, puffed-up body, especially in colder months.
Begin with a smooth curve that drops from the neck, creating a rounded chest and back. From the shoulder, draw the wing using long, flowing lines that gently hug the body.
Soften the belly and wing edges with short, layered strokes to imitate feathers. These subtle lines help the bird look warm, fluffy, and naturally resting on a winter branch.
7. Draw the Tail and Feather Layers
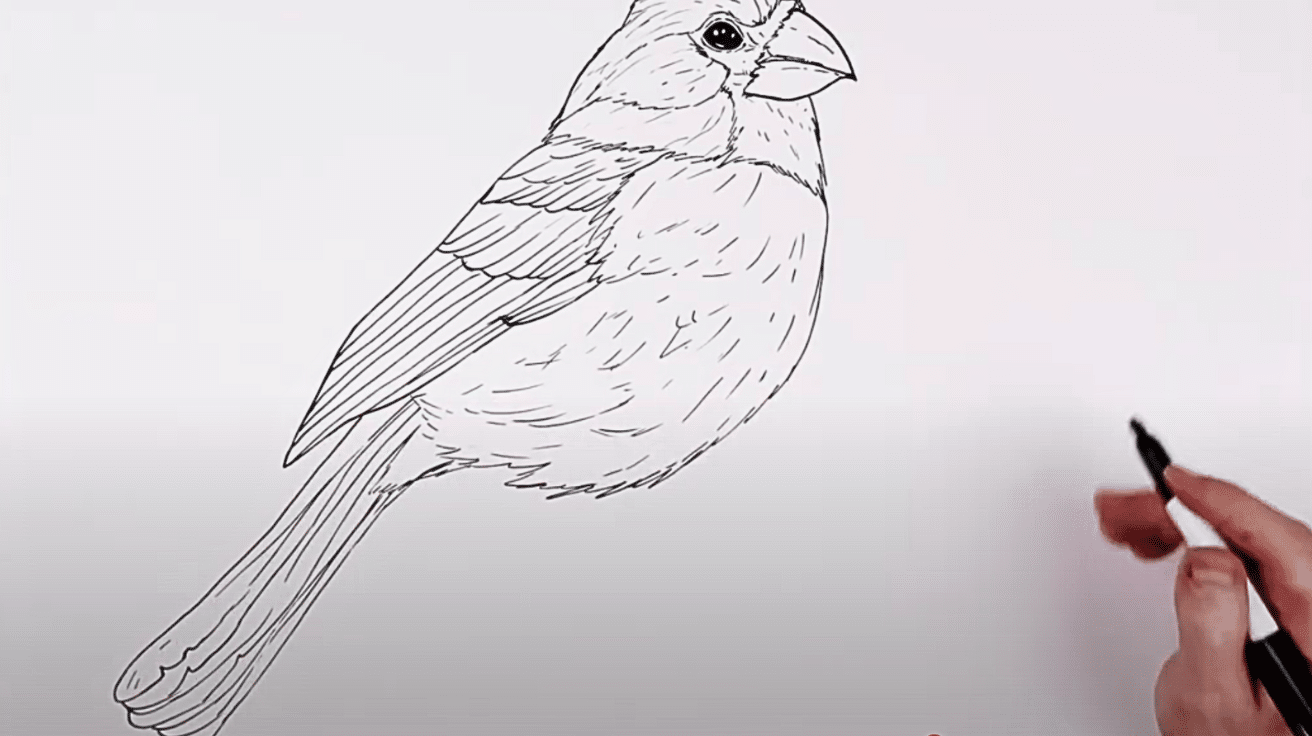
Understanding how to draw a cardinal means adding life to its tail. Cardinals have graceful, tapering tail feathers that fan out with softness and strength.
- Start with long, curved lines behind the body.
- Add 2-3 layers of overlapping feathers, slightly uneven.
- Create a fuzzy section where the tail meets the body.
This layering gives the tail movement, like a breeze has just rustled through its feathers.
8. Sketch the Legs and Gripping Claws
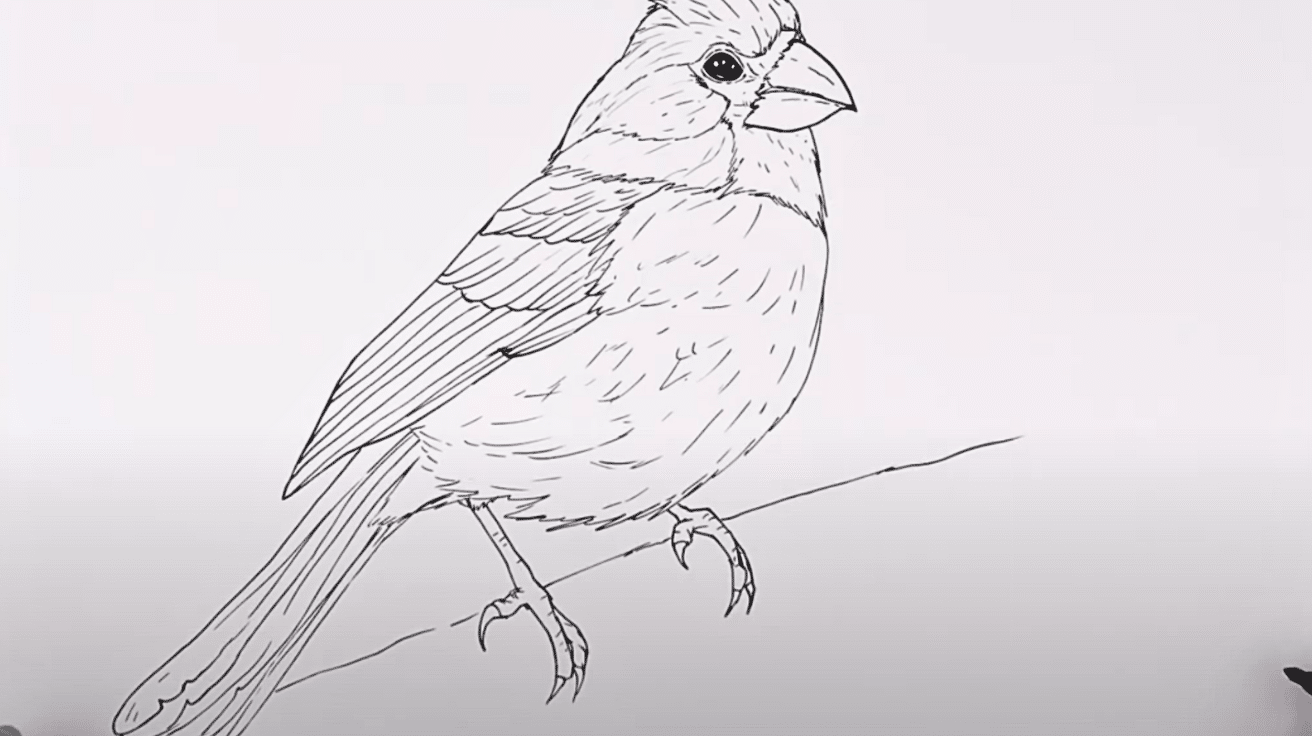
Part of mastering how to draw a cardinal includes the feet. Begin with the fluffy leg tufts, then draw curved toes gripping a branch.
Cardinals typically have three toes in front and one in the back. Make the middle toe the largest. Add tiny claws and wrinkles for texture. Ensure the foot’s position reflects the branch’s diagonal angle.
9. Finish with the Branch and Berries
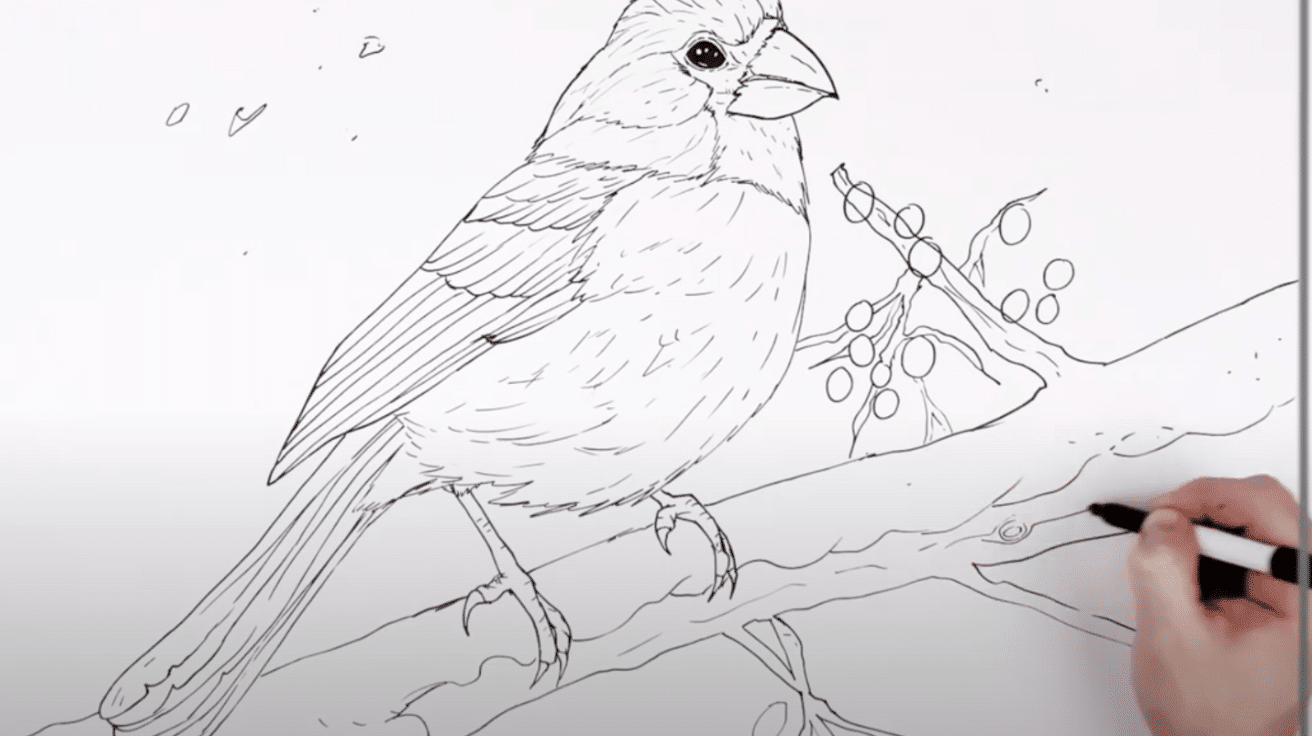
The final touch in drawing a cardinal is creating a charming wintry scene around it. Let the perch and berries add festive warmth.
- Draw a horizontal or diagonal branch beneath its feet. Add clumps of snow along the top edge.
- Scatter red berries in bunches and link them with tiny twigs.
- Use texture lines to roughen the wood.
This cozy setting frames your cardinal gorgeously and ties the whole drawing together.
How to Shade a Cardinal’s Feathers Like a Pro
Shading adds depth and realism to your bird drawing, and mastering this step will truly raise your skills. Here are expert-level tips to make your cardinal’s feathers look soft, layered, and lifelike.
- Use Layered Pencil Strokes – Lightly build up layers of graphite or colored pencil for a natural look. Follow the direction of the feathers with your strokes.
- Add Contrast for Dimension – Darken areas under the wings, tail, and neck for depth. Keep the top of the head and chest slightly lighter to show light source.
- Blend Without Losing Texture – Use a blending stump or tissue for smooth transitions. Avoid over-blending so feather details stay visible.
- Study Real Birds for Light Behavior – Observing real cardinals helps you not only learn how to draw a cardinal more accurately but also understand how light hits their feathers.
- Practice on Small Sections First – Shading smaller areas improves control, which is key when refining drawing cardinal with realistic detail.
Creative Inspiration & Unique Cardinal Drawing Ideas
Looking for fun and different ways to draw a cardinal? Even if you’re a beginner or just want to try something new, these simple ideas will help you look into your creativity and add a fresh twist to your bird drawings.
Flying Cardinal
Cardinal with Flowers
Cardinal in The Snow
Cardinal Under Full Moon
Key Takeaways
Drawing cardinals takes practice, but the results are worth every moment spent. The bright colors, distinctive shape, and expressive features of this bird make it a joy to illustrate.
Drawing cardinal isn’t just about following steps; it’s about building confidence with each stroke of the pencil or brush.
The techniques shared in this blog work for artists at any level. Beginners gain basic skills while experienced artists refine their approach. Either way, the process brings satisfaction when the cardinal takes form on the page.
Remember that art improves with time and patience. Small mistakes add character to drawings and show the human touch.
Drawing a cardinal becomes easier with each attempt, and soon, the process feels natural and fun. Keep your drawings to track your progress and enjoy watching your skills grow.