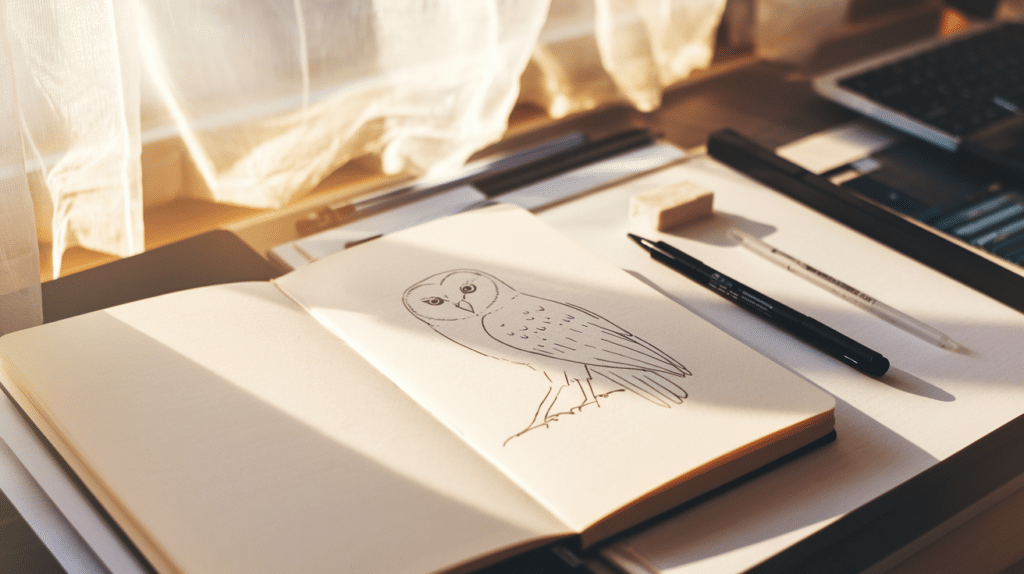
Many people find themselves frustrated when trying to sketch an owl. With its round face, big eyes, and fluffy body, it can be tricky to capture the essence of this majestic bird.
Often, the result looks more like a blob than the owl they imagined, leading to a feeling of defeat.
But don’t worry; learning how to draw an owl can be easy and fun! In this step-by-step guide, you’ll break the drawing process down into simple steps, making it much easier to follow.
From sketching the basic shape to adding the little details, by the end of this guide, you’ll have a realistic owl drawing that you can be proud of. Let’s get in and bring your owl to life!
Quick Tips to Improve Your Drawing Skills Instantly
Small changes can make a big difference in your art. Even if you’re starting or looking to refine your skills, these simple tips will help you draw more confidently and accurately.
You don’t need fancy tools or years of practice to see results, just a little dedication and the right techniques. Here are some fast ways to boost your drawing skills:
- Practice regularly, even for just a few minutes daily.
- Break complex objects into basic shapes first.
- Draw from real life or high-quality references.
- Experiment with different drawing tools and mediums.
- Focus on shading and light to add depth.
- Accept mistakes as learning opportunities.
- Keep a sketchbook to track your progress and stay inspired.
How to Draw an Owl: Step-by-Step Tutorial
Now, let’s examine how to apply these drawing tips with our step-by-step owl tutorial. Anyone can create a charming owl drawing by following these simple steps.
The process breaks down what seems tricky into manageable parts that build on each other naturally.
1. Prepare Your Workspace and Gather Materials
Before diving into your owl drawing, set up a calm, clutter-free space with good lighting.
Make sure your surface is smooth and comfortable to work on. This little preparation step can make a big difference in how relaxed and focused you feel while drawing. Here’s what you’ll need:
- A sharp pencil (HB or 2B recommended)
- A clean eraser
- A smooth sheet of paper
- A black pen or fine liner (optional)
- A blending tool or cotton swab (for shading)
2. Sketch the Owl’s Head and Body with Guiding Shapes
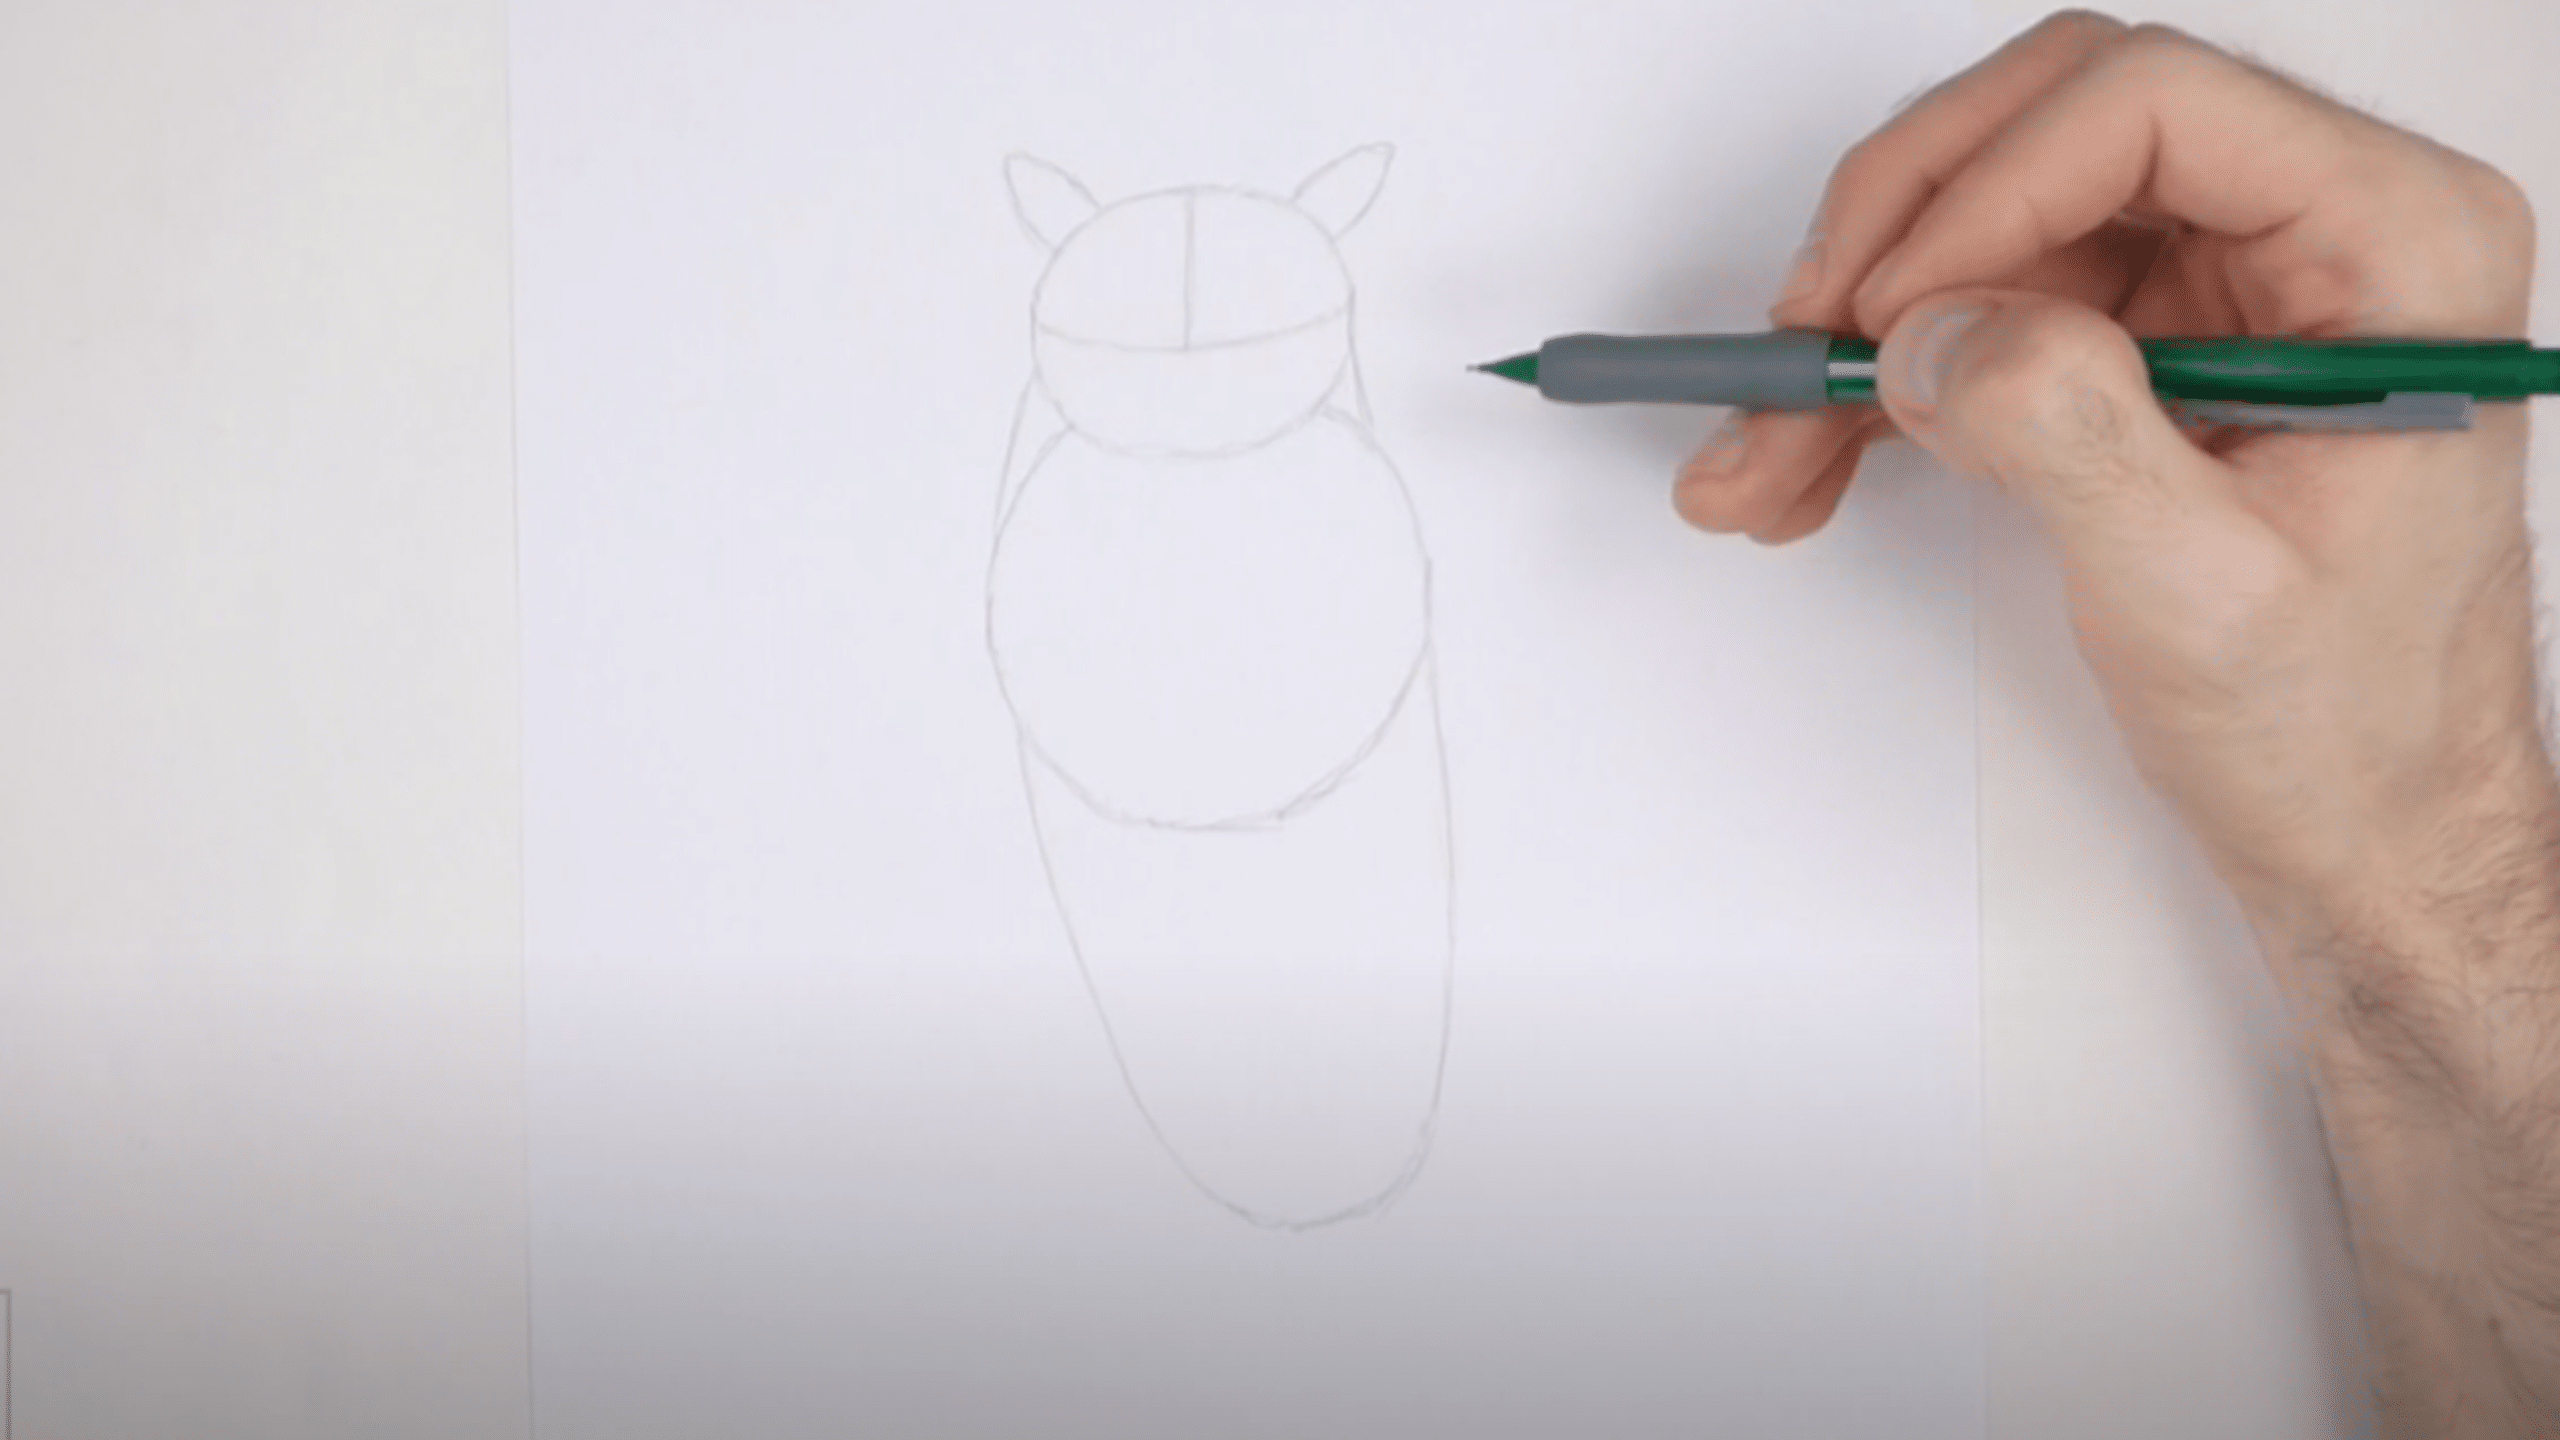
Begin with a light oval for the head using curved lines; this will serve as your main guide. To get the shape right, make small marks to measure the height and width and connect them smoothly.
Draw a large circle for the upper body beneath the head. It should be about 1.5 times the size of the head.
Then, add an upside-down arc shape below that for the lower half of the body. Connect everything gently using curved lines for a natural owl form.
3. Add Construction Lines and Feather Tufts
Draw a horizontal line across the head to help place the facial features later. Add a vertical line down from the top to guide symmetry.
On top of the head, sketch two soft arcs on either side. These are the owl’s feather tufts, often mistaken for ears. Keep them slightly curved and positioned evenly for a balanced look.
4. Draw the Beak, Eyes, and Facial Features
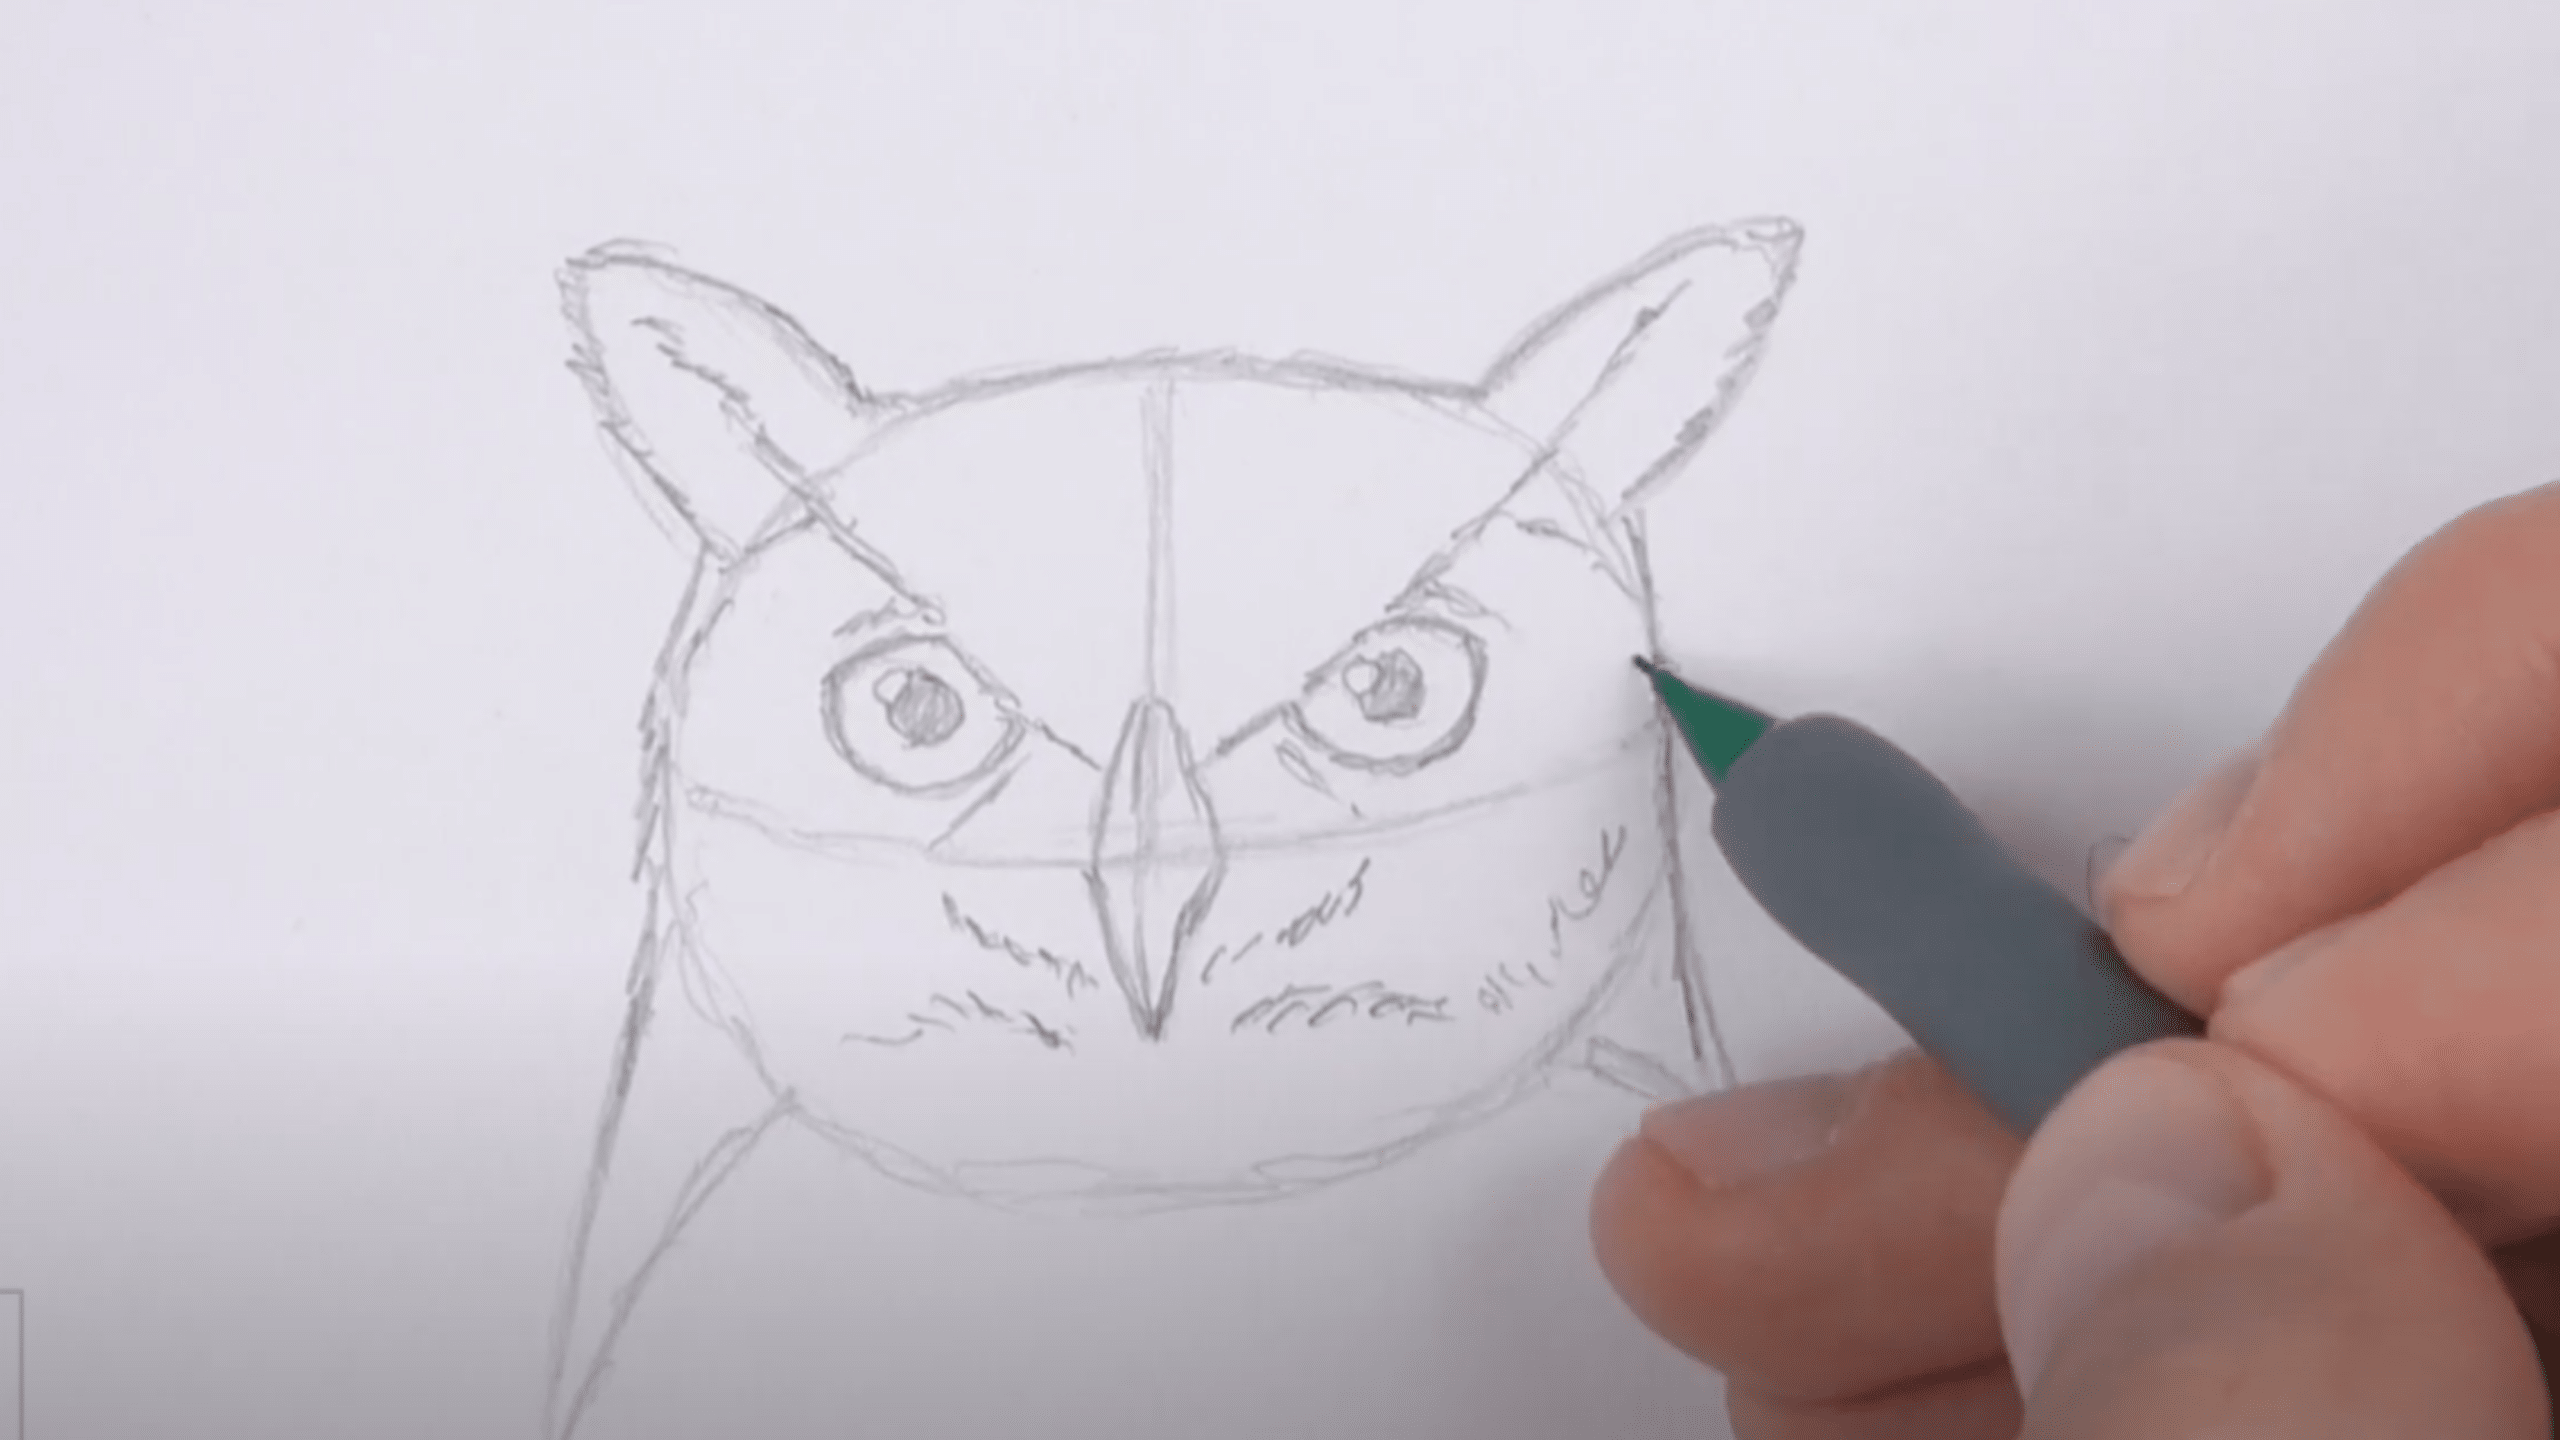
Right where the guidelines intersect, lightly sketch a diamond-like shape for the beak. Once it looks centered, darken it and curve the edges slightly for realism.
Above the beak, sketch gentle sloping lines for the brow, stretching into the tufts. Then, place two circles on either side of the beak for the eyes, slightly pointed at the corners.
Add a small circle inside each for highlights and a darker pupil in the center. Don’t forget those fine feather lines around the eyes for extra texture.
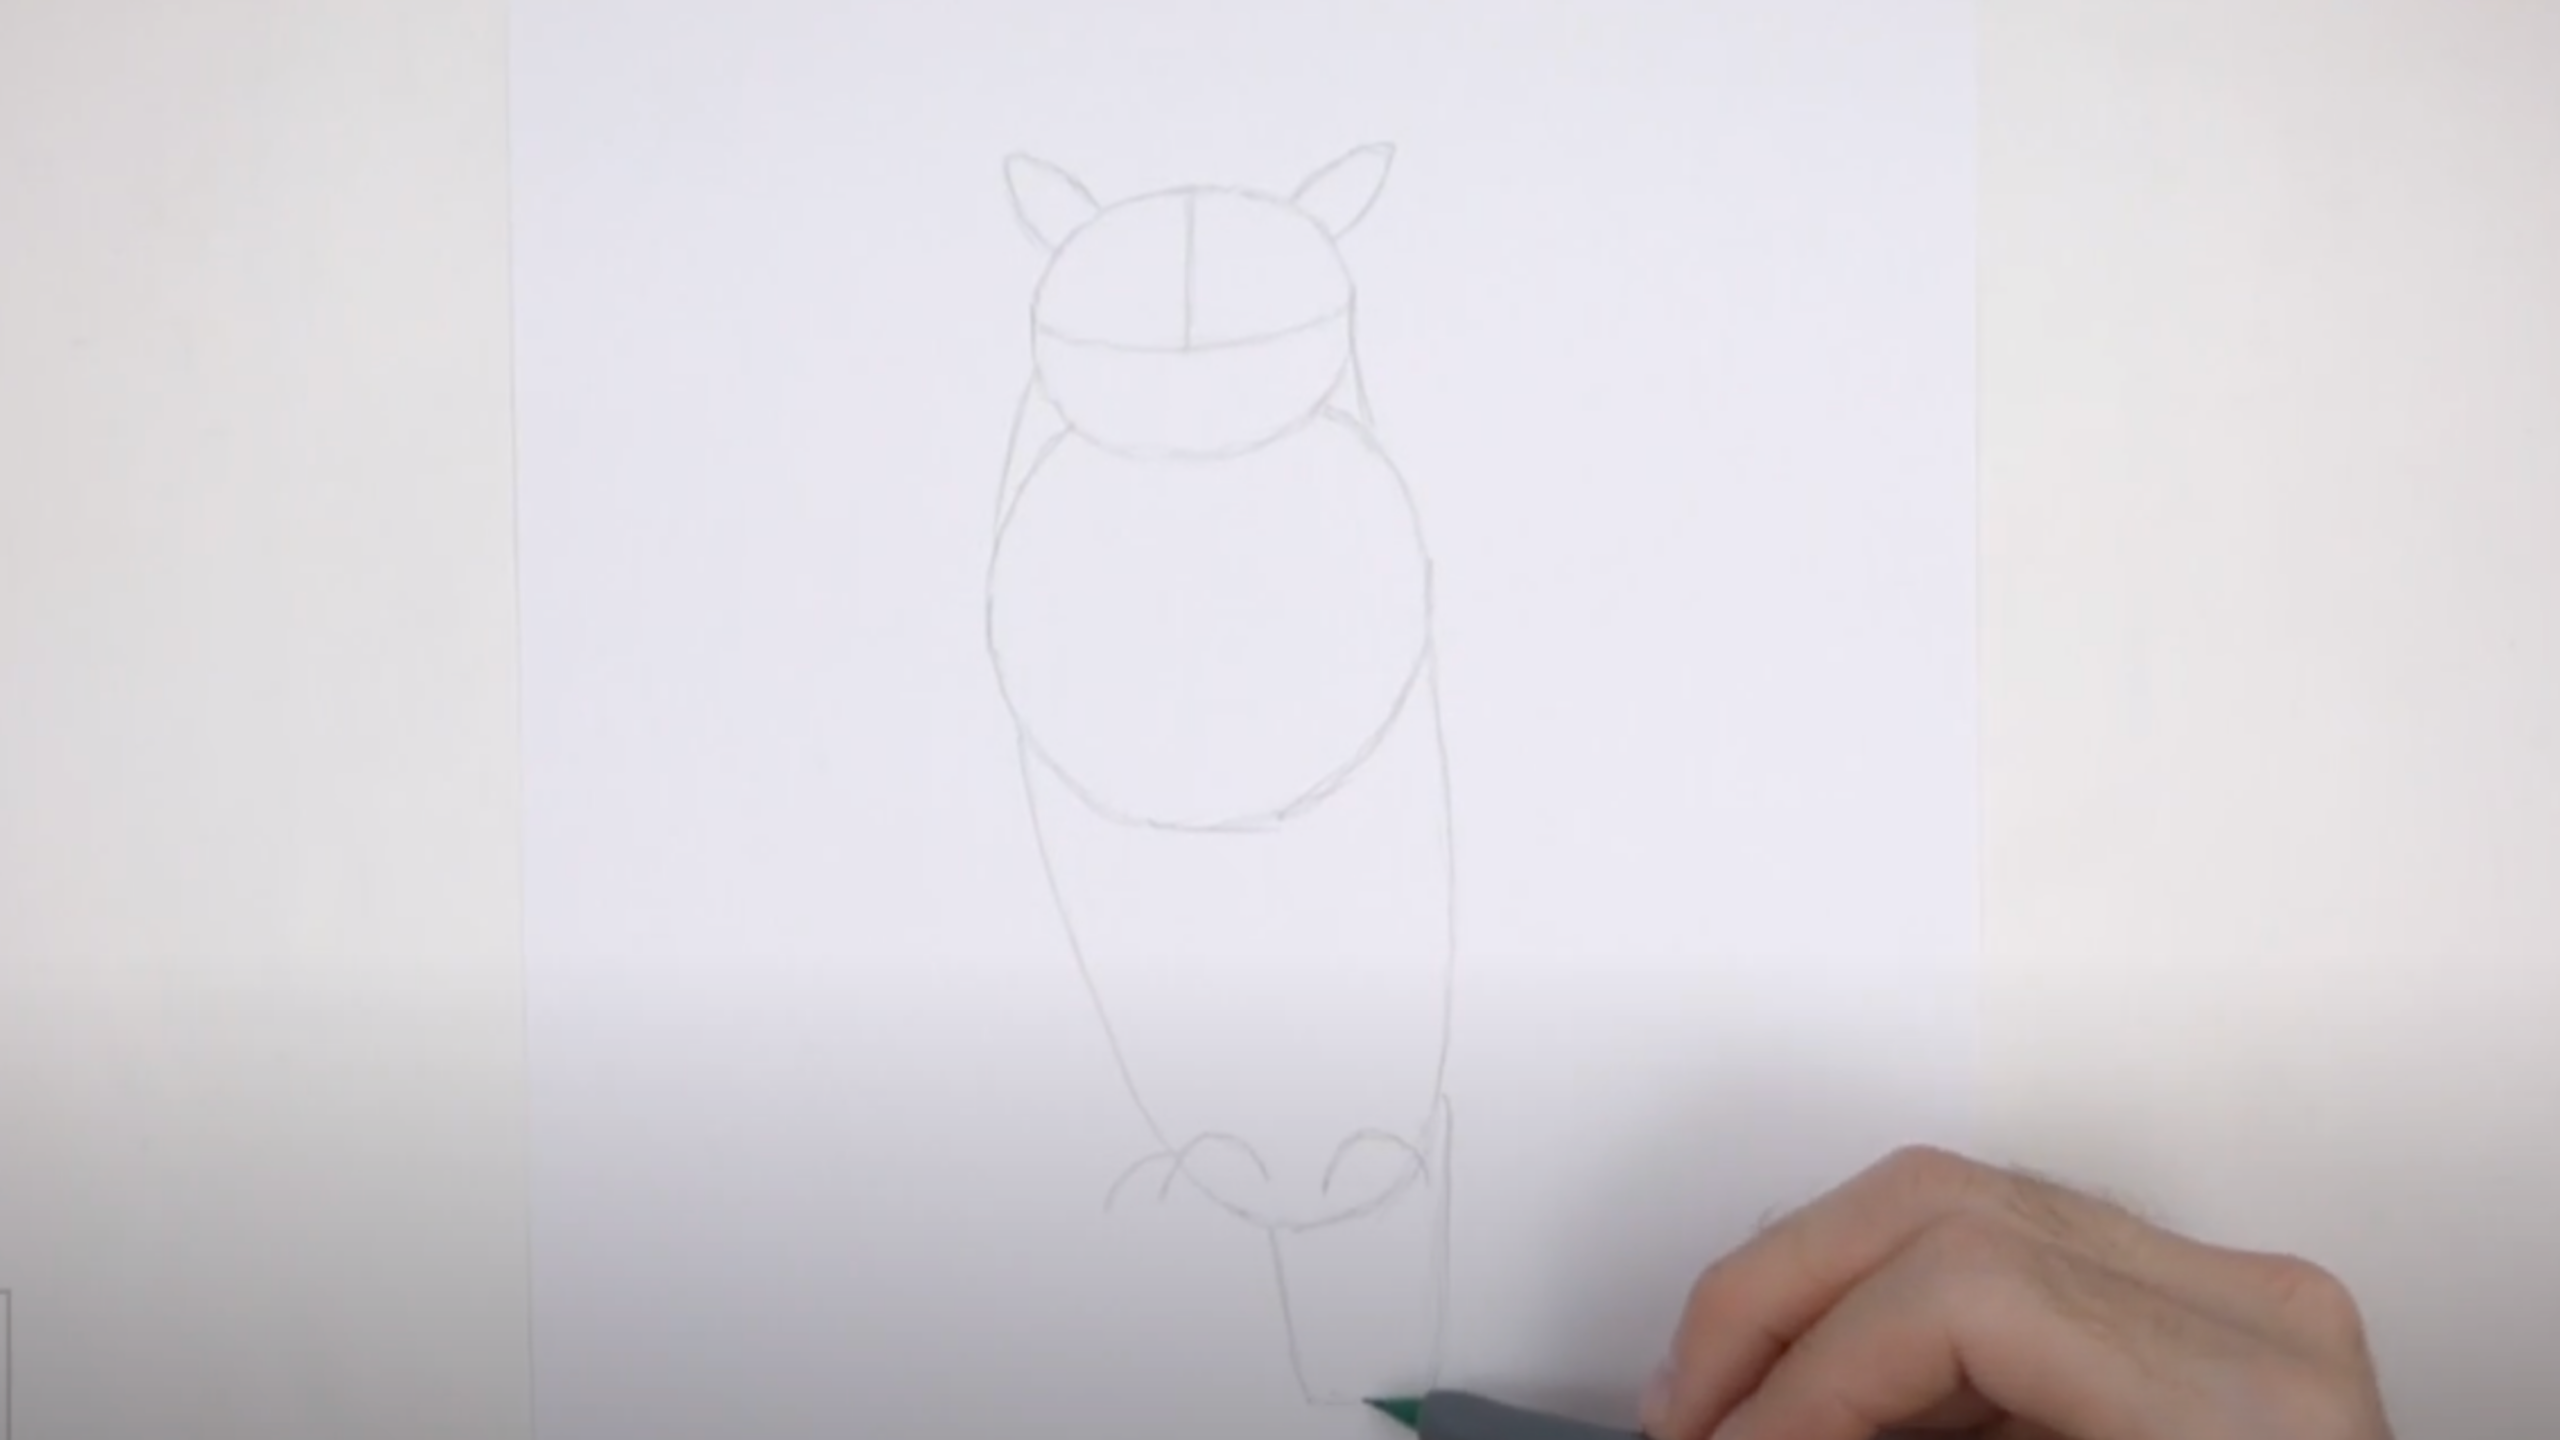
5. Define the Neck, Wings, Feet, and Tail
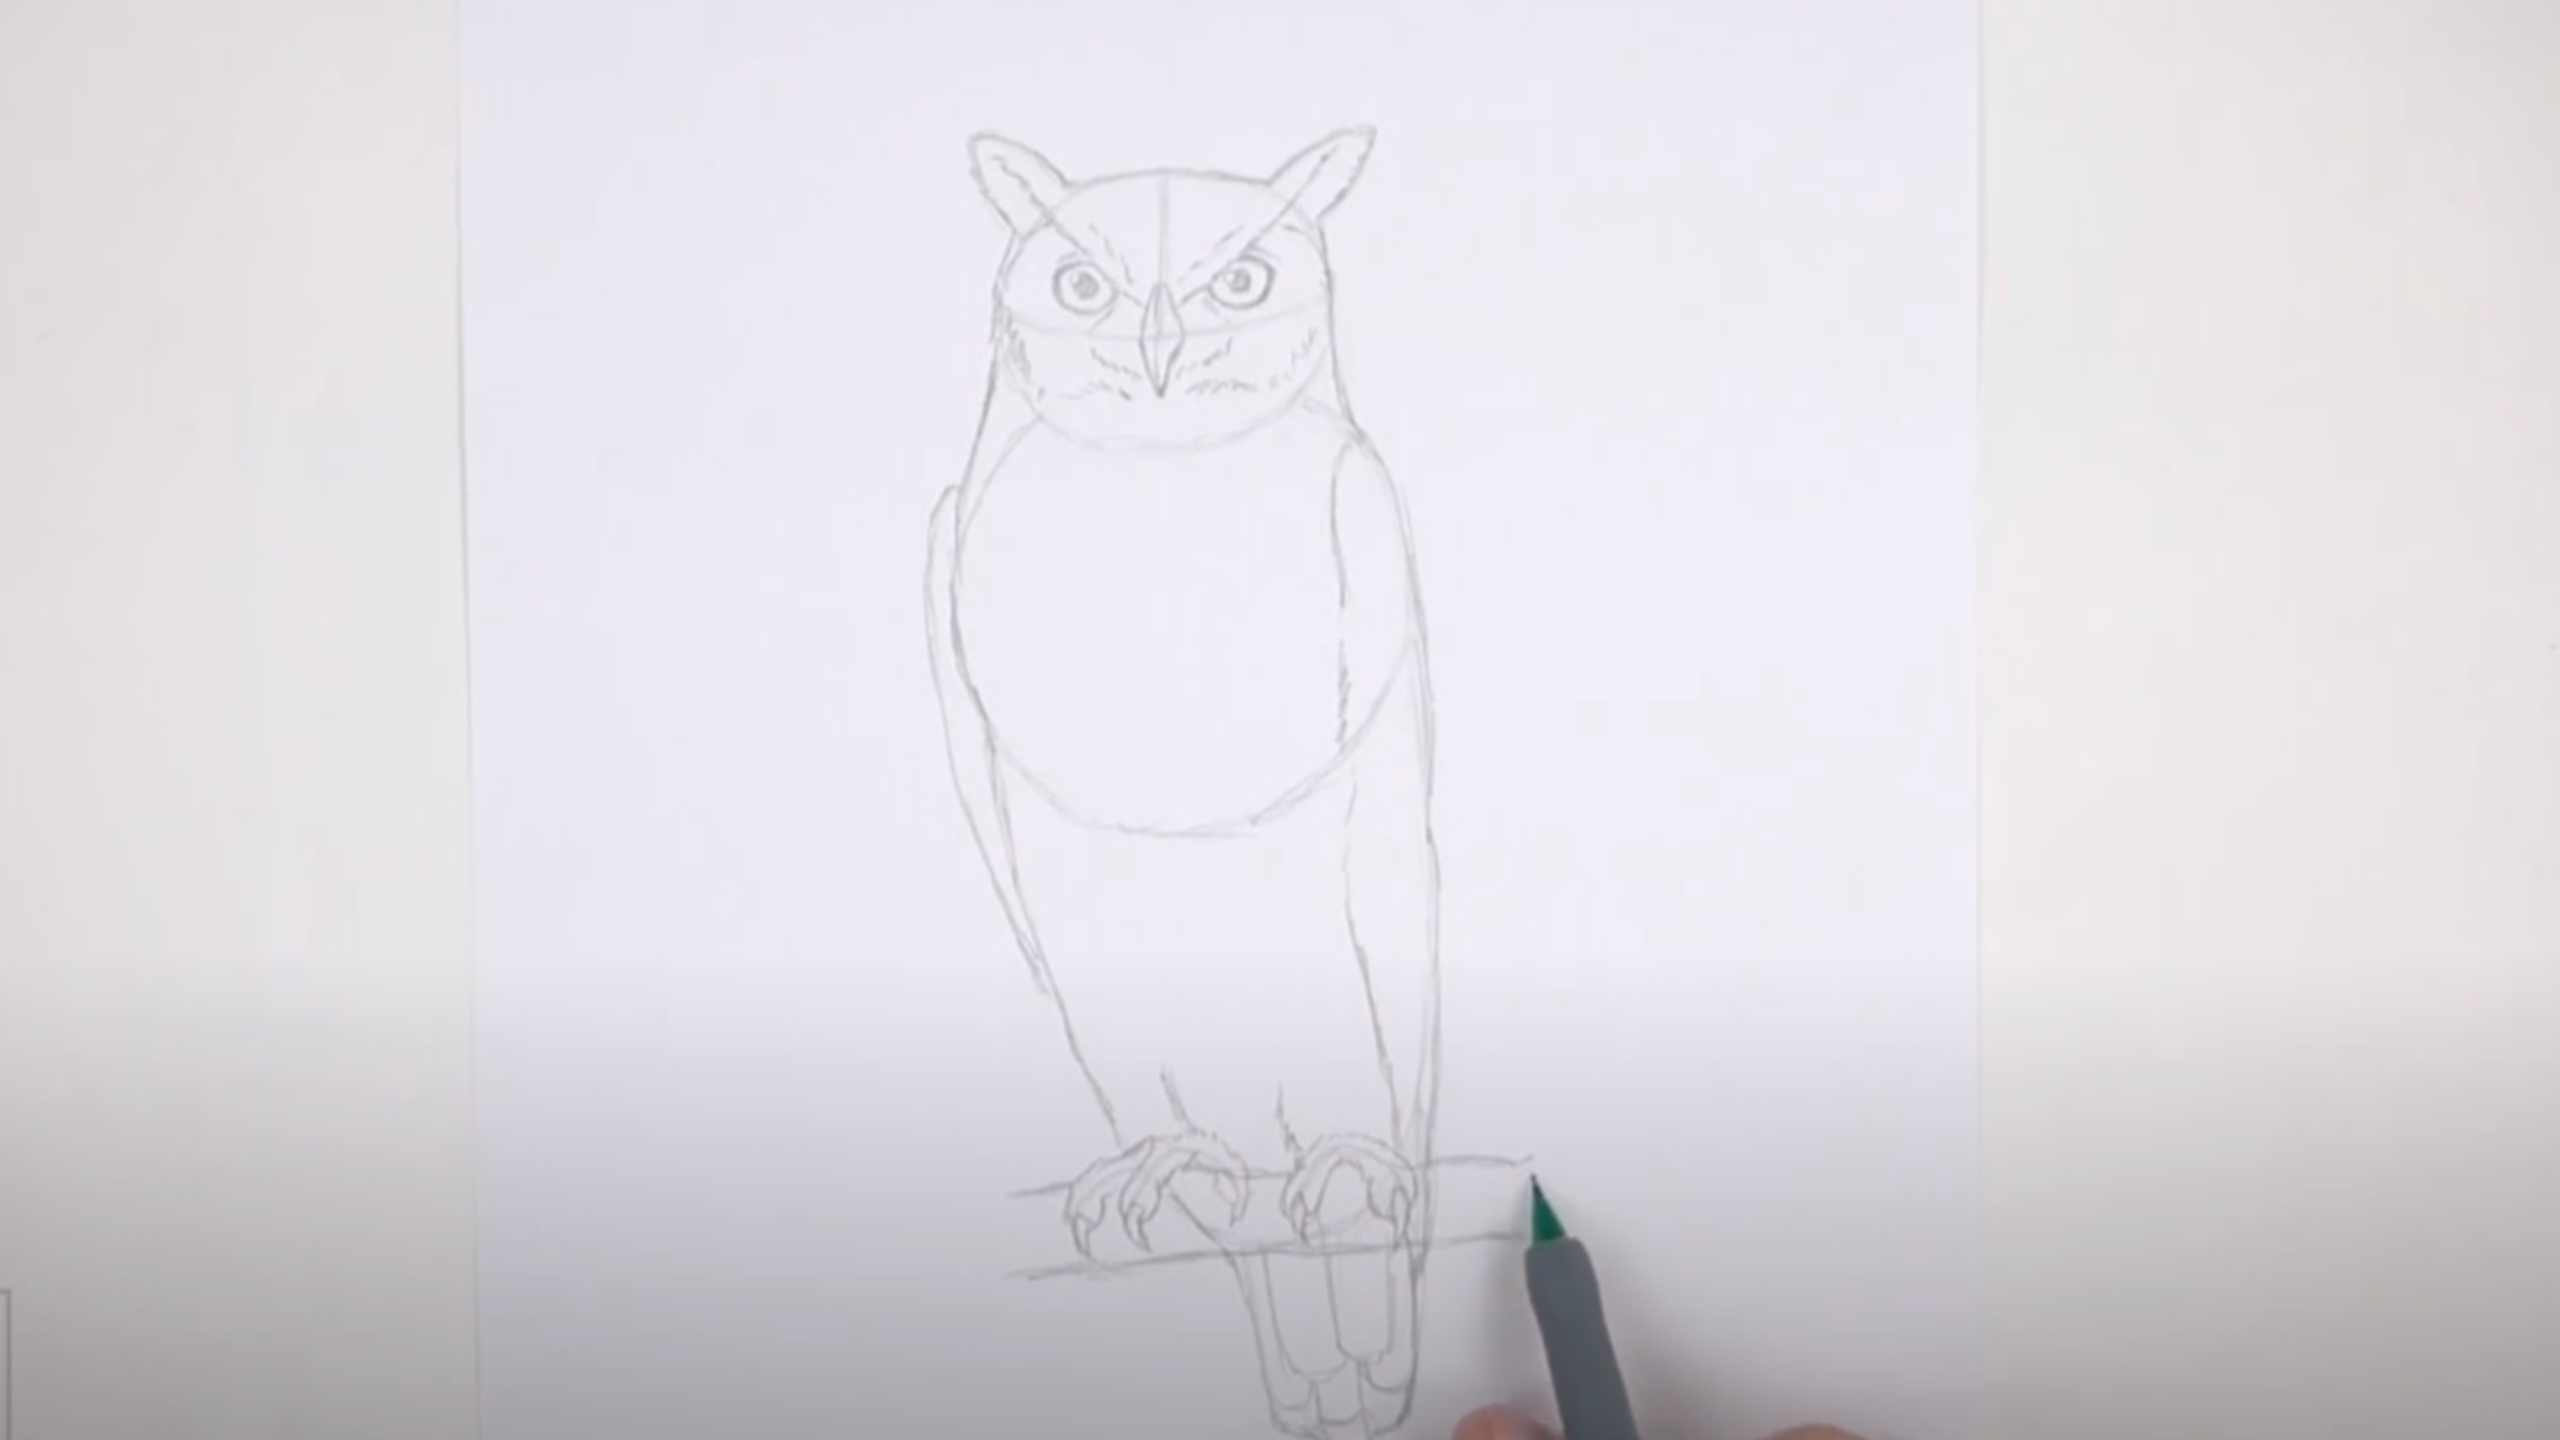
Use short lines to connect the head and body for the neck. Near the base of the body, add light lines for the feet, making sure most of them sit inside the body’s outline.
Sketch thin, pointy talons at the tips of the toes. Now add a small rectangular shape underneath for the tail, two vertical lines and a short horizontal base will do the trick.
6. Finalize the Outline and Clean Up
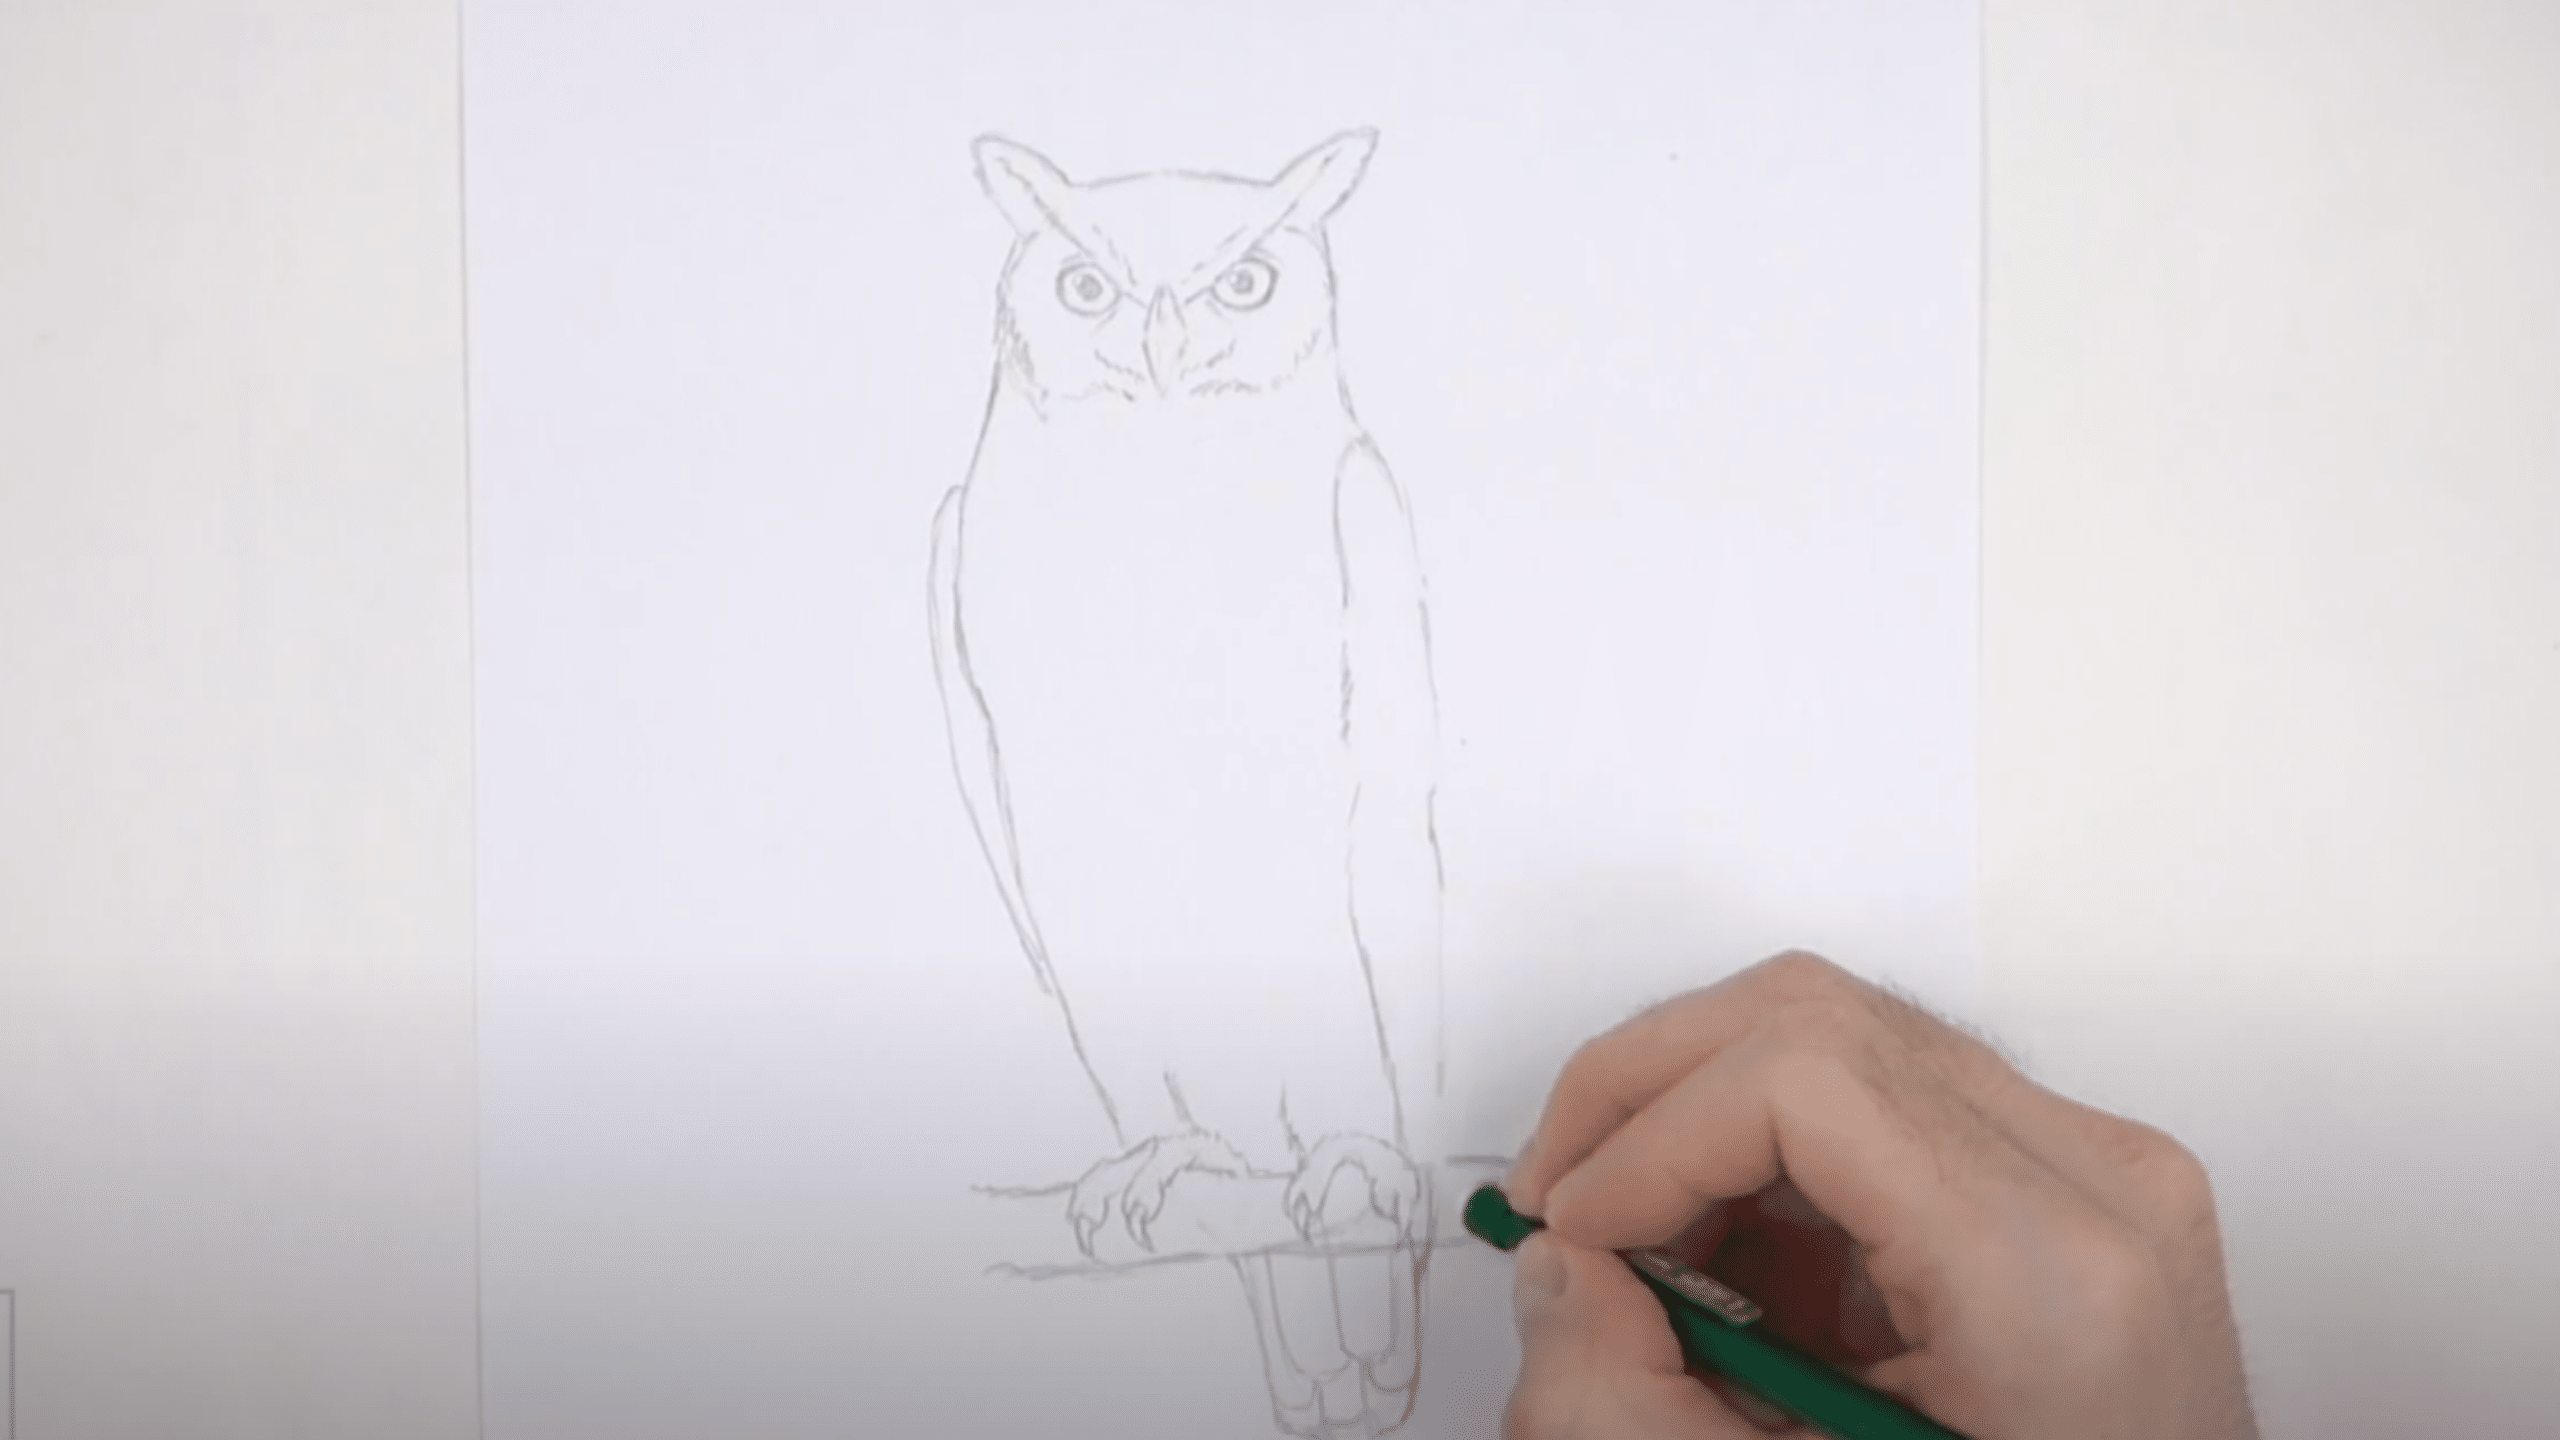
With all your guides in place, go over the entire drawing, darkening and refining the outer edges.
Make the head slightly flatter than your original oval and the body smooth and symmetrical. Sketch the folded wings on either side using long, curved lines.
Draw a few feather strokes near the base of the feet and round out the tail with short, curved lines for individual feathers. You can also sketch a simple branch beneath the owl if you’d like to add context.
7. Add Feather Patterns and Gentle Shading
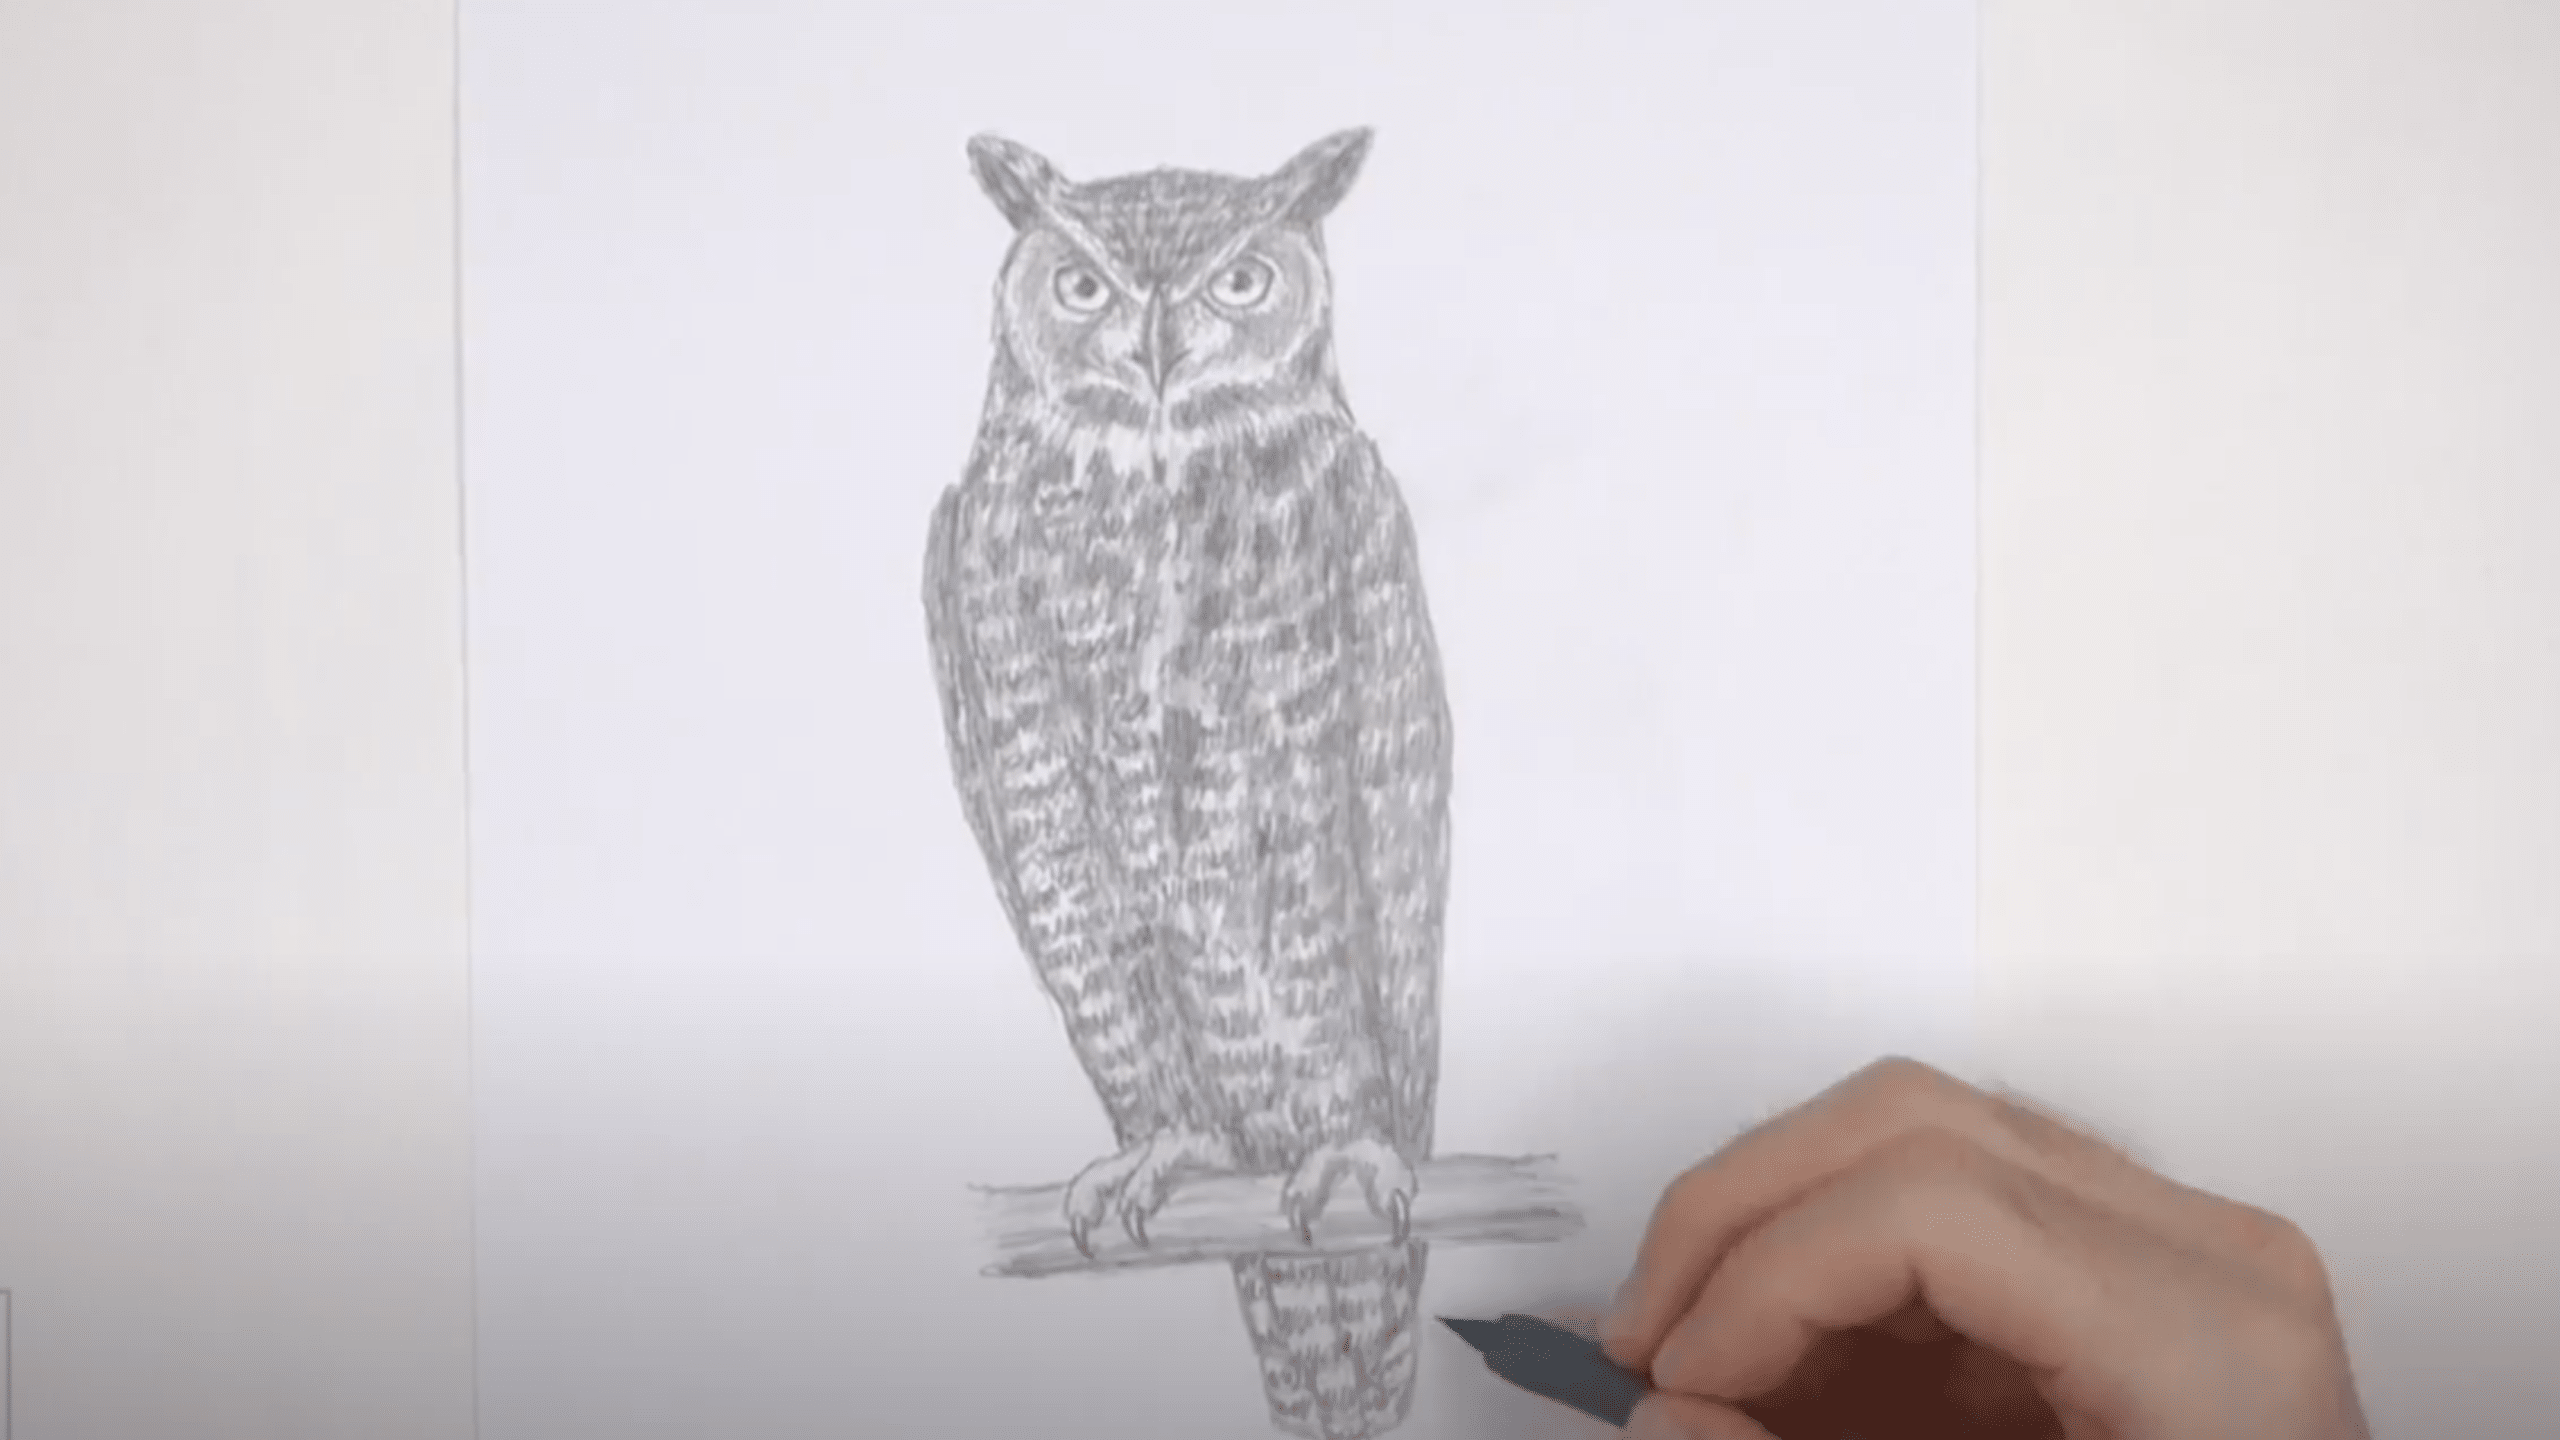
Now comes the most expressive part, bringing your owl to life with texture and shading. Begin with short, curved strokes that follow the natural direction of the feathers.
This technique adds depth and a realistic feel to your drawing. Focus on layering light and dark areas to give your owl a soft, feathery look. Leave the face and neck slightly lighter to highlight their contrast.
The following are some key shading tips to give your owl drawing a clean look:
- Use light pressure for soft shading, darker for depth
- Add spots and bars across the wings and chest
- Follow feather direction for natural texture
- Blend gently with a cotton swab or tool
- Shade the branch to ground your drawing
Creative Owl Drawing Ideas to Inspire Your Art
Simple Owl Drawing
Sketch of a Barn Owl
Cute Owl Drawing
Floral Owl Artwork
Owl Artwork
Realistic Owl Art
Owl Drawing Illustration
Wrapping Up
You now have all the skills to draw an owl that looks great! By breaking down the process into basic shapes and adding details step by step, you’ve turned what seemed difficult into something doable.
Remember that practice makes each drawing better than the last.
Drawing owls teaches patience and observation, skills that help with all kinds of art. The round eyes, curved beak, and feathered body become easier to create with each attempt.
You’ll see how much you’ve improved in a few months. The joy of creating something with your own hands is worth every minute spent learning.
What other animals would you like to learn how to draw? Share your owl drawings in the comments below! We’d love to see how your how to draw an owl drawings are going and offer helpful feedback on your work.