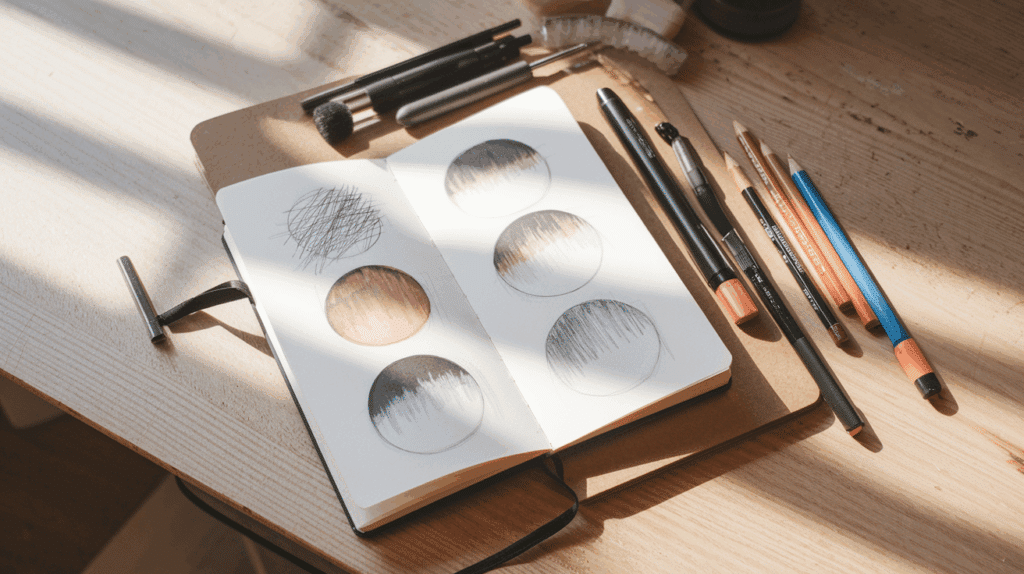
Shading brings flat drawings to life. It adds depth, form, and texture to artwork, turning simple lines into rich, three-dimensional creations.
Understanding how to shade properly can make the difference between basic sketches and striking artwork for beginners and experienced artists alike.
This guide walks readers through practical shading methods step by step. It covers essential techniques from basic hatching to smooth blending that help create stunning effects with just a pencil and paper.
Each method builds upon the last, giving artists the tools to create shadows, highlights, and everything in between.
By the end of this guide, readers will know how to use light and shadow to make their drawings pop with realism and dimension.
The Role of Shading in Drawing: Its Uses and Significance in Art
Shading is the method artists use to create the look of light and shadow in a drawing. It involves adding darker tones to parts of an artwork to show areas that receive less light.
This simple act helps turn flat, two-dimensional shapes into objects that seem to have form and volume.
When an artist applies shading to their work, they’re essentially telling viewers where the light source is coming from and how that light interacts with the subject.
The darker areas suggest shadows, while lighter areas indicate where light hits directly. Shading techniques serve several key purposes in artwork:
-
Creating Shadows: Shading adds realistic shadows to objects and spaces.
-
Adding Texture: Shading suggests surface qualities like rough or smooth textures.
-
Building Depth: Light and dark shading create depth and distance.
-
Showing Form: Shading reveals the three-dimensional shape of objects.
-
Setting Mood: Shading style and intensity set the emotional tone of the artwork.
Drawings without shading often appear flat and cartoon-like.
Add shading, and suddenly, these same drawings feel solid and real, the apple looks round enough to pick up, the face gains character, and the landscape stretches into the distance.
The Difference Between Various Popular Shading Techniques
| Shading Technique | Description | Appearance | Best For | Tools Used |
|---|---|---|---|---|
| Hatching | Drawing closely spaced parallel lines | Lines go in one direction | Basic texture, quick shadows | Pencil, pen, ink |
| Cross-Hatching | Layers of hatching that cross over each other | Crisscrossed lines create depth | Strong shadows, form definition | Pencil, pen, ink |
| Stippling | Using tiny dots to build up shade | Grainy or soft look | Precise shading, pointillism | Fine pen or marker |
| Scumbling (Scribbling) | Loose, controlled scribbles | Textured and chaotic | Dynamic textures and fur | Pencil, charcoal, ballpoint pen |
| Blending | Smoothing out strokes to create a gradient | Smooth, soft transitions | Realistic skin, gradual shadows | Blending stump, tissue, finger |
| Contour Shading | Shading along the object’s curves | Follows the form’s shape | 3D volume and realism | Pencil or pen |
Blending Shading Technique
Blending involves smoothly transitioning between light and dark areas using tools like blending stumps, fingers, or tissues.
This technique creates soft, seamless shadows and a realistic look by gradually merging tones without harsh lines.
How to Do It

1. Start with a dark pencil and establish mid-tones
Start by using a dark pencil, such as a 6B, to outline the darkest areas of your drawing.
Apply medium pressure to your pencil to gently build up mid-tones, ensuring a smooth transition from light to dark. The goal is to create a sense of depth and shape.
-
Use medium pressure for mid-tones.
-
Darken the opposite side of the light source.
-
Focus on achieving a smooth tonal transition.
2. Blend using your fingers or smudging tools
For a smooth transition between tones, use your fingers or a smudging tool to blend the shaded areas.
Start from the darker side and work your way up toward the mid-tones, being careful not to reach the light source area.
This will ensure that the light part of the drawing remains clean and vibrant while the shadows are seamlessly blended.
3. Refine edges and soften smudges
If the edges of your blended areas are too harsh, gently use an eraser to lighten the transition areas.
Be cautious not to smudge the lighter areas, and keep the edges smooth for a more realistic finish. This step helps in achieving a more polished and professional look.
Blending – Shading Practice Ideas to Try
Now that you understand the steps for blending, it’s time to test your skills. Try these simple practice ideas to achieve smoother transitions and realistic shading.
Blended drawing of a whale
Drawing of a coffee mug
Sketch of a Swan
Hatching Shading Technique
Hatching is the use of parallel lines drawn in one direction to build up shading. The closer the lines are, the darker the area becomes. This technique is great for creating texture and a sense of depth with a linear approach.
How to Do It

1. Start with light strokes for the lightest areas
Begin by using a very light touch on your pencil to create soft, gentle strokes. Focus on the areas where light naturally hits your drawing.
The goal is to apply minimal pressure, almost just grazing the paper, to achieve a faint, light shade.
This step sets the foundation for the rest of your shading process, ensuring that the lightest parts are well-defined and soft.
-
Use a gentle touch with your pencil.
-
Apply minimal pressure to create light strokes.
-
Focus on areas where light naturally hits.
-
Set the foundation for shading by leaving the lightest areas soft.
2. Gradually increase pressure for darker values
As you move towards the areas that are shaded more deeply, begin applying more pressure to your pencil. This will darken the lines and create contrast between the light and dark regions.
Work slowly and steadily, ensuring that the lines become darker without pressing too hard all at once. Building layers is key for smooth shading.
3. Overlap your lines to fill in spaces
To fill in any gaps and enhance the depth of your shading, overlap your lines. Keep the strokes close together, but feel free to layer them to achieve the desired intensity.
This will add richness to the shaded areas, helping them blend naturally and giving the drawing a more cohesive look.
4. Finish by refining the lightest areas
As you approach the final stages, reduce the pressure once again to lighten the strokes on the areas where the light is most prominent.
This gradual shift from dark to light, by layering your strokes, will help you create smooth transitions and enhance the overall realism of your drawing.
Shading Practice Ideas to Try for Hatching
Once you’ve got the hang of drawing clean, parallel lines, challenge yourself with these practice designs. These ideas will help you control line spacing and direction.
Monstera illustration Line Hatching
Hatching Wall Art
Hatching Sketch of a Boy
Cross-Hatching Shading Technique
Cross-hatching involves drawing intersecting sets of parallel lines.
By layering lines in different directions, artists can build up darker areas and more complex shading, making this technique effective for creating detailed shadows and texture.
How to Do It

1. Start with single hatching for base shading
Begin by using light, close-set strokes in a single direction to establish the base shading. Hold your pencil with moderate pressure to ensure your lines are consistent and controlled.
As you move across the drawing, gradually ease up on the pressure as you approach the lighter areas.
This will create a smooth transition from light to dark, setting the foundation for the subsequent darker tones to be added.
- Use light, close-set strokes in one direction.
- Apply moderate pressure for consistent lines.
- Gradually reduce pressure toward the lightest areas.
- Establish a smooth transition from light to dark.
2. Increase pressure to deepen the shadows
Once your initial layer of hatching is complete, focus on areas that need to be darker. Apply more pressure with your pencil to intensify the darkness in these regions.
Continue to keep the lines close together, but vary the pressure slightly to build up the desired shading in a controlled manner.
3. Begin cross-hatching with a different direction
To add depth, start cross-hatching by drawing another set of lines in a different direction.
For example, if your initial lines are horizontal, begin adding vertical lines. Keep your strokes light and controlled as you cross the previous lines.
This method creates a grid-like effect that enhances the tonal contrast.
4. Vary pressure for a dynamic effect
As you cross-hatch, adjust your pressure to achieve different shades. In areas that need to be darker, apply more pressure, while in lighter areas, use less.
The key to cross-hatching is maintaining consistent line spacing and direction, but changing the pressure to create a range of tones and depth.
5. Gradually blend into the lightest areas
Finally, as you approach the lightest parts of your drawing, gradually lighten your strokes and reduce pressure.
The lines should become almost imperceptible, creating a smooth transition from dark to light. Be patient and deliberate, as this step will ensure that the shading appears seamless and the contrast looks natural.
Cross-Hatching Shading Practice Ideas to Try
With the basics in place, it’s time to build up depth using layers of lines. The following exercises will help you sharpen your precision and shading contrast.
Cross-Hatching Cherry Sketch
Rabbit in a Hat Cross-Hatching Drawing
Spiderman Cross-Hatching Sketch
Scribbling Shading Technique
Scribbling uses random, irregular strokes to create texture and shading. It’s a more expressive and loose technique, often used for rough textures or creating a sense of chaos and movement in the artwork.
How to Do It

1. Start with rough, multi-directional scribbles
Begin by making small, rough scribbles in various directions to build texture. Focus on creating free, varied marks, without worrying about precision. The idea is to avoid any single dominant direction, which allows for a natural, rough texture.
As you approach the light areas of your drawing, gradually ease up on the pressure to let the marks become more spaced and lighter, providing a smooth transition to the highlight.
- Make small, rough scribbles in all directions.
- Avoid any dominant direction for a varied texture.
- Ease up on pressure as you approach the light areas.
- Allow marks to become more spaced out as you reach the highlight.
2. Lighten the marks as you approach the highlight
As you move toward the highlight of your object, gradually lighten the pressure on your pen. Begin to leave more gaps between your strokes, creating a less dense and disconnected effect.
In the lightest areas, aim for very few marks, almost like stippling, to keep the texture consistent while gradually fading the value.
3. Build up layers for a stronger contrast
Once the basic shading is in place, continue building up the darker areas around the edges. This step enhances the contrast and ensures that the light areas stand out more.
Add more scribbles where necessary, especially in areas like the shadow or the darker sides of your drawing, to achieve a richer range of values and a more defined look.
Scribbling – Shading Practice Ideas to Try
Now that you’ve learned the freeform nature of scribble shading, try these fun practice sketches. They’ll help you create texture and loosen up your hand movements.
Bird Drawing
Cat Drawing with Scribble Shading
Mr. Bean Scribble Sketch
Stippling Shading Technique
Stippling involves using small dots or points to build up shading. The density and distribution of the dots control how dark or light the area appears. This technique is perfect for creating subtle gradients and intricate details.
How to Do It

1. Start with light dots for the lightest areas
Begin by placing light dots in the lightest areas of your drawing. Use a fine-point pen to lay down the dots, keeping them spaced apart carefully.
The goal is to build up value gradually, so start with less pressure and fewer dots. This will help you establish the lightest areas and provide a smooth base for further shading.
- Place light dots in the lightest areas.
- Use a fine-point pen for precision.
- Keep the dots spaced apart.
- Start with less pressure and fewer dots.
- Establish the lightest areas for a smooth base.
2. Gradually add more dots for mid-tones
As you move towards the mid-tones, start adding more dots, gradually increasing their density. Place the dots closer together to create a slightly darker value.
This gradual buildup will give your shading a smooth transition from light to dark, allowing you to control the overall shading effect.
3. Focus on the darkest areas by clustering dots
To achieve the darkest values, focus on adding more dots in the shadowed areas of your drawing. Cluster the dots closely together in these regions, but be careful not to make them too large or blotchy. The goal is to create a smooth, consistent dark shade by layering small dots without overloading any particular area.
4. Avoid clumping dots and maintain consistency
As you work through your drawing, avoid creating clumps or patches of dots that appear uneven.
Keep the dots well-spaced and consistent throughout the piece. This will help prevent uneven shading and give your artwork a cleaner, more polished look.
5. Adjust dot size to fine-tune shading
Once you’ve established the base layer of dots, use smaller, finer dots to fill in any gaps and refine the shading. Lightly tap your pen to make smaller dots, which will help even out the shading and ensure smoother transitions between light and dark areas. This technique adds depth and helps to achieve a more consistent look.
6. Gradually refine and balance the values
After completing the shading, step back and evaluate your drawing. Use a light touch to add additional dots as needed, particularly in areas that need more contrast or smoother transitions.
This final adjustment will help balance the light and dark areas, ensuring your stippling creates a realistic and well-defined texture.
These steps will guide you through the stippling technique, allowing you to create detailed, textured shading with precision and care.
Stippling Shading Practice Ideas to Try
Stippling takes patience and control, these practice ideas will train your eye and hand coordination. Look how varying dot density affects shading and form.
Stippling Flower Illustration
Face Illustration with Stippling Art
Stippling Wall Art Design
Cast Shadow Shading Technique
Cast shadows are the shadows that objects cast onto other surfaces due to a light source. This technique involves drawing the dark areas created by an object’s shape and position, adding depth and realism to the artwork.
How to Do It

1. Understand the light source and its position
Begin by establishing the position of your light source. Visualize it as a vertical line, with the direction of light emanating from the base of this line.
The angle of the light comes from the top of the light source, which helps determine how the light will interact with the shape you’re shading.
- Establish the position of your light source.
- Visualize the light source as a vertical line.
- The direction of light emanates from the base of the line.
- The angle of the light comes from the top of the light source.
- This helps determine how the light will interact with the shape.
2. Draw the light direction and light angle lines
Next, draw the light direction lines from the base of the shape, ensuring these lines are parallel to each other. Then, draw the light angle lines from the top of the shape.
These lines should also be parallel and will cross the light direction lines, helping to define the shadow’s edge.
3. Locate the intersection points of the lines
The intersection of the light direction and light angle lines marks the points where the shadow will form. These points are critical in establishing the exact boundaries of the cast shadow.
By joining these intersection points to the edges of your shape, you can create a clear outline of the shadow.
4. Adjust the light source for different shadow effects
Experiment with changing the position of your light source. By shifting the light direction and angle, you can create different shadow effects.
Remember, the principle remains the same: the light direction and light angle lines should always be parallel and drawn from the corresponding parts of the shape.
5. Practice with different shapes to refine your technique
Start with simple shapes like cubes and then progress to more complex ones like cylinders and cones.
The basic principles of light direction, light angle, and intersection points apply to all shapes, so practicing with various forms will help you become more comfortable with creating accurate and dynamic cast shadows.
Shading Practice Ideas to Try for Cast Shadow
You’ve learned how cast shadows ground objects in space. Use these drawing prompts to practice shadow placement and achieve a realistic light source effect.
Still Life with Cast Shadows
Cast Shadow Bulb Drawing
Realistic Cast Shadow Art
The Bottom Line
Shading takes your drawings from flat outlines to rich, lifelike creations. Through this guide, we’ve walked through several key methods that help create depth, form, and mood in your artwork.
Remember that mastering these skills takes time. Start with simple objects and basic techniques before moving to complex subjects. Each pencil stroke builds your skill and eye for detail.
The true power of shading comes when you begin combining techniques to develop your personal style. Your unique approach to light and shadow will make your art stand out.
What matters most is regular practice. Even fifteen minutes daily will improve your shading abilities faster than occasional long sessions.
Have you tried any of these shading techniques? Which one works best for your style? Share your experiences in the comments below or post your shaded artwork.
We’d love to see how you apply these methods in your own creative work!

