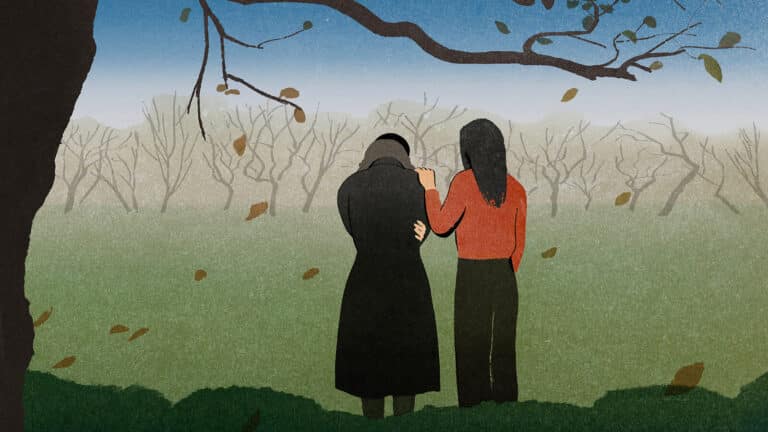
Artists know the struggle of creating flat, lifeless drawings that lack depth and dimension. Without proper texture drawing techniques, artwork often falls short of capturing the viewer’s attention.
Texture drawing adds rich layers of visual interest that change simple sketches into appealing pieces. A skilled artist can use various methods to show how surfaces feel through their work.
This blog will show practical texture-drawing methods that help artists take their work to new heights.
From basic cross-hatching to advanced gradient techniques, readers will learn how to apply these skills to their own projects. With these tips, anyone can enhance their artwork with textures that feel real enough to touch.
What is Texture Drawing?
Texture drawing is an artistic technique that focuses on creating visual texture through various mark-making methods.
It adds depth, dimension, and tactile qualities to artwork by representing surfaces that appear to have physical texture.
Key elements of texture drawing include:
- Using different stroke patterns (cross-hatching, stippling, etc.) to simulate various surfaces
- Creating contrast between rough and smooth areas
- Employing various drawing tools (pencils, charcoal, pens) for different textural effects
Artists use texture drawing to evoke sensory responses in viewers, making flat surfaces appear three-dimensional. This technique is essential in realistic drawing but also adds interest and complexity to more abstract or stylized work.
Must-Know Texture Drawing Tips for Absolute Beginners
Getting started with drawing texture can feel a bit overwhelming, but don’t worry everyone begins somewhere! These beginner-friendly tips will help you build a strong foundation and boost your confidence as you practice.
- Start Simple – Begin with basic textures like wood grain, bricks, or fabric folds to understand the fundamentals.
- Use Reference Images – Always study real-life objects or photos to capture accurate patterns and surfaces.
- Observe Light and Shadow – Realistic texture drawing depends heavily on how light interacts with the surface.
- Practice Different Strokes – Vary your pencil pressure, direction, and style to mimic different materials.
- Layer Gradually – Build texture slowly using light layers; avoid pressing too hard early on.
- Keep a Texture Sketchbook – Create a dedicated space to look into and refine your drawing skills.
- Be Patient – Mastery takes time focus on progress, not perfection.
Step-By-Step Tutorial – How To Draw Realistic Textures with Ease
Drawing realistic textures may seem challenging at first, but with the right techniques and a bit of practice, anyone can master it.
Whether you’re sketching wood, fabric, or stone, these tips will make drawing feel much more approachable and enjoyable.
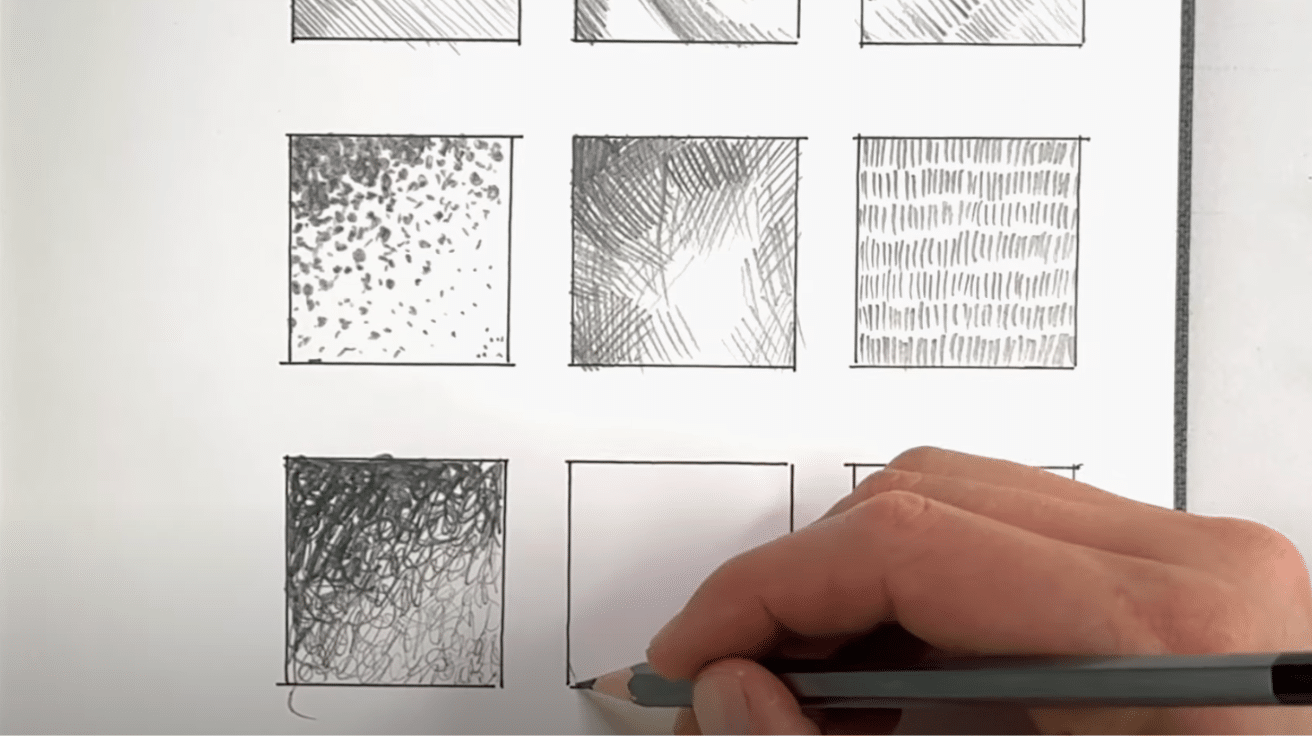
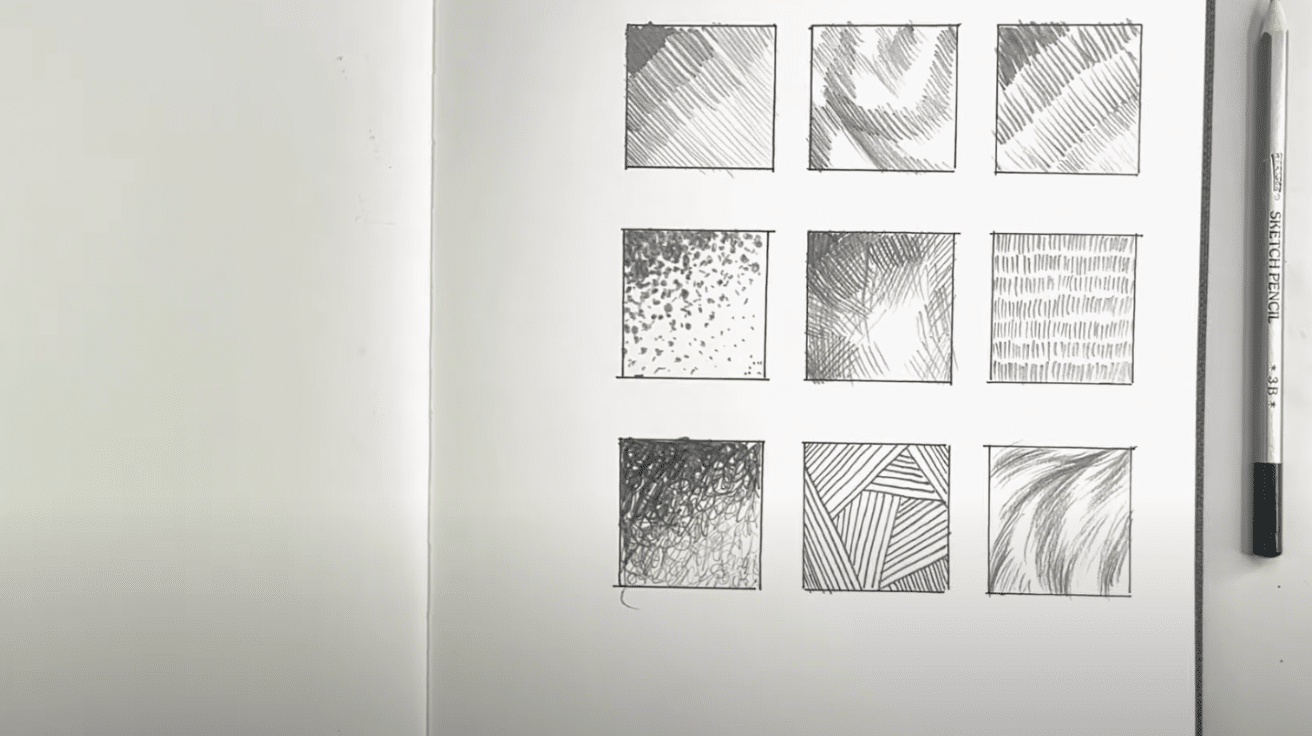
1. Set Up a Practice Grid
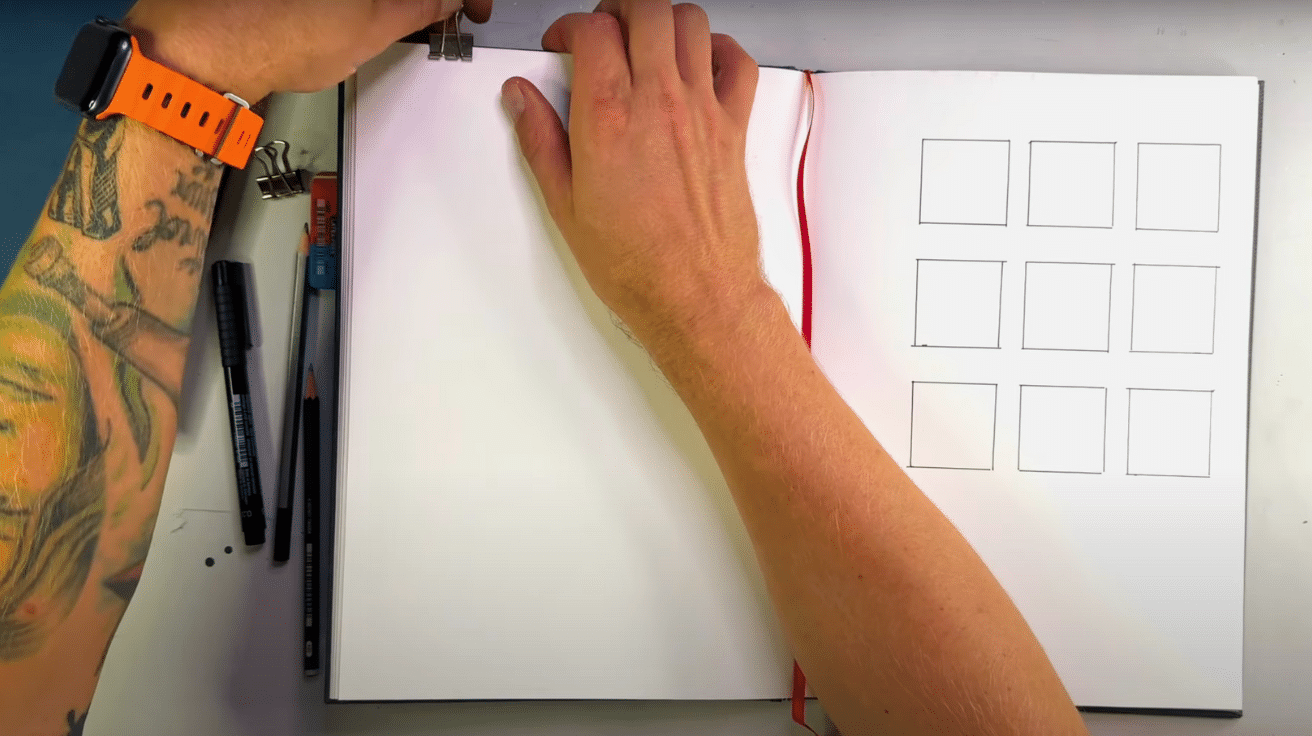
Begin your texture drawing experience by creating a simple grid on your paper. This grid acts as a stress-free zone where you can freely experiment.
Fill each square with different marks lines, dots, curves without aiming for perfection. The purpose is to build confidence and look into how various textures develop through repeated strokes in drawing.
2. Try Diagonal Lines and Loose Strokes
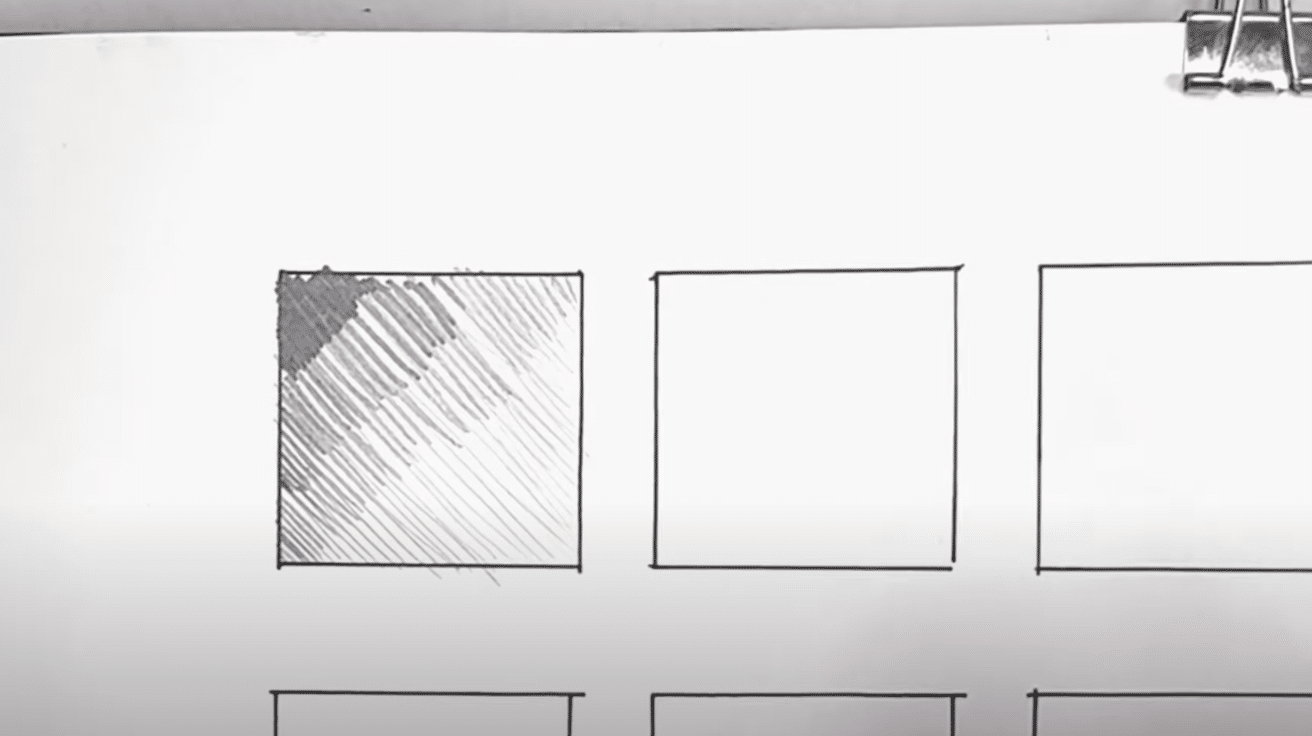
Begin your drawing by examining the expressive power of diagonal and crisscrossing lines. These strokes form the foundation for many organic patterns.
- Use a mix of short and long lines. Vary the pressure to look into light and dark contrast.
- Try tight spacing for density or loose gaps for breathability.
This part of drawing helps you mimic natural surfaces like tree bark or woven fabric. Let your hand flow freely and enjoy the calming rhythm of motion.
3. Create Light-to-Dark Gradients
As you draw, aim to transition each square from light to dark. This teaches your hand to control pressure and helps develop depth in texture drawing.
Play with density cluster your lines or dots more tightly to darken an area. Even random patterns will start to show a gorgeous gradient when you work with intention.
4. Accept Mistakes and Keep Going
One of the most freeing parts of drawing is letting go of expectations. You’re not chasing perfection you’re determine.
- Allow each square in your grid to be a small, unique experiment.
- Don’t erase too much; even “flaws” teach you something.
- Accept that textures aren’t always neat, and that’s the beauty.
As you sketch, enjoy the quiet, meditative act of repetition. Texture drawing encourages you to let go, trust your hand, and let creativity unfold naturally.
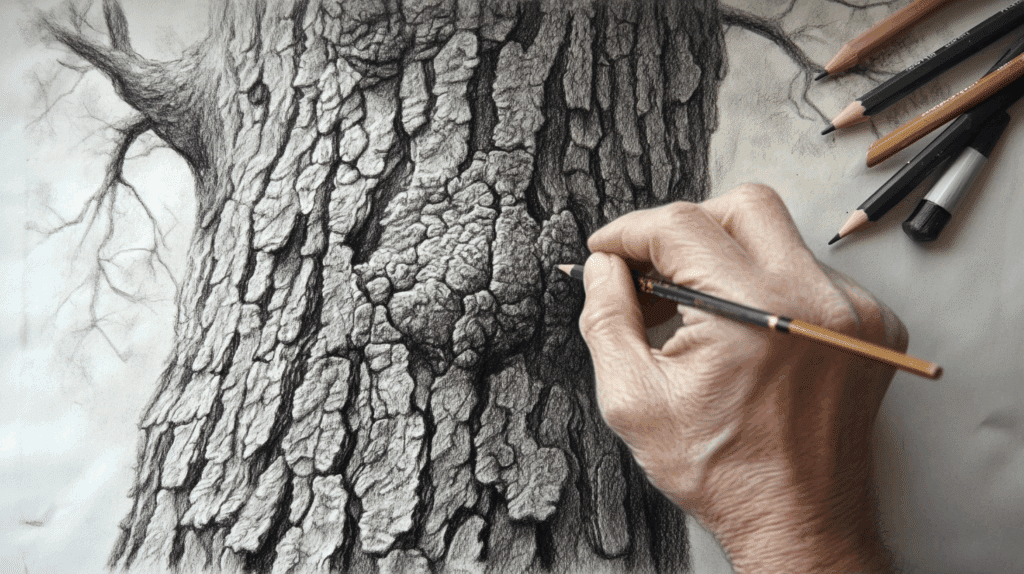
5. Begin Your First Real Texture – Wood
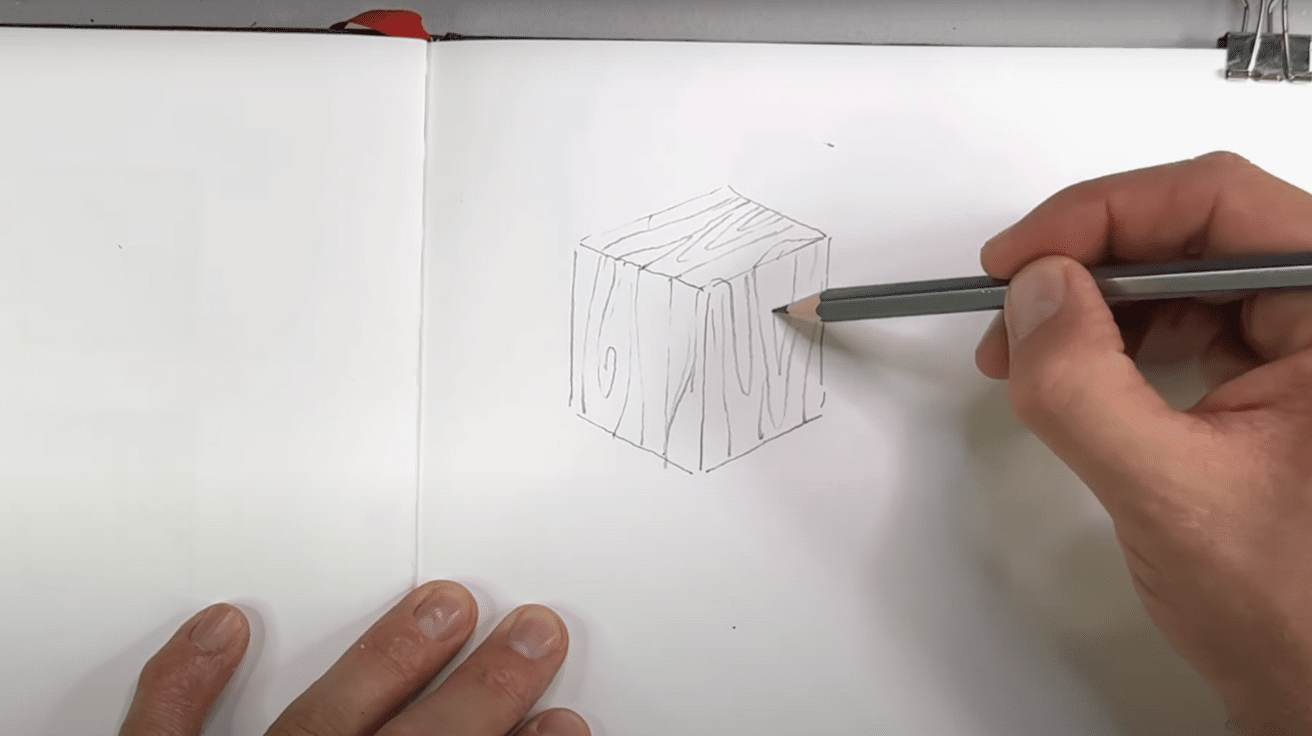
Now, apply your practice to something real. Start by drawing a cube, then use gentle, organic lines to mimic wood grain.
Nature is rarely uniform, so make sure your lines vary in direction and thickness. This part of drawing helps you study how natural patterns flow and change subtly across surfaces.
6. Add Dimension with Shadow and Shape
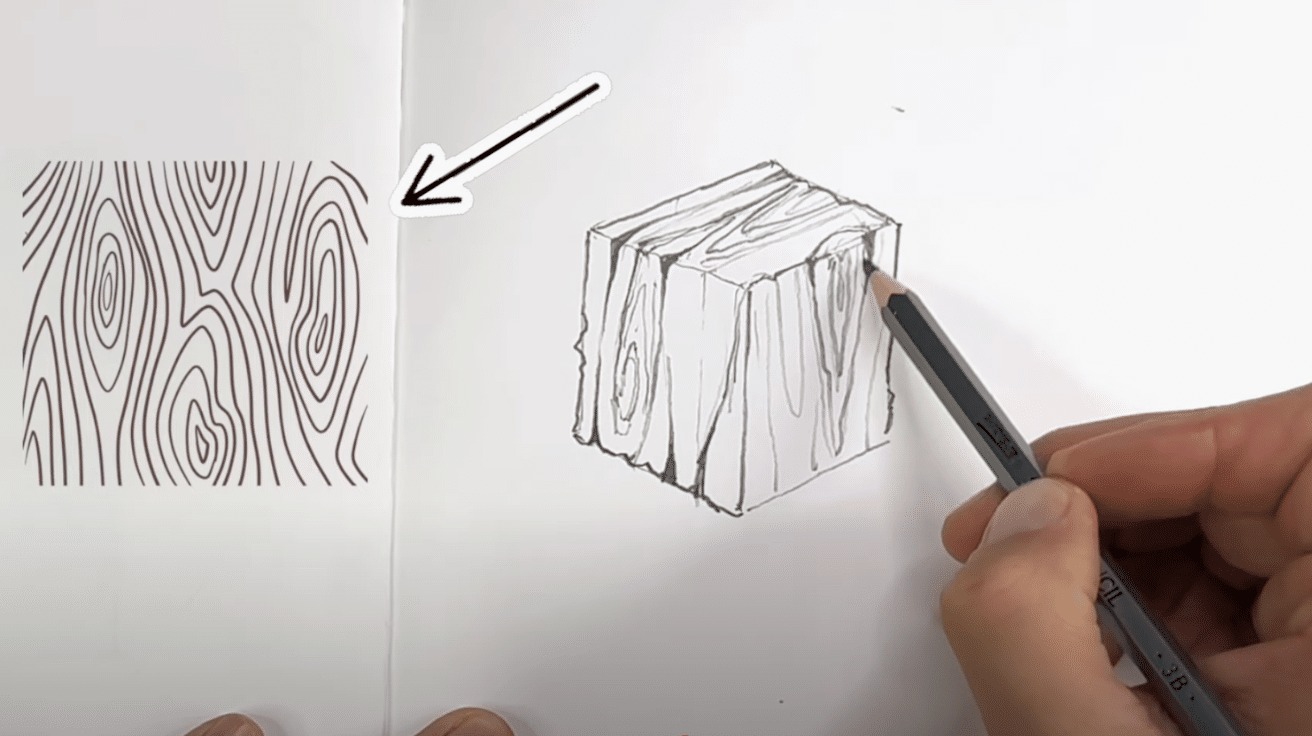
To raise your wooden cube and give it a lifelike feel, start by shading along the natural direction of the grain.
Darken certain edges to suggest depth, then add irregular shapes like small ovals or knots these mimic real wood’s organic imperfections.
Focus on layering your lines without using blending tools. This approach to drawing adds dimension and realism by relying solely on line work, proving that even simple tools can produce a richly textured visual effect.
7. Build a Brick Cube with Uneven Details
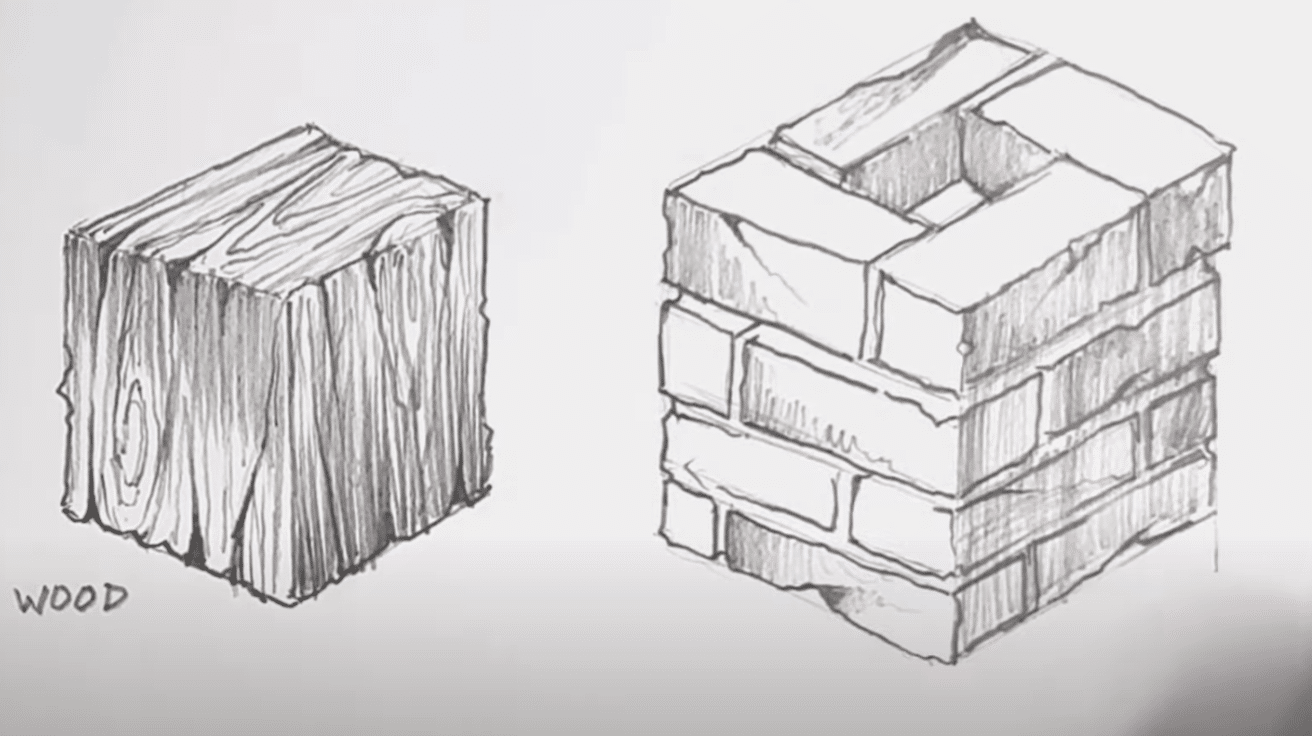
To practice structured texture drawing, sketch a cube and fill it with uneven brick-like shapes.
- Outline each “brick” clearly, but avoid perfect symmetry.
- Add little cracks, chips, or offsets for realism.
- Keep to linework only no shading just yet.
This exercise teaches how architectural textures come to life through irregularity. By using only lines, you’ll learn to rely on form and edge. With a few added dark accents, your bricks will start to feel aged and grounded in reality.
8. Simulate Grass with Pressure Control
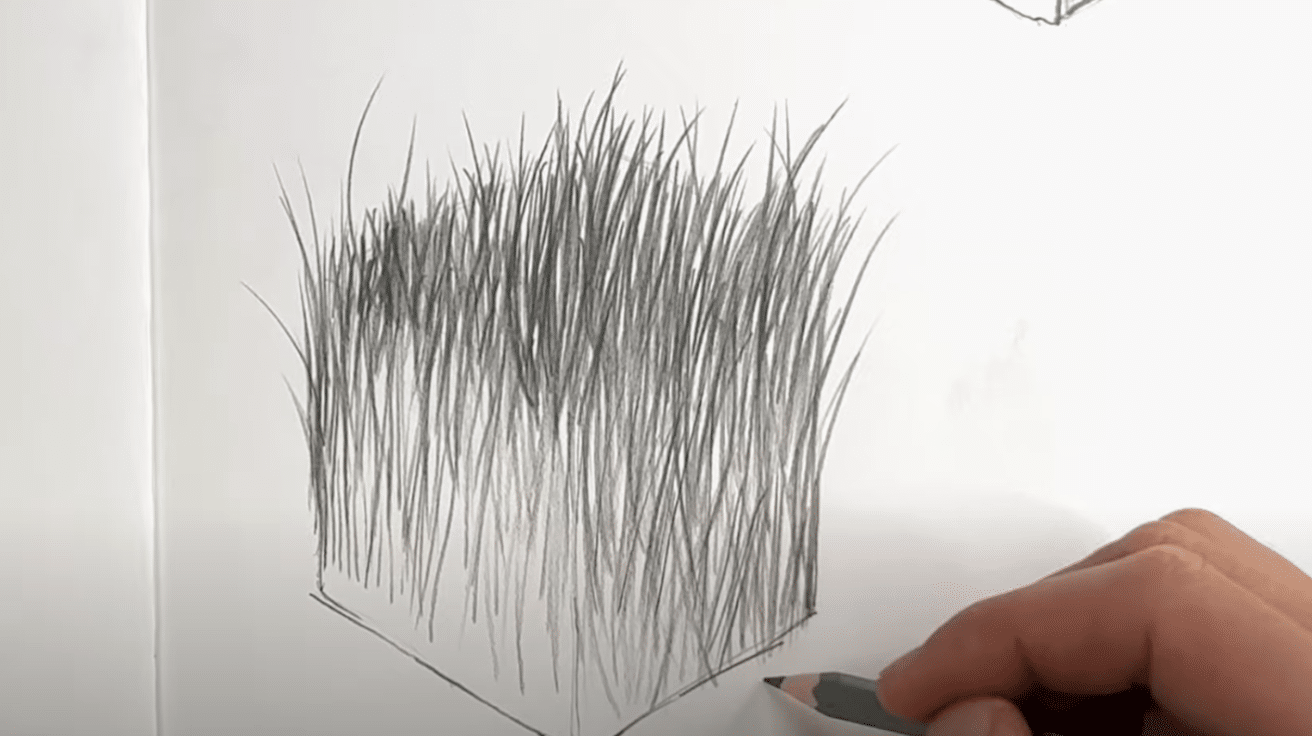
When drawing grass, your hand pressure becomes your most valuable tool. Begin each line lightly, increase the pressure through the middle, and release it softly at the end.
This simple motion mimics the smooth taper of a blade of grass. Most strokes should move vertically with slight waviness.
As you fill the cube, this technique in drawing produces a natural, airy look. It’s a peaceful process, and the more you practice it, the more organic your results will appear.
9. Capture the Softness of Fur
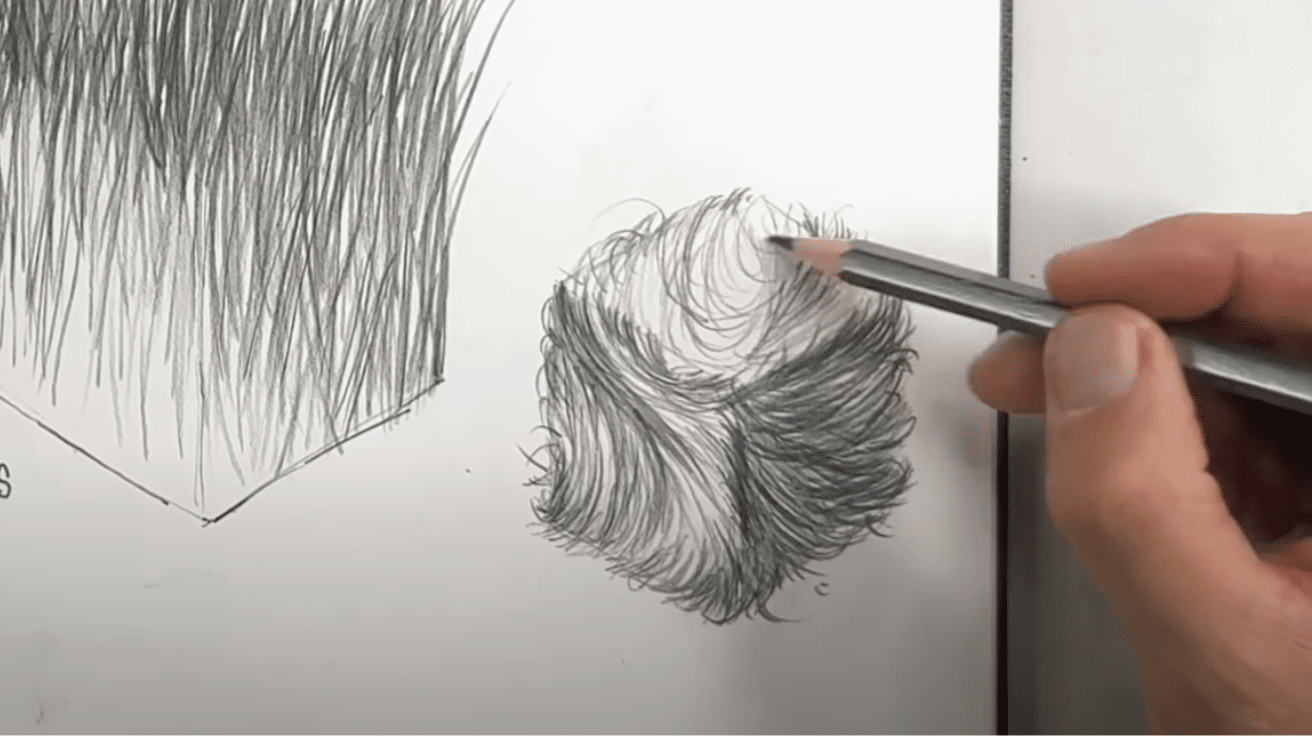
For your final exercise, try drawing fur. Begin with flowing guide lines to set direction. Layer fine and thick strokes, then deepen shadowed areas using more pressure.
Texture drawing of fur is all about motion and softness, so keep your hand loose. Don’t worry about perfection focus on creating a believable illusion.
Inspiring Texture Drawing Ideas to Try Today
Drawing textures helps you understand how things feel just by looking at them. These inspiring texture drawing ideas are fun to try and perfect for improving your skills.
Each one gives you a chance to look into different surfaces and shading techniques in a creative way.
Rough Tree Bark
Soft Wool Sweater
Fuzzy Teddy Bear
Smooth Glass Surface
Sand Texture
Key Takeaways
Texture drawing brings ordinary sketches to life. By adding visual depth and feel to artwork, artists can express more than just shapes on paper.
The techniques shared in this blog offer a starting point for those looking to improve their skills. Remember that practice makes perfect – no one masters texture drawing overnight. Try each method on different subjects to see what works best.
Some textures suit certain objects better than others. As artists gain experience, they’ll develop their own unique texture drawing style that sets their work apart.
The beauty of art lies in this personal touch. With time and effort, these skills become second nature, allowing for true creative expression that speaks to viewers on a deeper level.