Drawing ears often stops many artists in their tracks. The curves, folds, and shadows of ears can seem too hard to capture on paper. Most artists struggle with getting the structure right, leading to flat and unrealistic results.
But here’s the truth: drawing lifelike ears isn’t as tough as one might think. With the right steps and techniques, artists can create ears that look real and three-dimensional.
This blog will show readers exactly how to draw ears that stand out in portraits.
It’s time to learn the simple ways to make ear drawings come to life.
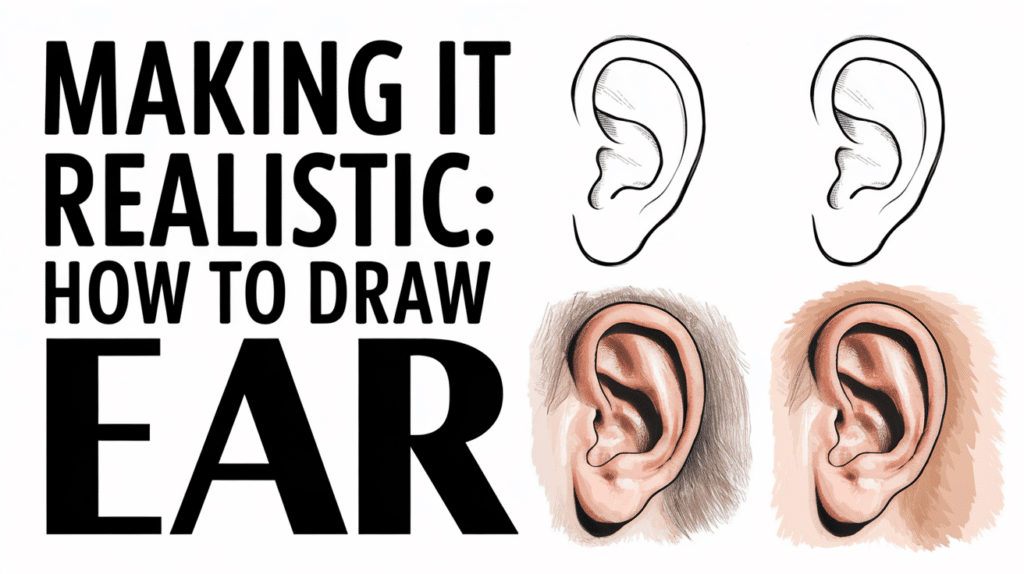
Steps to Perfectly Draw an Ear from The Front Side of Face
Drawing the human ear from a front view can be a challenging yet rewarding task, but with the right steps, anyone can master it.
Here, Mark KY simplifies the process, focusing on just a few key lines to capture the ear’s unique structure and depth.
Whether a beginner or someone looking to enhance their skills, this method provides a clear path to a realistic and accurate ear drawing. Now, let’s get started and bring the ear to life!
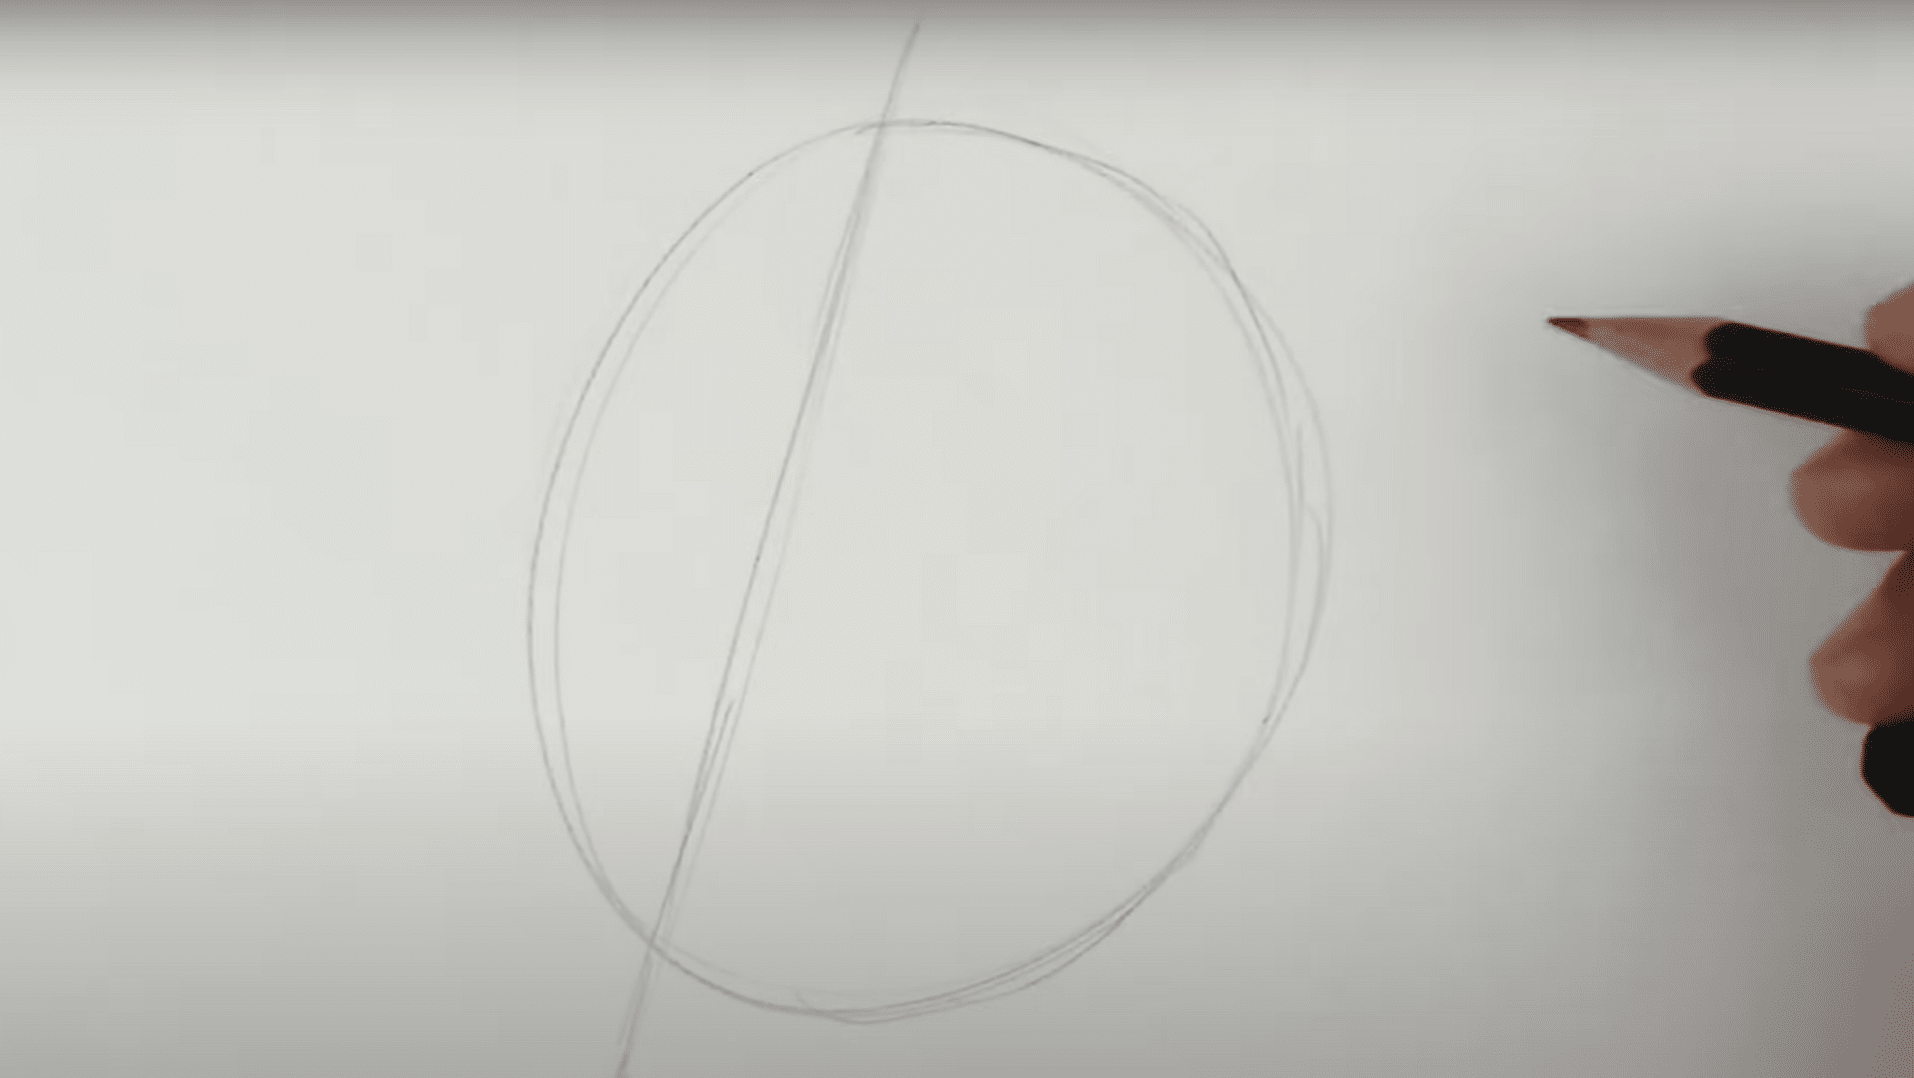
Step 1: Start with the Basic Contour
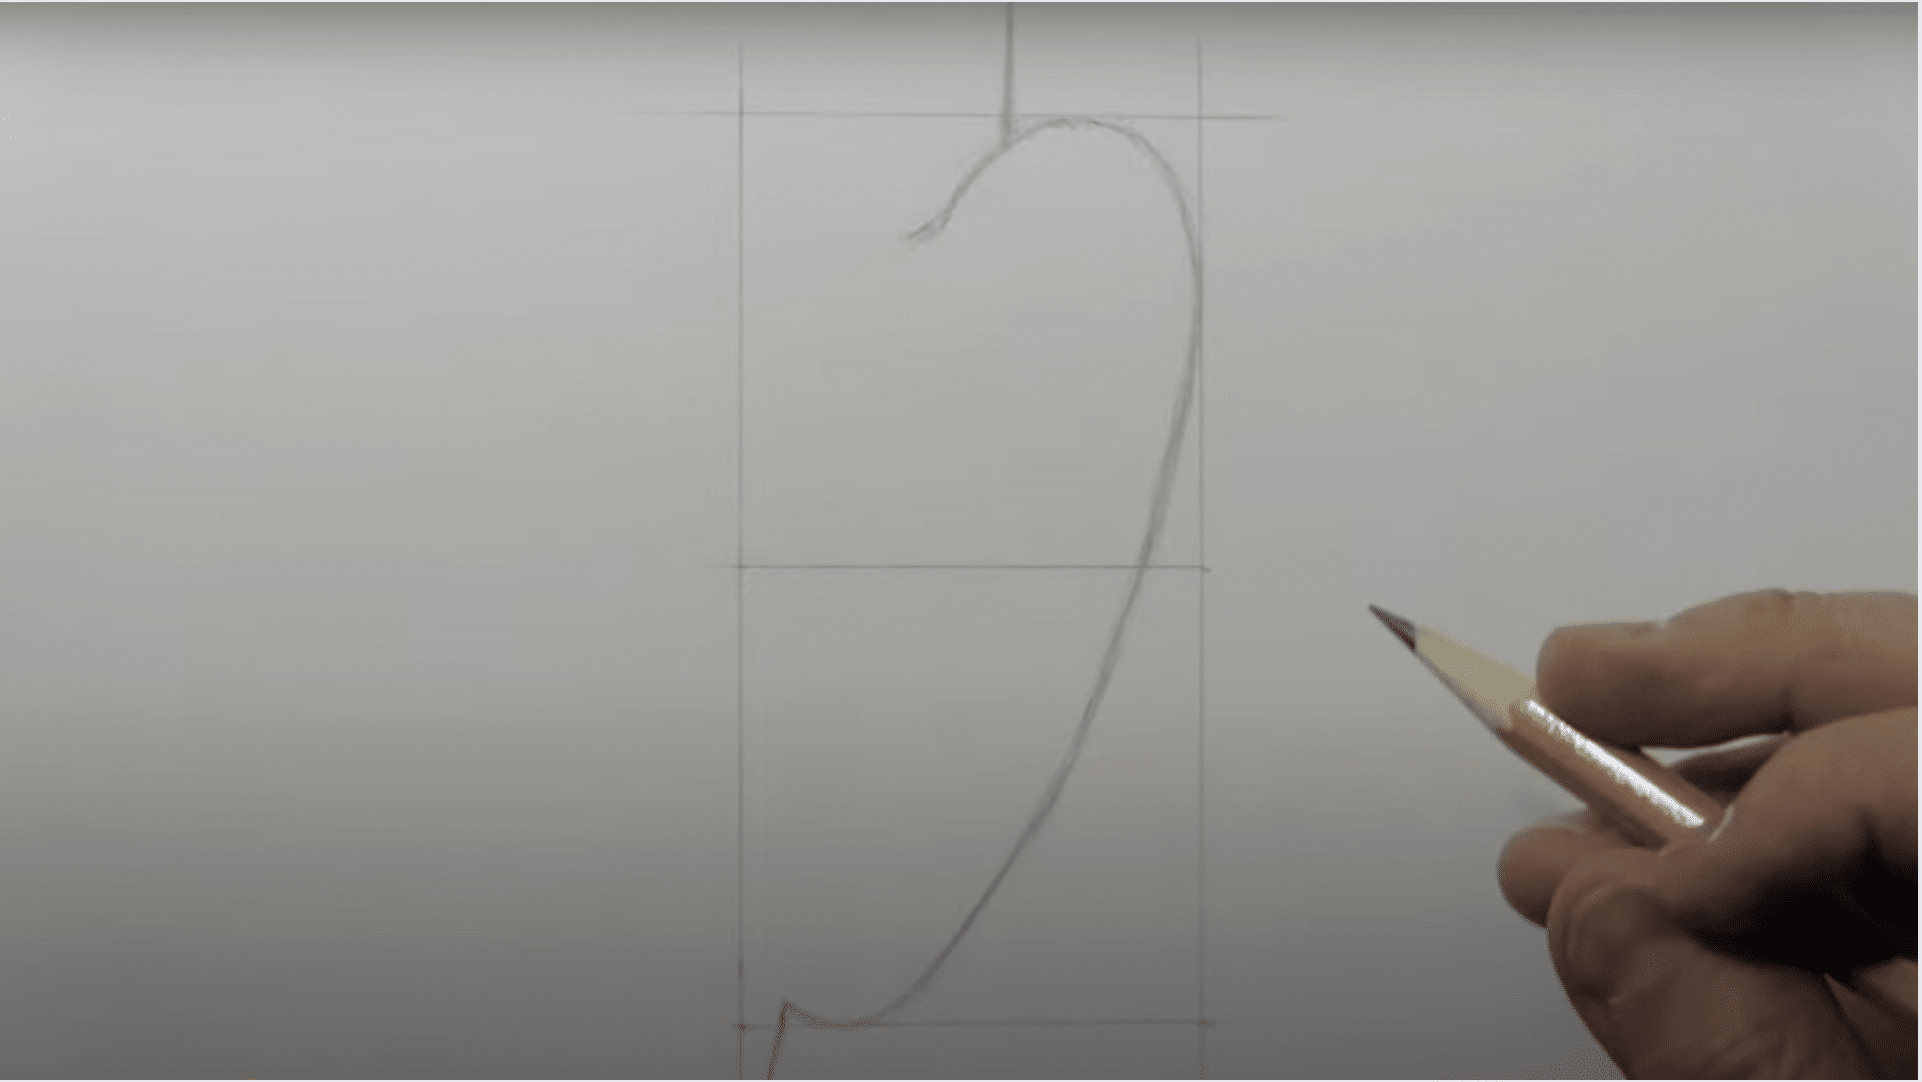
Begin by sketching the ear’s general shape with a soft curve that moves from the top to the bottom.
This will form the outer boundary, resembling a circle that gradually flattens and straightens towards the bottom, where it will slightly narrow into a point. Ensure your lines are smooth and follow the natural flow of the ear.
Step 2: Outline the Upper Rim
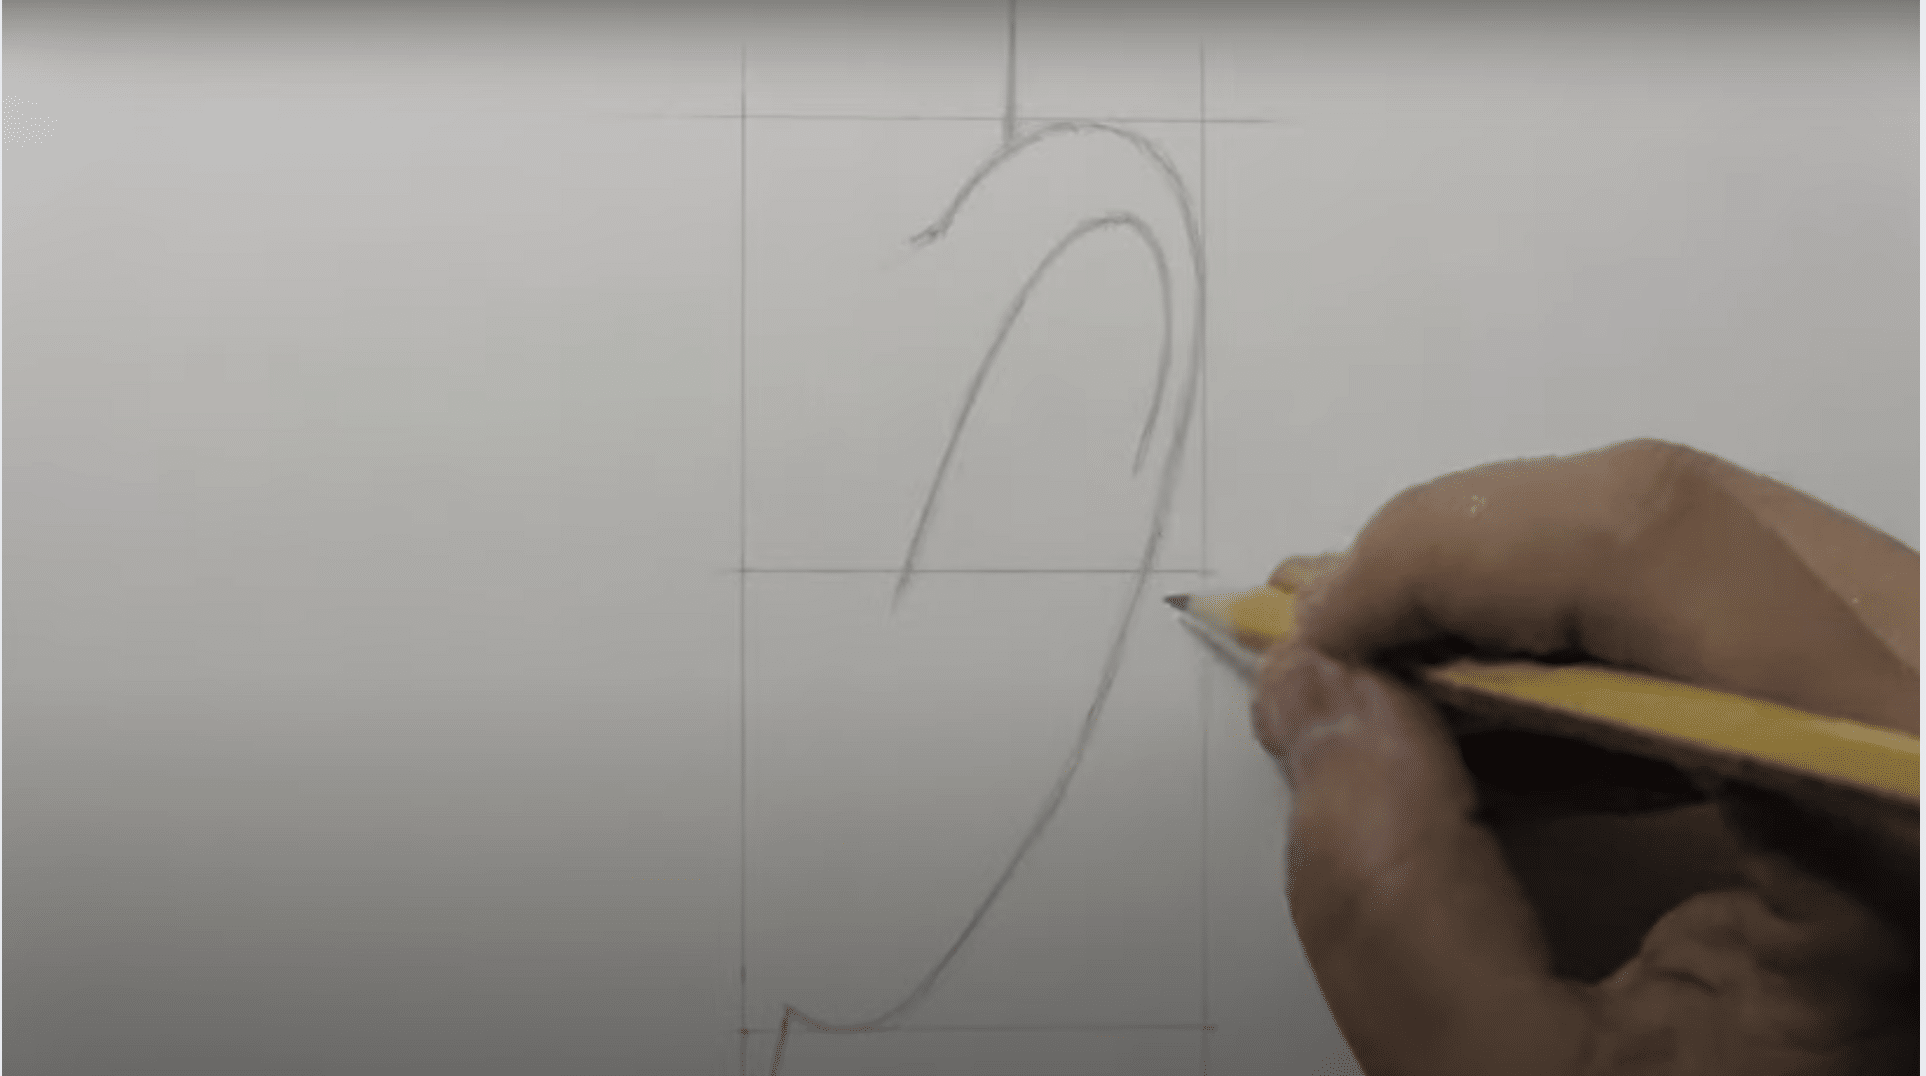
Draw a thin, curved line starting at the top and curving downward. This line represents the upper rim of the ear, which is typically more pronounced in this front view.
The curve should be gentle and end near the middle of the ear, but ensure it doesn’t touch the bottom of the ear.
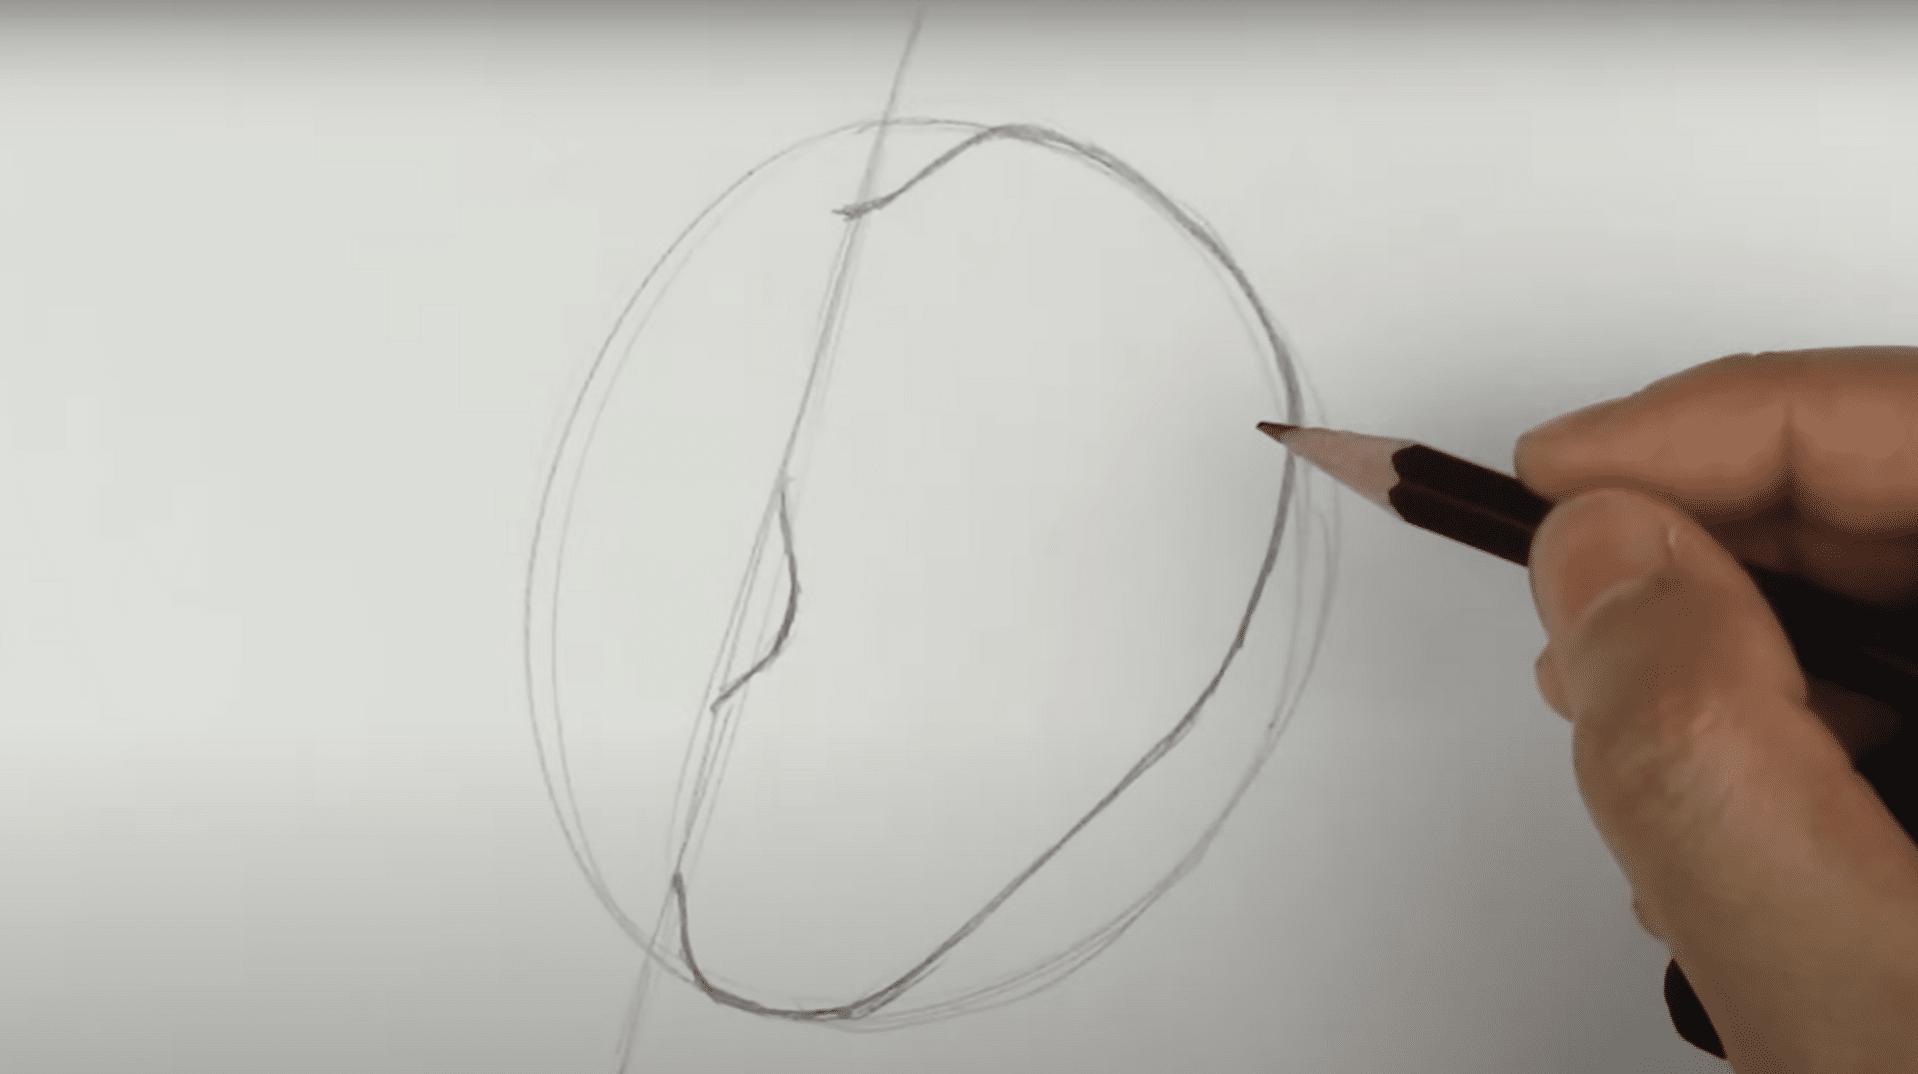
Step 3: Sketch the ‘Thumbs Down Mitten’ Shape
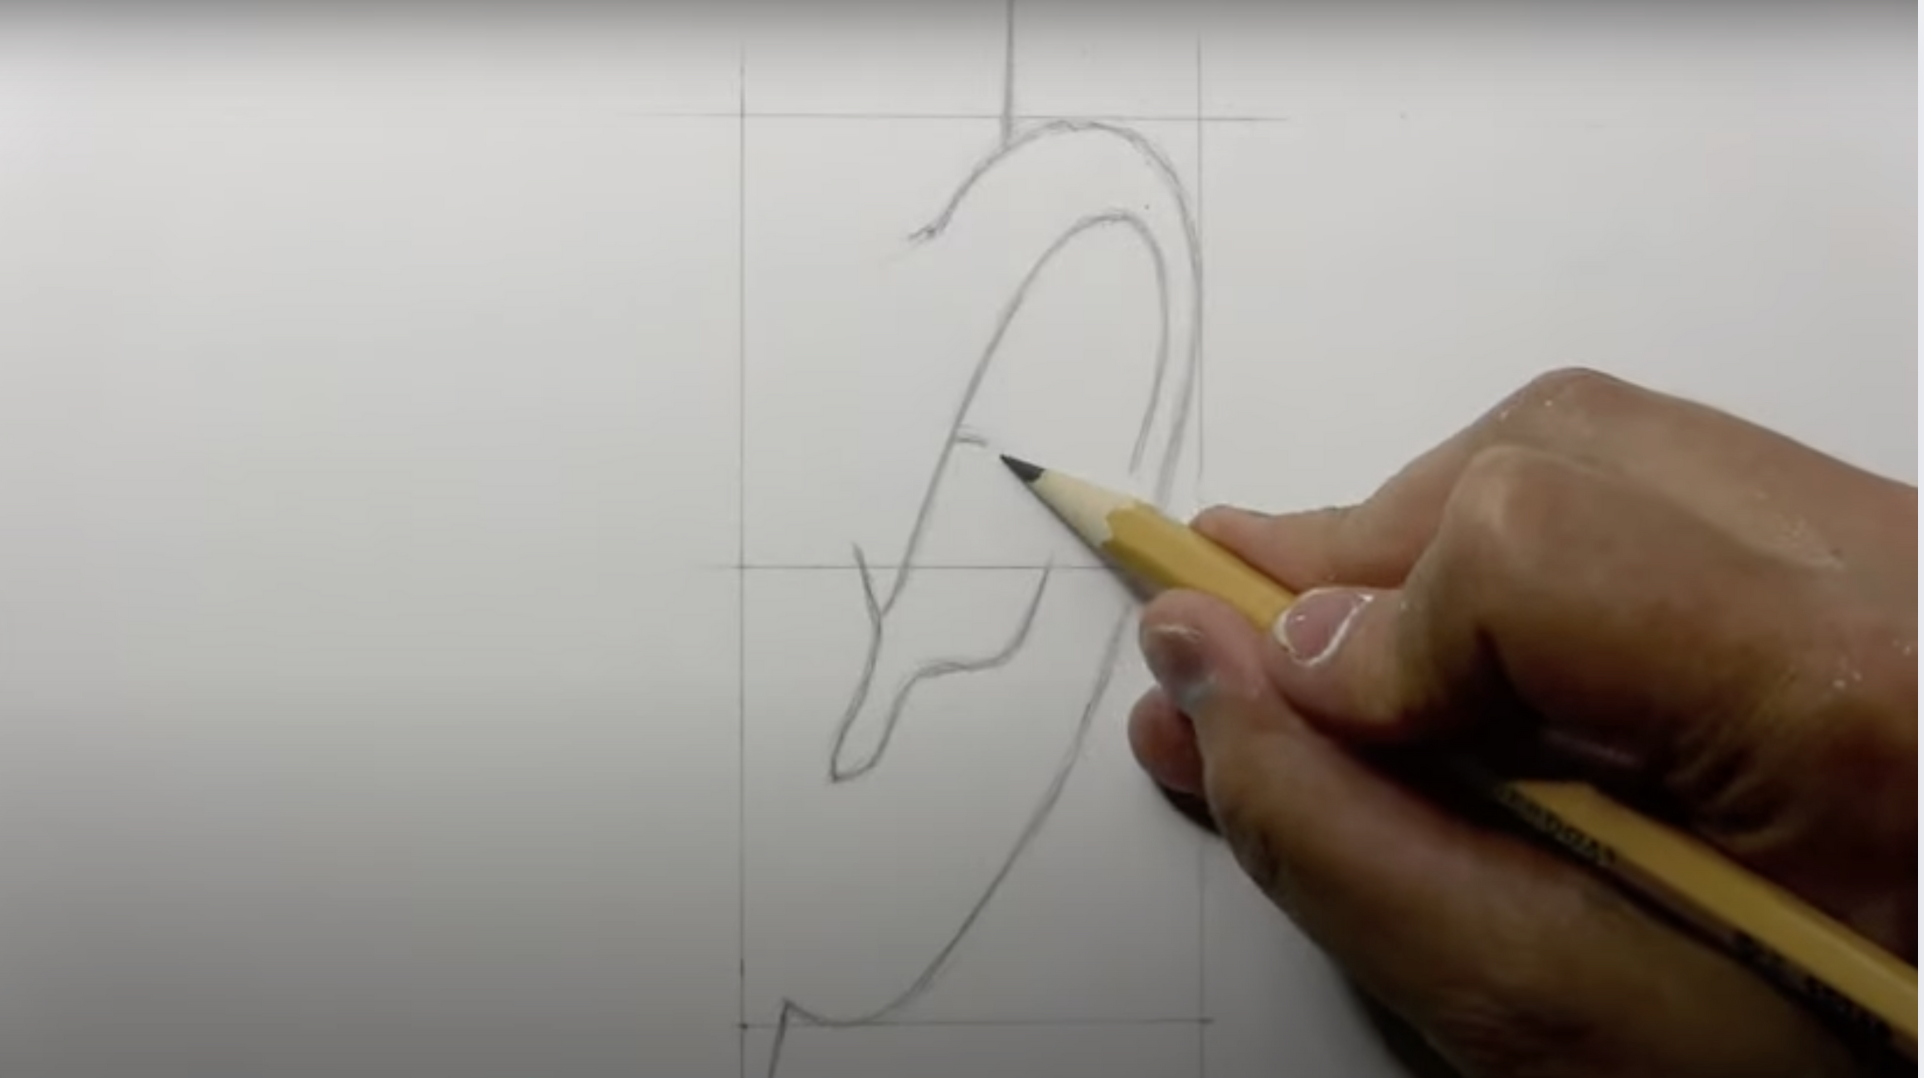
The “thumbs down mitten” is crucial for defining the ear’s inner folds. This shape is positioned at the center of the ear and plays a significant role in its structure. The mitten shape helps outline the central area of the ear, giving it more dimension.
Inculcating these steps is essential for adding depth to the ear’s inner structure:
- Draw the mitten-like shape in the center of the ear’s contour
- Taper the shape towards the bottom to match the natural curvature of the ear
Step 4: Draw the Inner Curvature
This step focuses on adding the inner curvature, which adds realism to the ear by separating its outer and inner sections.
This line starts at the top of the ear and curves gently downward, crossing in front of the earlier drawn lines. This creates a distinct division between the ear’s outer rim and its inner folds, adding more definition.
- Begin the line at the top of the ear
- Curve it downward and in front of the previous lines
- Ensure the line gently connects to the outer edge of the ear, forming a natural bulge
By adding this line, the ear gains dimension and structure.
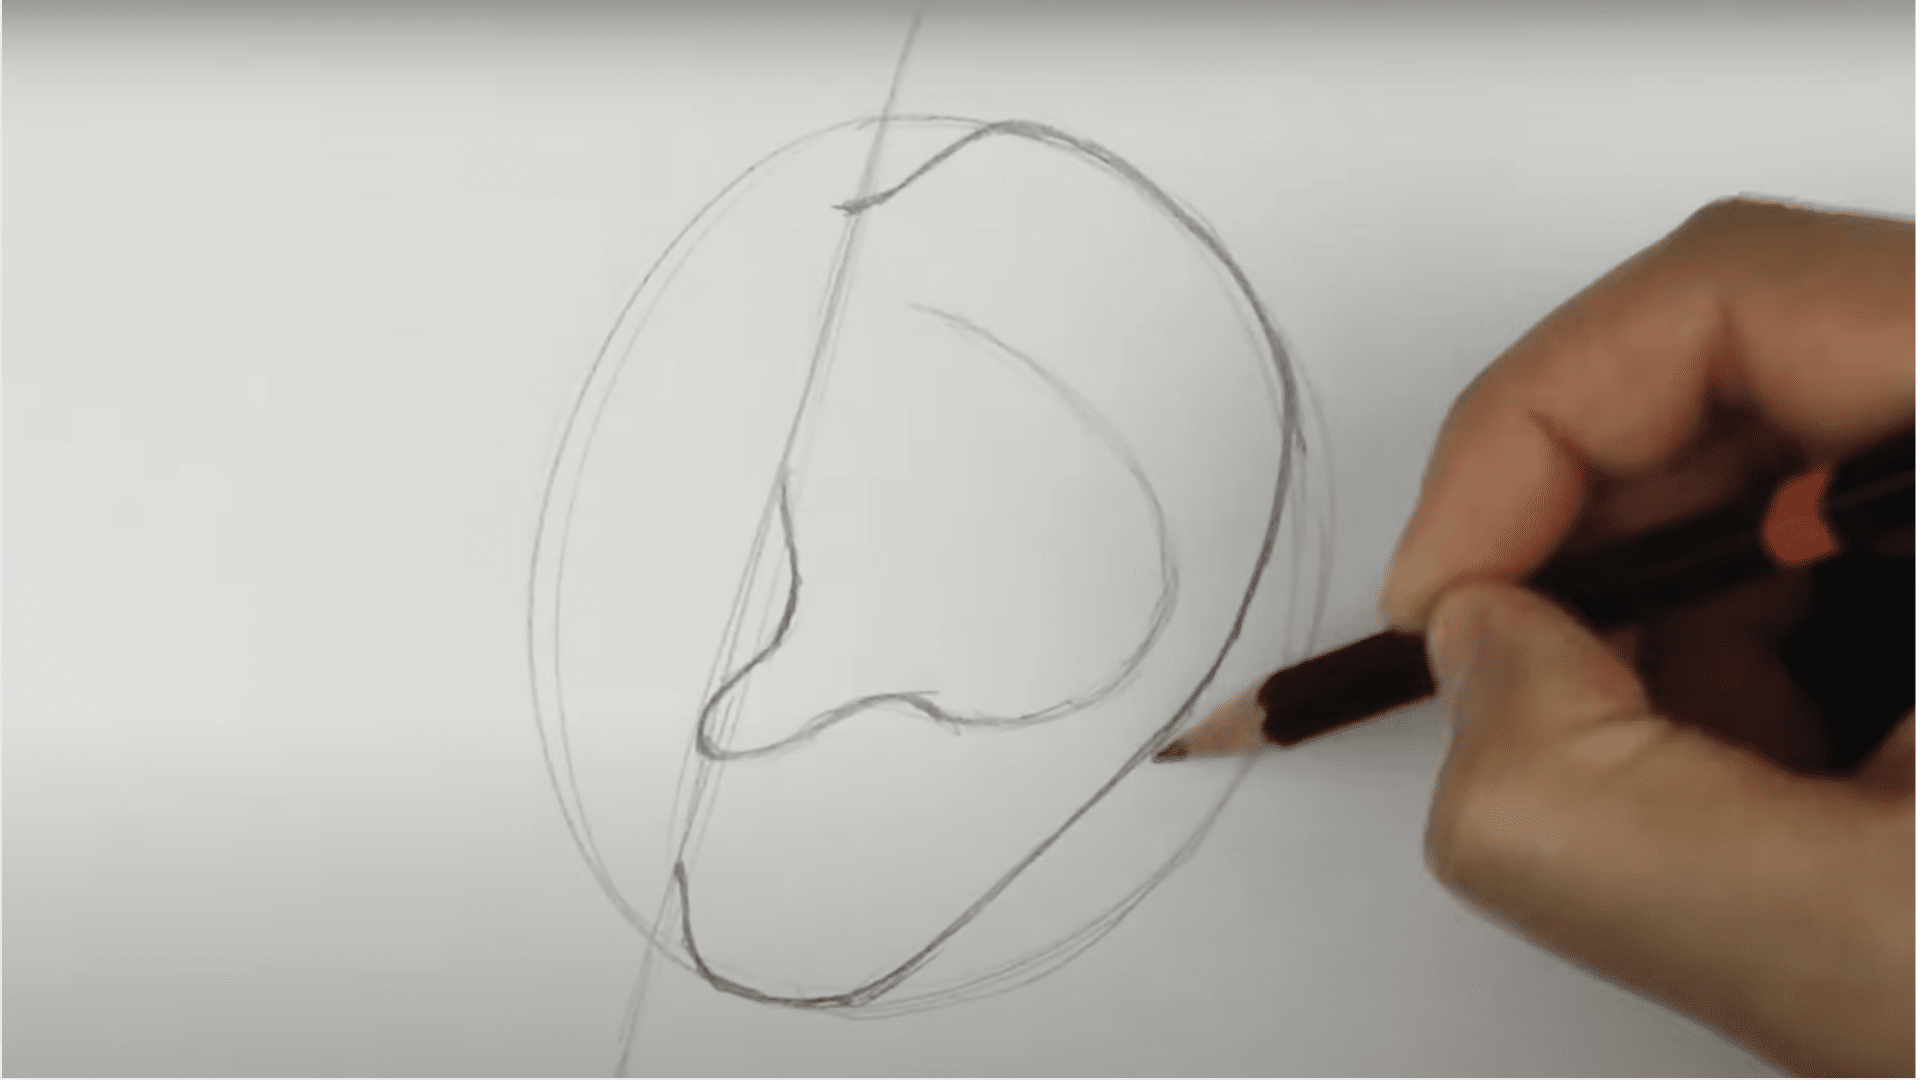
Step 5: Add Detailing and Refinements
Once you’ve outlined the major shapes, refine them by softening the lines. Pay attention to the curvature and the subtle ridges.
You may choose to use dotted lines to represent areas that don’t have defined edges, such as the inner ear folds that can blend into shadows.
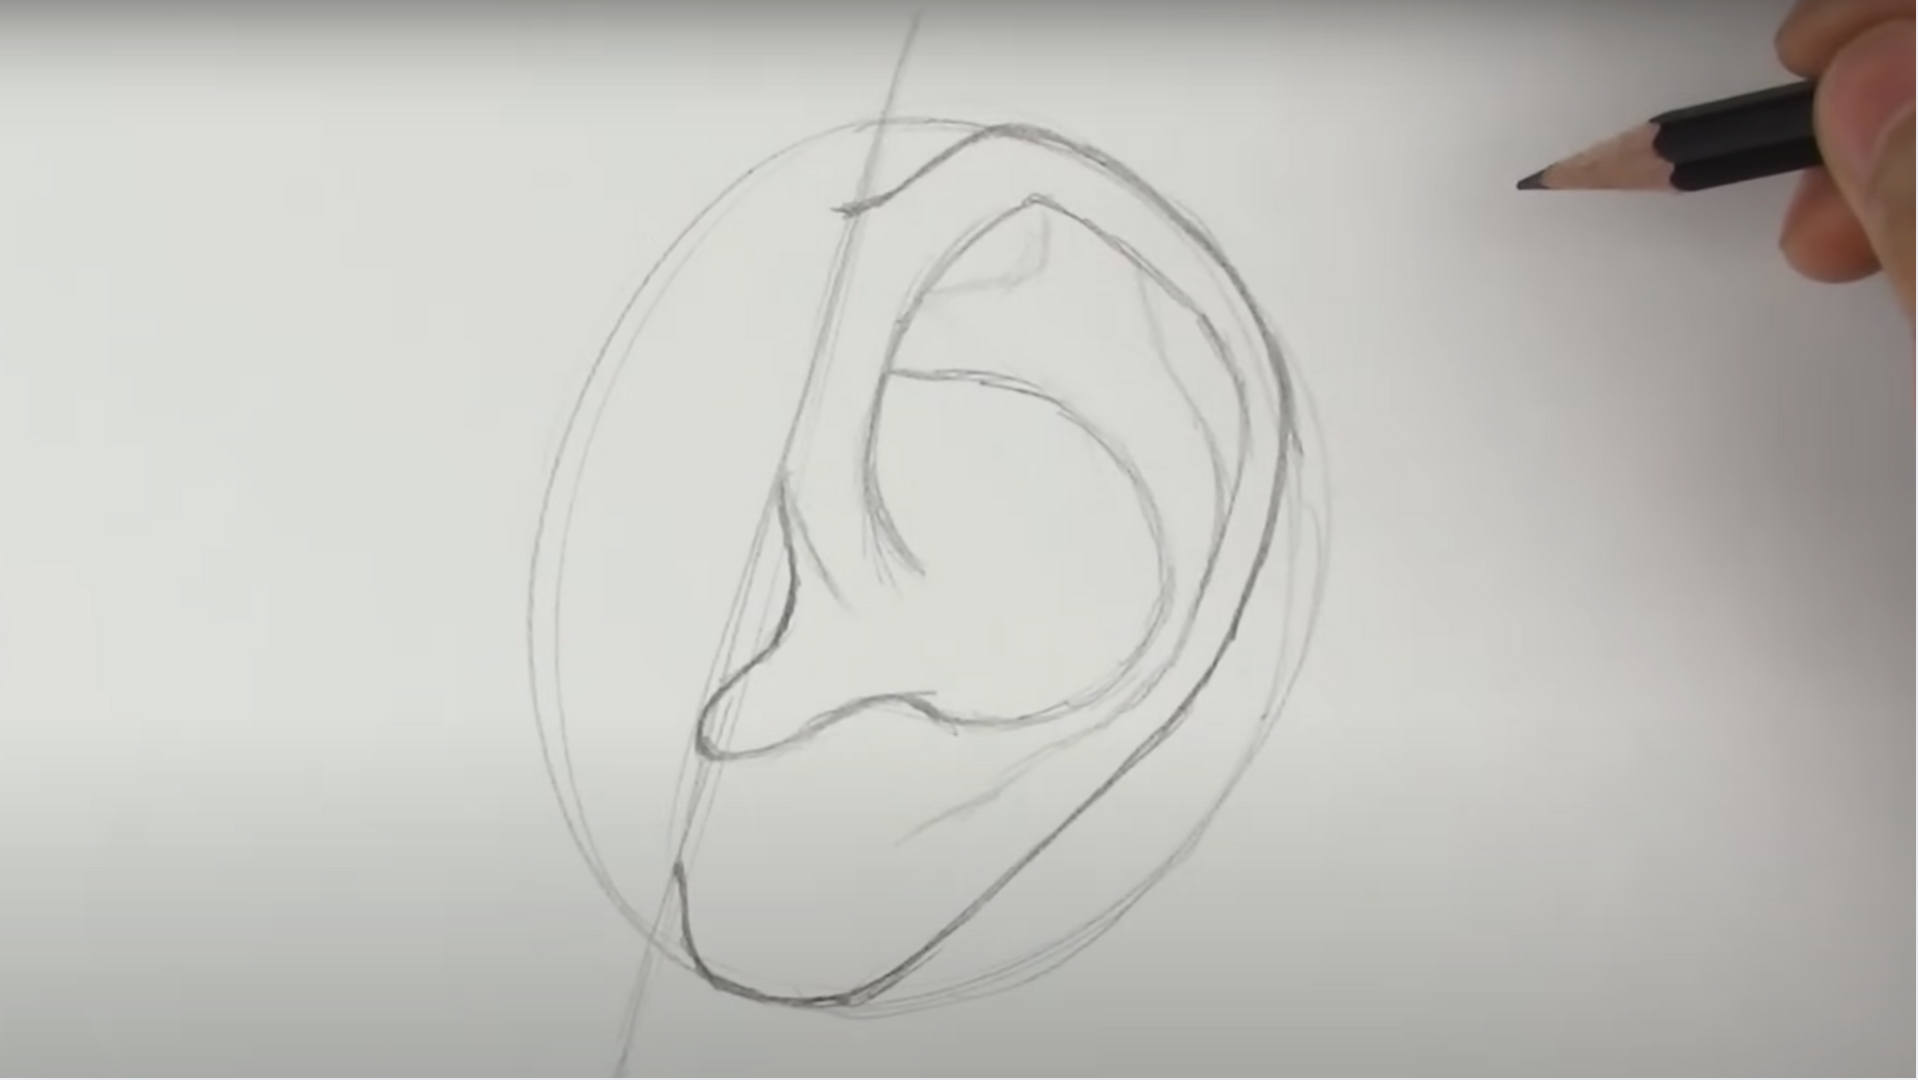
Step 6: Apply Shading for Realism
Begin shading the ear to give it a more realistic appearance. Use light, curved strokes to add depth around the inner folds, particularly where light might not directly hit. The shading will help make the ear look more three-dimensional, highlighting areas like the “thumbs down mitten” and the ridge of the ear.
Step 7: Final Touches and Details
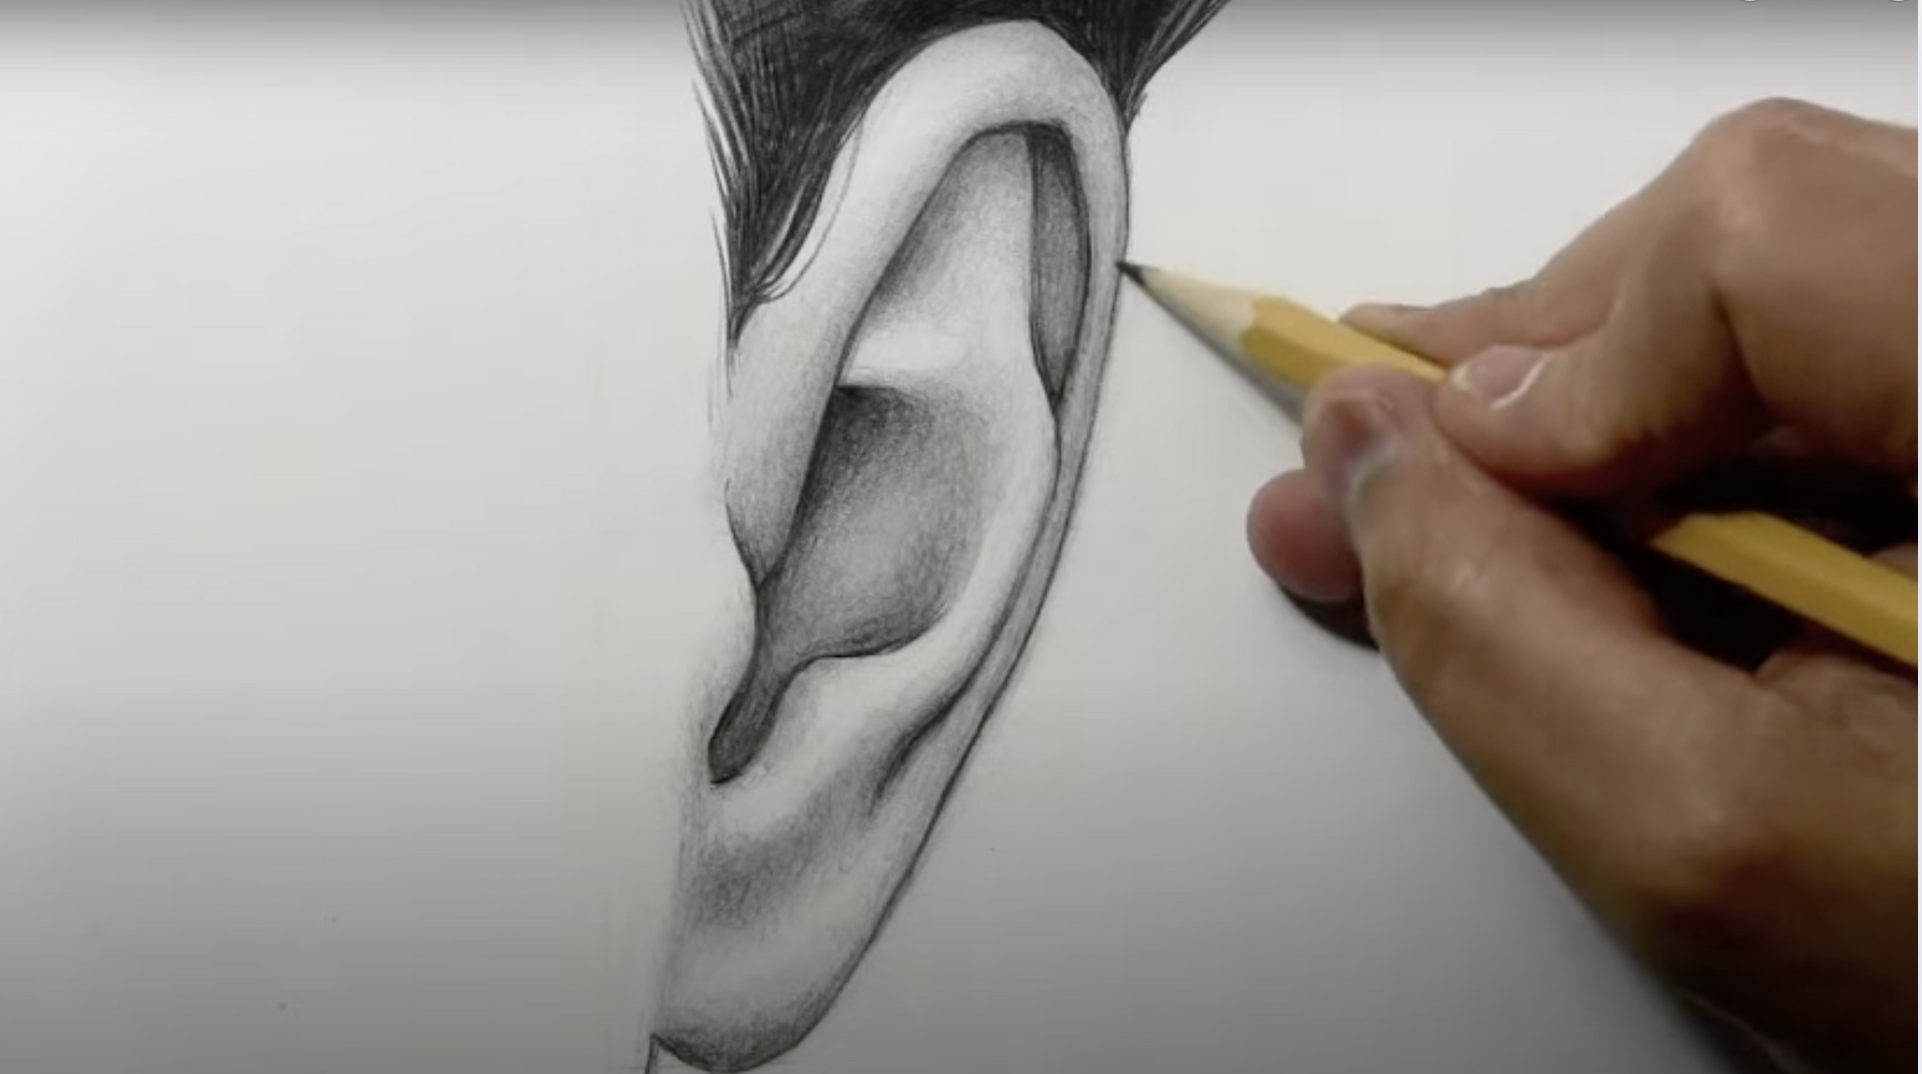
After shading, refine the outlines and add any final details, such as the outermost ridge, which may not be visible in some ear shapes.
You can also shade or leave lighter spots to reflect how light would interact with the ear’s curves, and this can differ depending on whether the person has hair or not.
Mastering the Side View of An Ear from The Face
Drawing a realistic ear from a side view requires attention to detail and an understanding of its structure. By following these simple steps, anyone can create a lifelike ear with accurate proportions, shading, and depth.
This guide breaks down the process into manageable steps for a clear and realistic result.
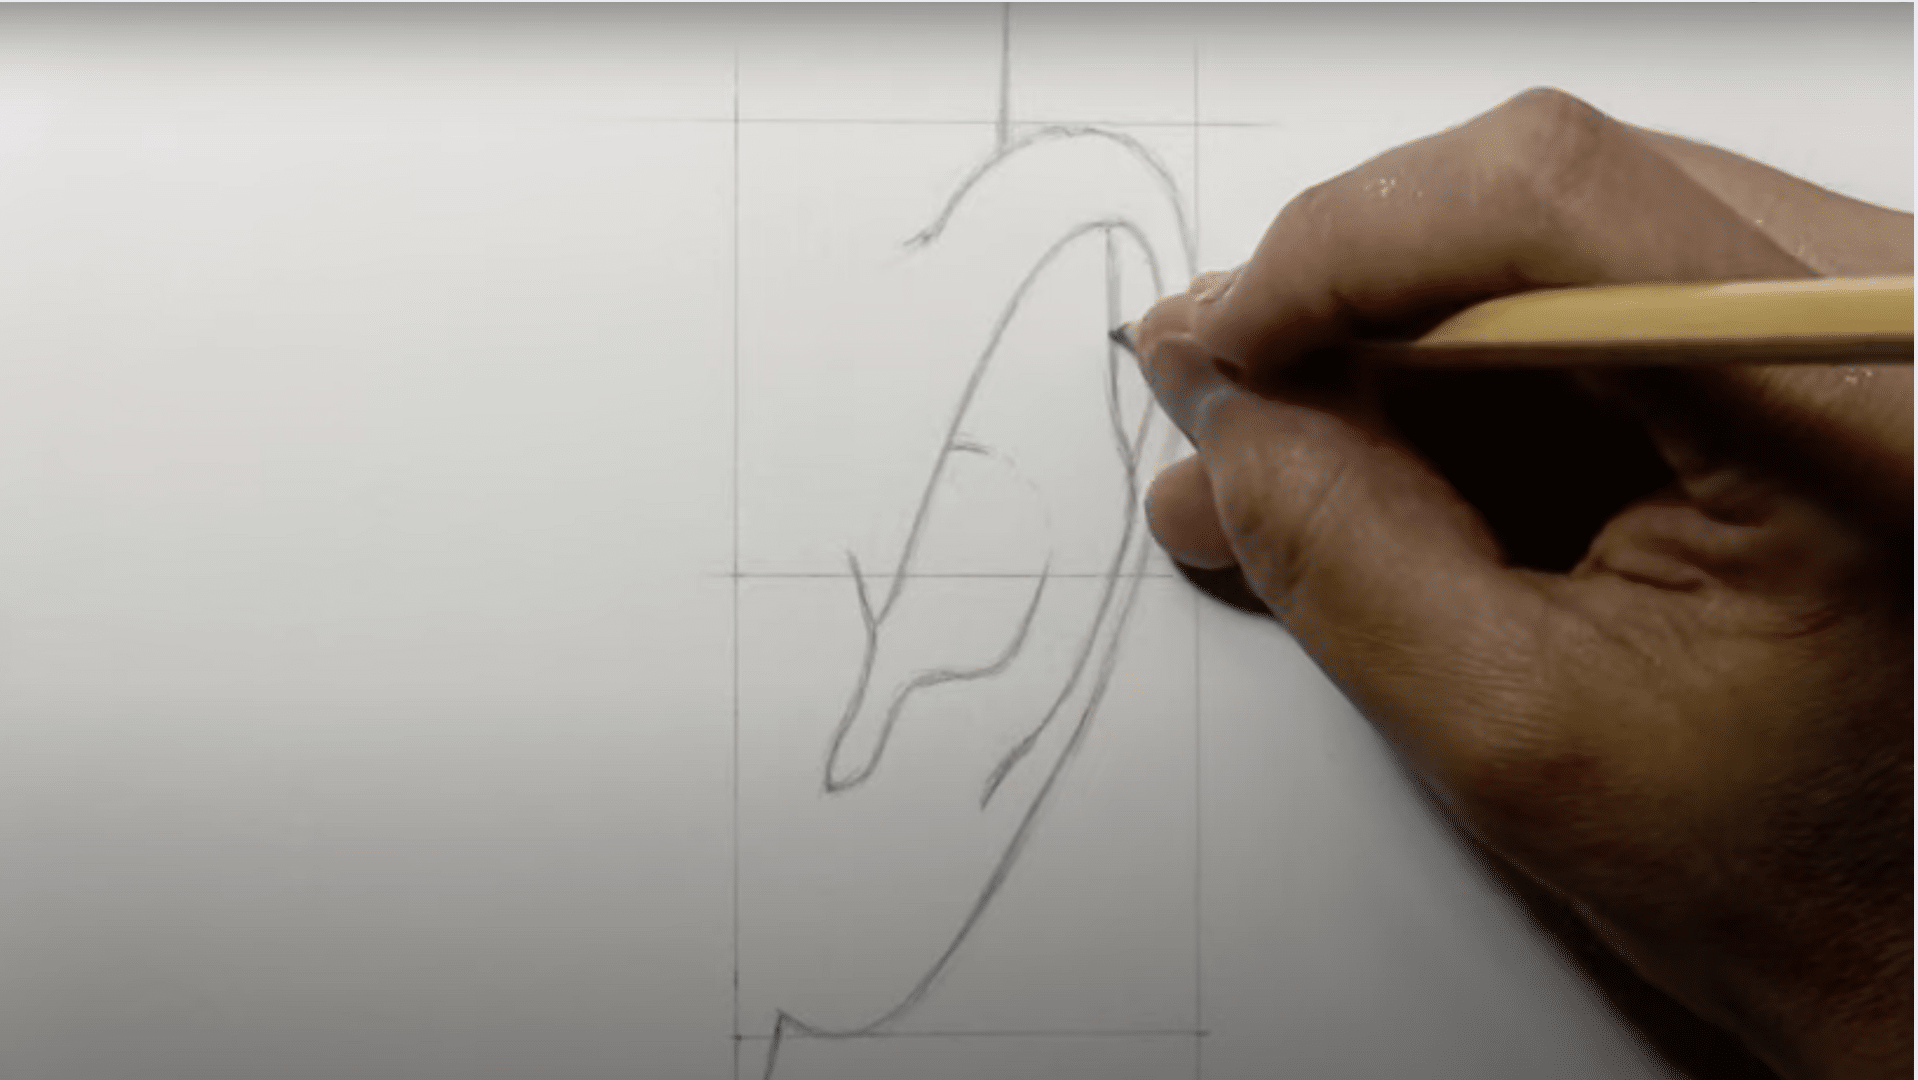
Step 1: Establish the Construction Lines
The first step in drawing a realistic ear is to lightly sketch a slanted line on the paper. This line serves as a reference to indicate where the ear connects to the head.
Then, a larger oval shape is drawn slightly to the right of this line. The size and width of this oval will help determine the ear’s proportions, so it’s important to adjust the oval according to the desired ear width.
Step 2: Outline the Shape of the Ear
With the oval in place, the next step is to outline the overall shape of the ear.
Starting a small distance from the oval along the slanted line, the artist should gently draw the upper portion of the ear, shaping it according to the oval.
The ear’s top should follow the oval’s guidelines but can be altered to achieve a more unique or natural form.
Step 3: Draw the Earlobe
The artist then moves on to sketch the earlobe, beginning from the vertical line. The earlobe should start away from the oval, and it’s common to make it narrower.
The shape can vary based on preference, but typically, the earlobe tapers from a wider top to a smaller bottom.
Step 4: Sketch the Tragus and Antitragus
The tragus is a small, curved piece of cartilage located just in front of the ear canal. To draw it accurately, start at the midpoint between the earlobe and the ear canal, and extend a stroke downward.
From there, curve the line upward into a hook-like shape. This will give the tragus its distinct form.
- Draw the antitragus across from the tragus, a small bump that adds definition.
- The antitragus should be placed just above the earlobe, completing the curve of the ear.
- These two features should complement each other, giving the ear its characteristic shape.
Step 5: Define the Helix Curve
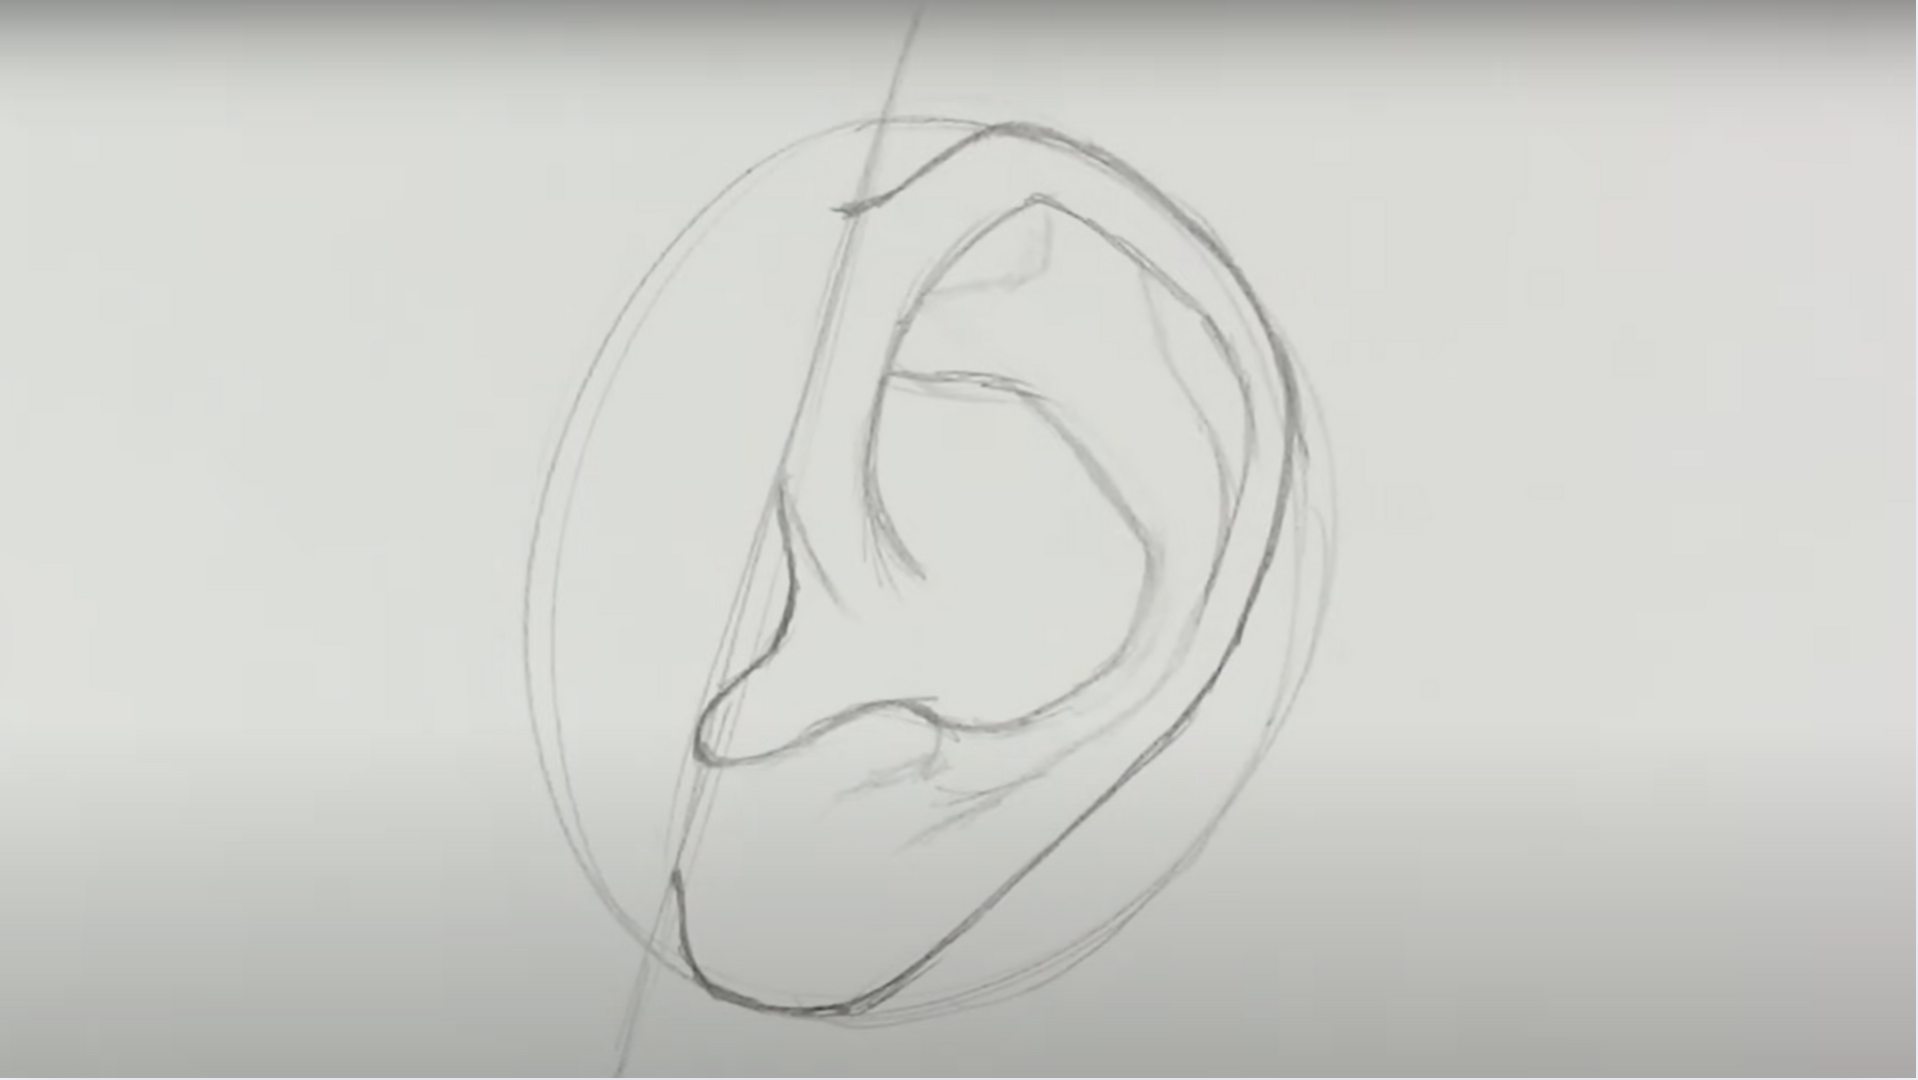
The helix is the outer rim of the ear, and it curves inward in a gentle loop.
- Start at the top of the ear and draw the helix as a smooth, continuous curve that moves downward and inwards.
- Ensure the curve maintains a consistent distance from the edge of the ear, helping to add a three-dimensional feel.
- Vary the curvature slightly for a more realistic effect, reflecting the ear’s natural form.
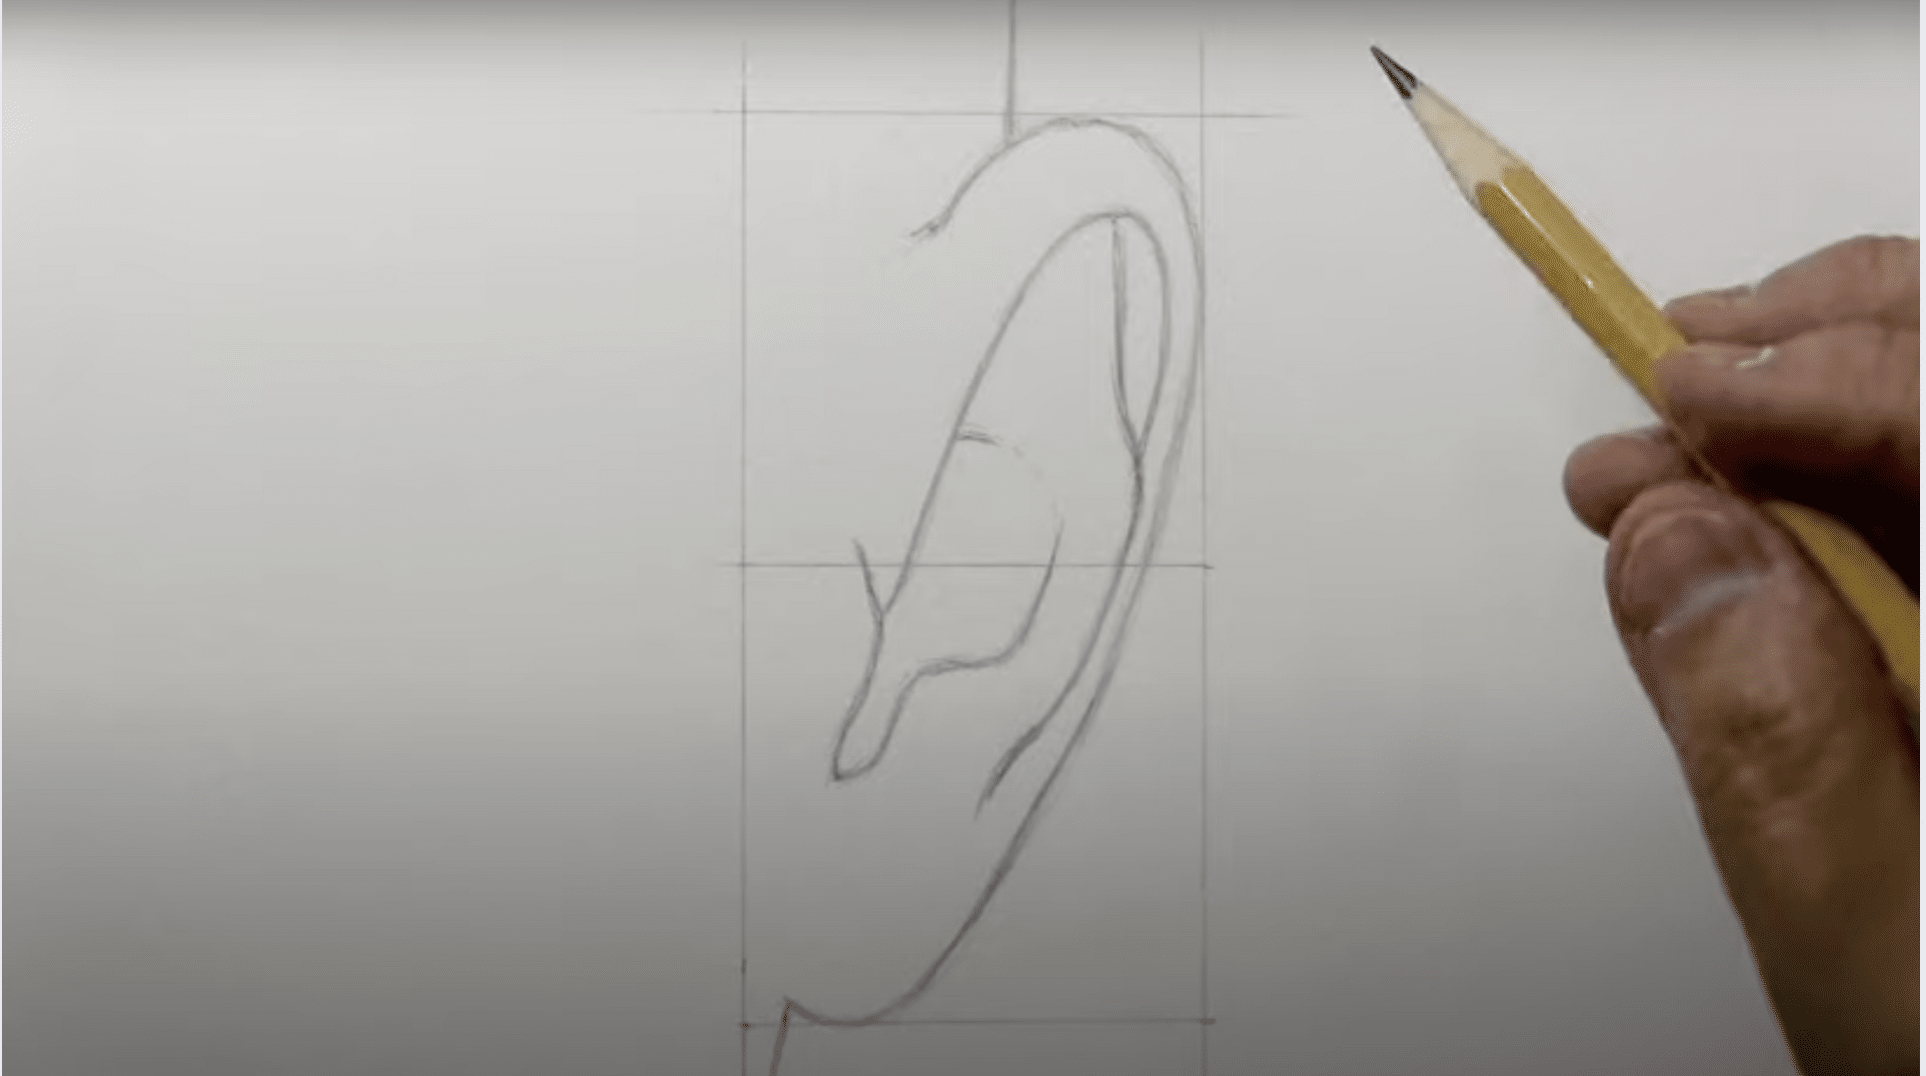
Step 6: Refine the Shapes and Erase Construction Lines
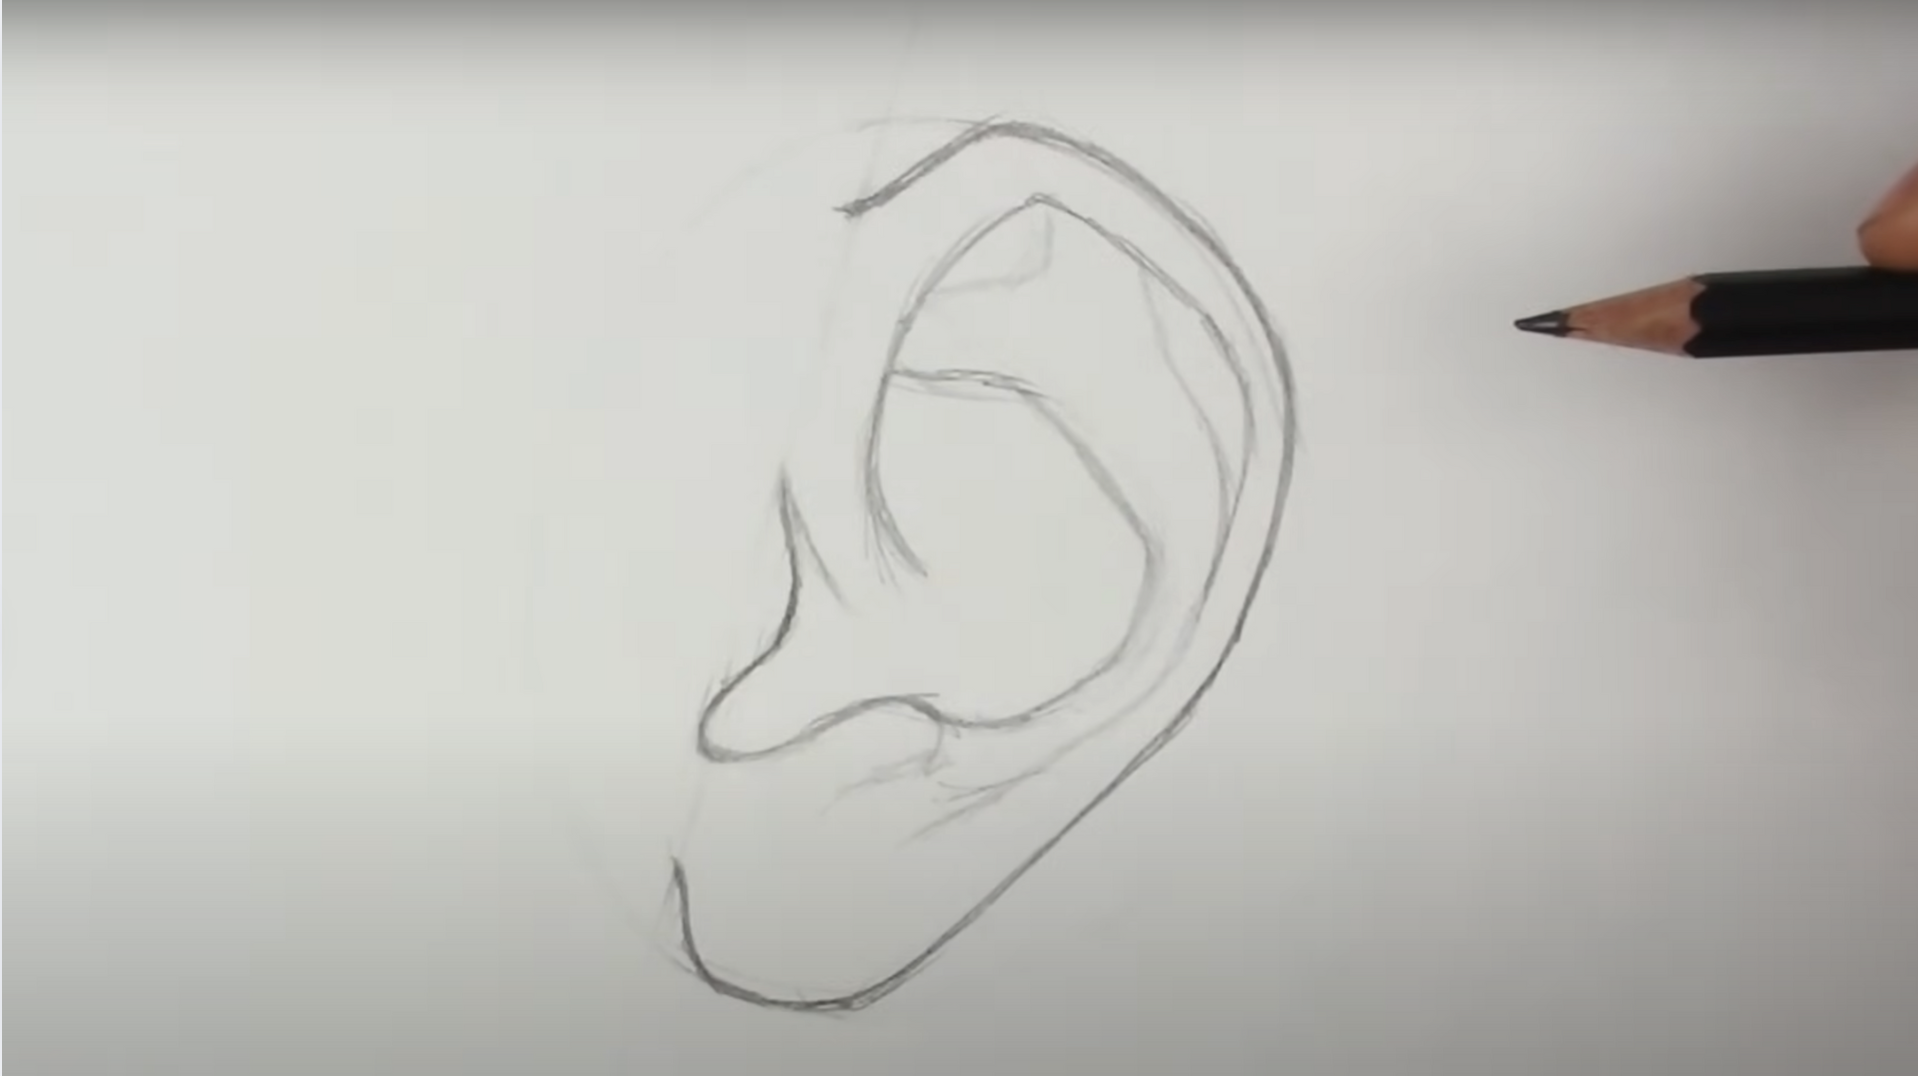
Once the basic ear shape has been established, the artist should refine the lines and shapes for a more accurate and polished appearance.
Any remaining construction lines can be erased to clean up the drawing. The ear should now appear more defined and ready for further detail work.
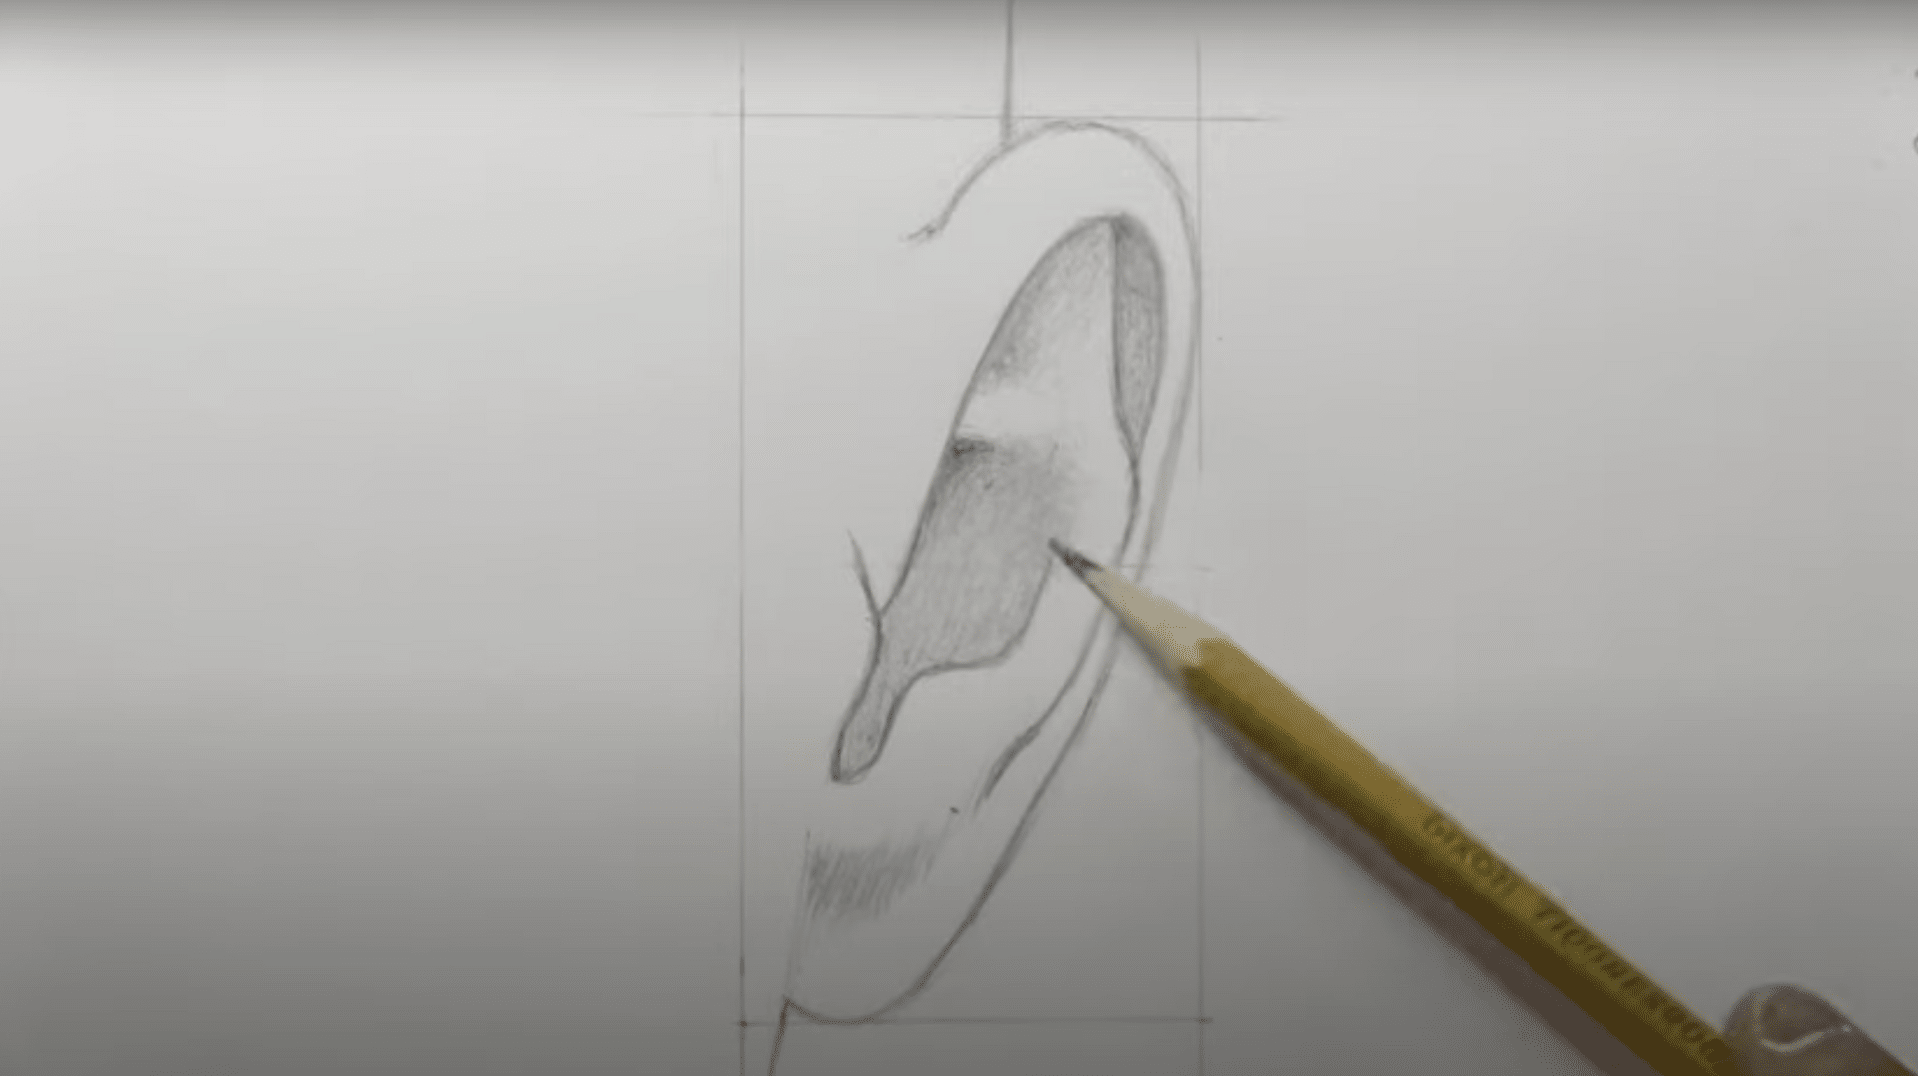
Step 7: Shading and Blending for Realism
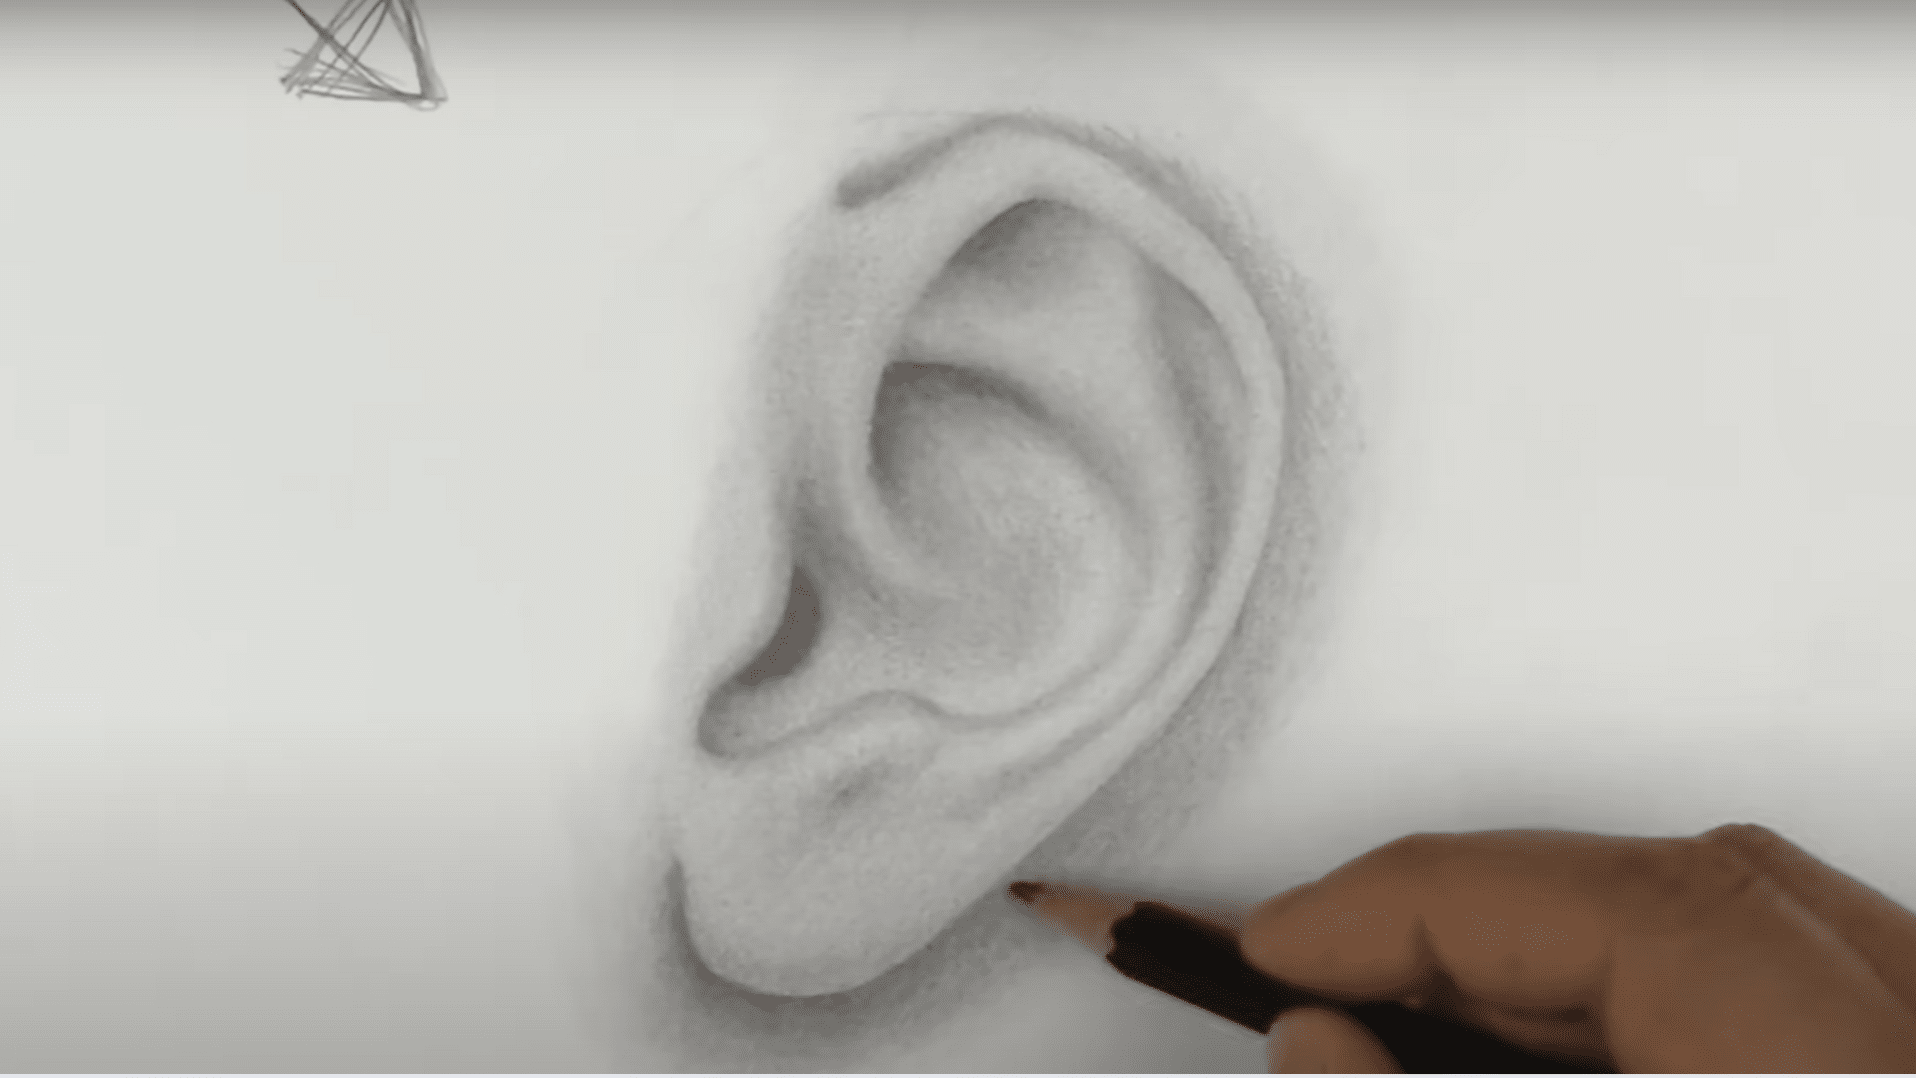
Shading is essential for bringing the ear to life. The artist should begin shading with an HB pencil, applying light pressure to build up values slowly.
The darkest areas, such as the ear canal and tragus, should be shaded first. A blending stump or soft tissue can then be used to smooth out the shading, making transitions between light and dark areas softer.
As the artist shades, they should keep in mind the direction of light to ensure the ear’s three-dimensional form is clear.
Essential Tips for Drawing Ears Like a Pro
Drawing ears well can make a big difference in portrait quality. Artists who master ear drawing add realism to their work that others often miss. These tips will help anyone improve their ear-drawing skills.
- Observe real ears: Artists should study ears from different angles before drawing. Looking at how light hits the curves and folds gives a better understanding of ear structure. This observation helps create more natural-looking results.
- Start with guidelines: Beginning with light lines to map out the ear position saves time later. These guidelines should mark the ear’s height, width, and angle on the head. Proper placement is key for realistic portraits.
- Pay attention to proportions: The average ear is about the same length as the nose. It typically sits between the eyebrow and bottom of the nose. Getting these measurements right helps the ear look natural on the face.
- Practice consistently: Regular drawing practice builds muscle memory. Artists should try drawing ears from memory, then check against references to find mistakes. This method speeds up learning and improves accuracy over time.
Inspiring Ear Drawing Techniques to Try Today
Ears can be tricky parts to draw for many artists, both beginners and experts. These techniques focus on simple steps that make ear anatomy less complex for anyone with a pencil and paper.
Casual Doodle
Negative Space Method
Value-Based Approach
Easy Quick Sketching
Cross-Hatching Technique
Grid Method
Tonal Blocking
Simplification of Study with Steps
Light-To-Dark Method
Conclusion
Drawing ears might seem tricky at first, but breaking down the process makes it much simpler.
This guide covered multiple techniques for how to draw ear features that look natural and three-dimensional. Artists who practice these methods regularly will see their skills improve with time.
Why does this matter? Because well-drawn ears add a level of realism to portraits that many artists overlook.
The ear connects viewers to the humanity of the subject. Its complex structure tells a story about the person being portrayed. Artists who master ear drawing distinguish their work from others who skip this important detail.
Understanding how to draw ear shapes correctly transforms ordinary portraits into exceptional artwork. The techniques shared here provide a foundation for artists at any skill level to enhance their drawings with anatomically correct ears.