Many artists wonder how to create lifelike scenes with just pencils. Landscape color pencil drawing captures nature’s beauty through simple tools available to everyone.
Unlike other art forms, color pencils offer control without the mess of paints or complexity of digital tools. They make art accessible to beginners while giving experts room to grow.
With landscape color pencil drawing, one can portray sunlight dancing through trees, water reflecting clouds, and mountains fading into misty horizons. These techniques bring scenes to life on paper, creating works that pull viewers in and transport them to faraway places.
Artists ready to learn the secrets behind stunning landscape drawings will find this guide walks through essential steps to create beautiful artwork that others will admire.
Tips for Realistic Landscape Color Pencil Drawing
Artists often find landscape color pencil drawing both fun and challenging. The right techniques can make a big difference in the final result.
Creating realistic scenes requires attention to detail and practice. The following tips will help anyone improve their landscape art skills.
1. Light source: Artists should identify where light comes from in their scene. This helps them add correct shadows and highlights. Consistent lighting makes landscapes look more believable and three-dimensional.
2. Layering colors: One should build up colors gradually with light pressure. Starting with lighter shades and adding darker tones creates depth. This technique allows for smooth blending and rich color variations.
3. Texture techniques: Different pencil strokes can mimic various textures in nature. Short, choppy strokes work well for grass, while circular motions create fluffy clouds. Long, parallel lines can represent water or smooth rock surfaces.
4. Composition basics: Artists should plan the focal point before starting. They can use the rule of thirds to place key elements. A strong composition guides the viewer’s eye through the drawing naturally.
5. Value contrast: Creating a range of light to dark areas adds drama to landscapes. Strong contrasts between foreground and background elements make drawings more dynamic, helping create the illusion of distance.
6. Color temperature: Using warm colors (yellows, oranges) for sunlit areas and cool colors (blues, purples) for shadows amplifies realism. Color temperature changes help convey time of day and weather conditions effectively.
How to Create Impressive Landscapes
Landscape color pencil drawing is a wonderful way to bring the beauty of nature onto paper with precision and a touch of artistic expression. The process requires thoughtful planning, technique, and the right tools to create depth, vibrancy, and balance.
By focusing on layering, color blending, and the intricate use of light and shadow, artists can bring life to their landscapes, regardless of the scene’s complexity.
Step 1: Choose the Right Paper
Start by selecting a suitable paper. Pastelmat is highly recommended for its ability to hold multiple layers, allowing for smooth blending.
Other options include hot-pressed watercolor papers like Arches and Ash or smooth Canson Me-Tens pastel paper. These papers can effectively handle solvent blending, making them ideal for vibrant, saturated colors.
Tools and Materials Required:
| Tool/Material | Purpose |
|---|---|
| Clairefontaine Pastelmat Paper | Ideal for layering and blending colored pencils |
| Colored Pencils (Derwent Drawing, Caran d’Ache Luminance) | For rich, lively color layers |
| Solvent (like Odorless Mineral Spirits) | Used for blending and softening pencil marks |
| Paper Towels | To dab excess solvent and clean the brush or blending stump |
| Blending Stump or Brush | For precise blending of colored pencil areas |
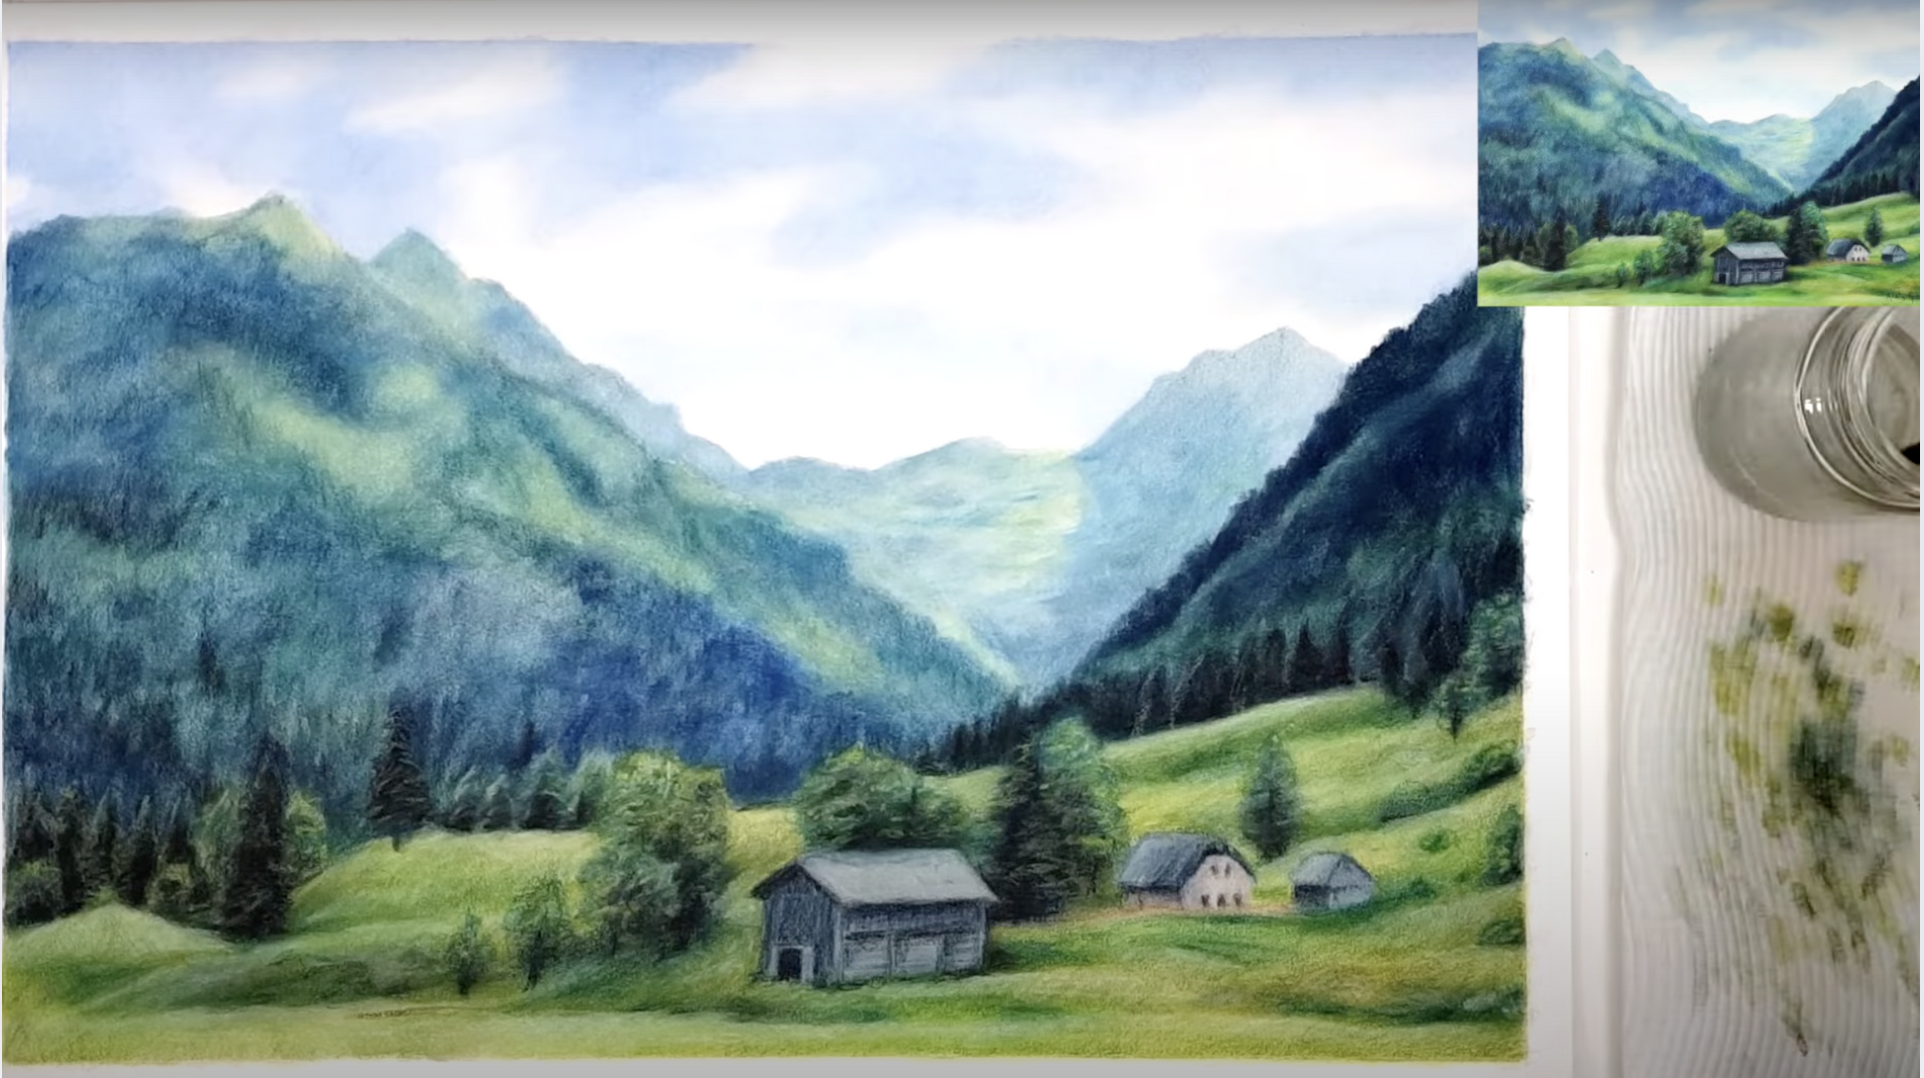
| Reference Photo | Provides color and detail guidance |
| Pencil Sharpener | For keeping pencils at the ideal sharpness for detailed work |
Step 2: Composition and Horizon Line
When creating your landscape, be mindful of the composition. Avoid placing the horizon line in the center of the drawing.
For a more engaging image, follow the rule of thirds: Position the horizon in the top or bottom third of your piece, depending on whether you want the focus to be on the sky or the foreground.
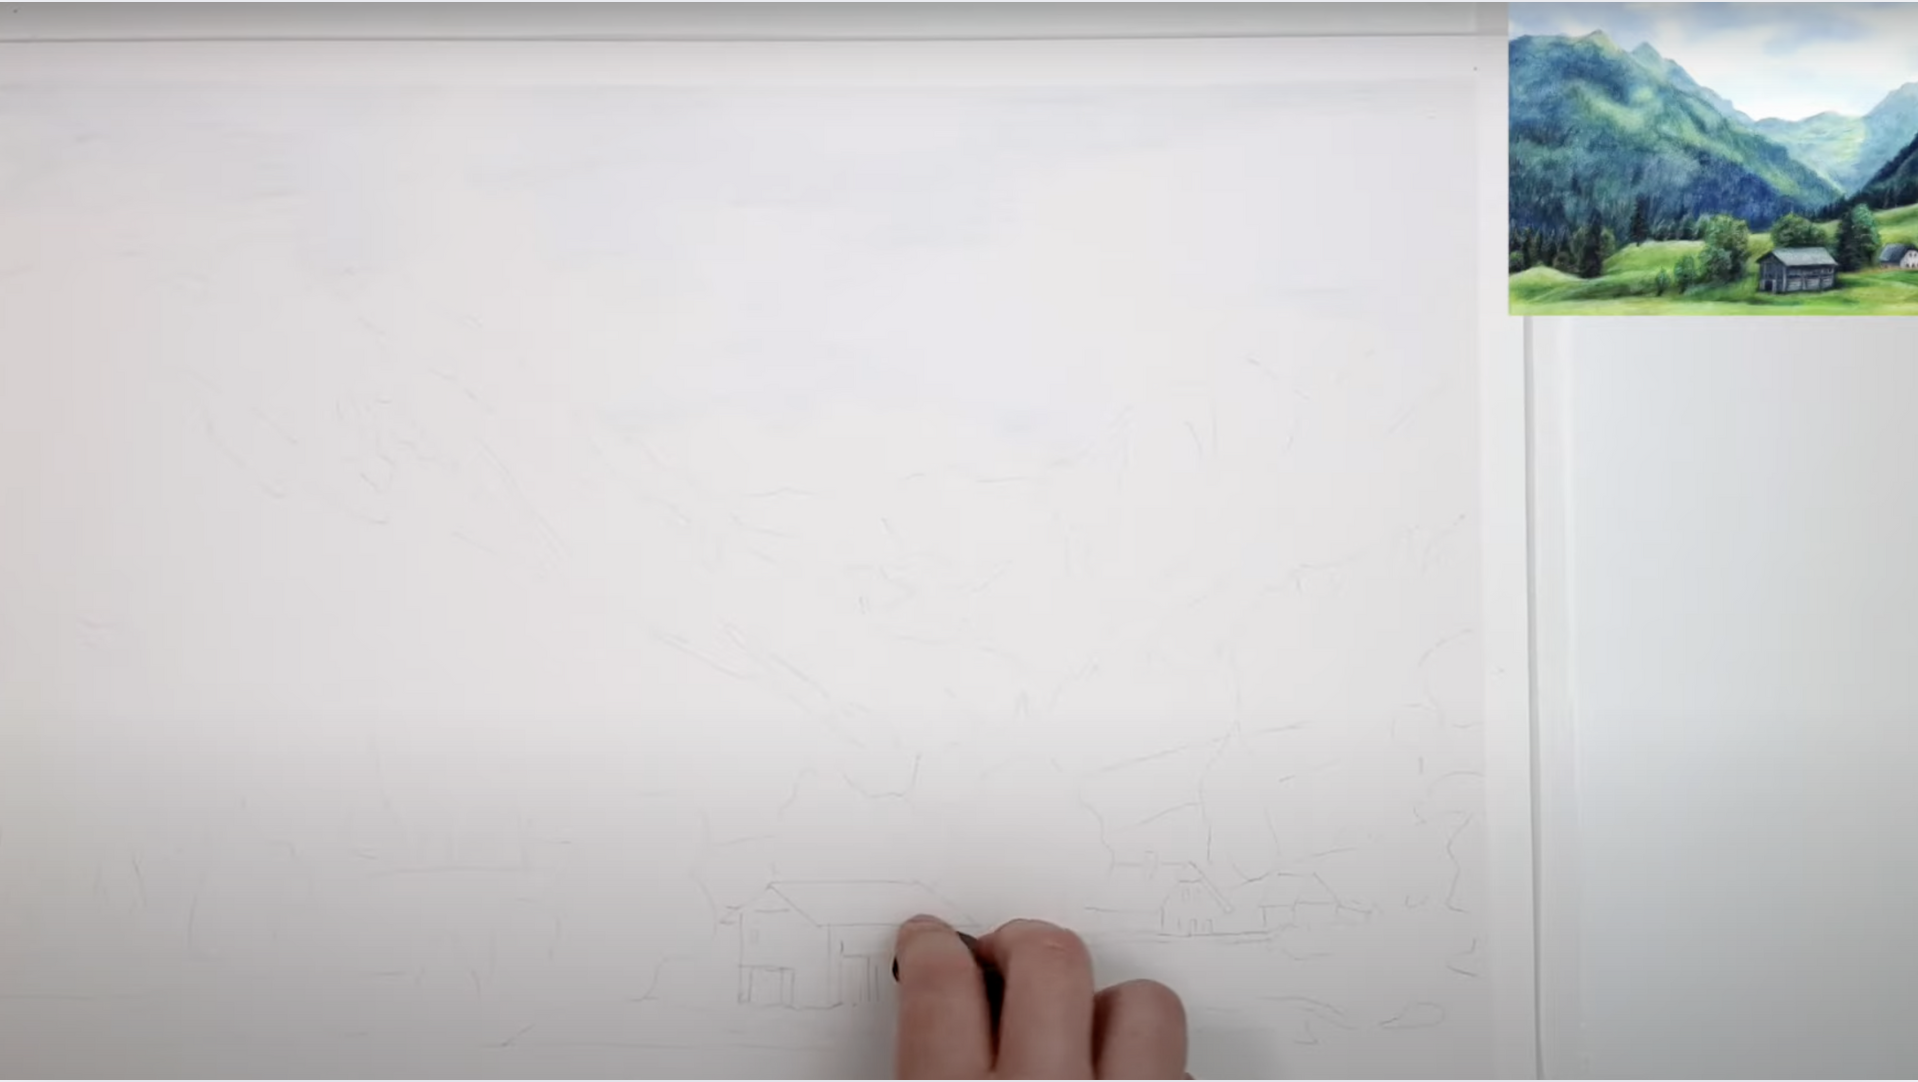
Step 3: Blocking in the Base Layer
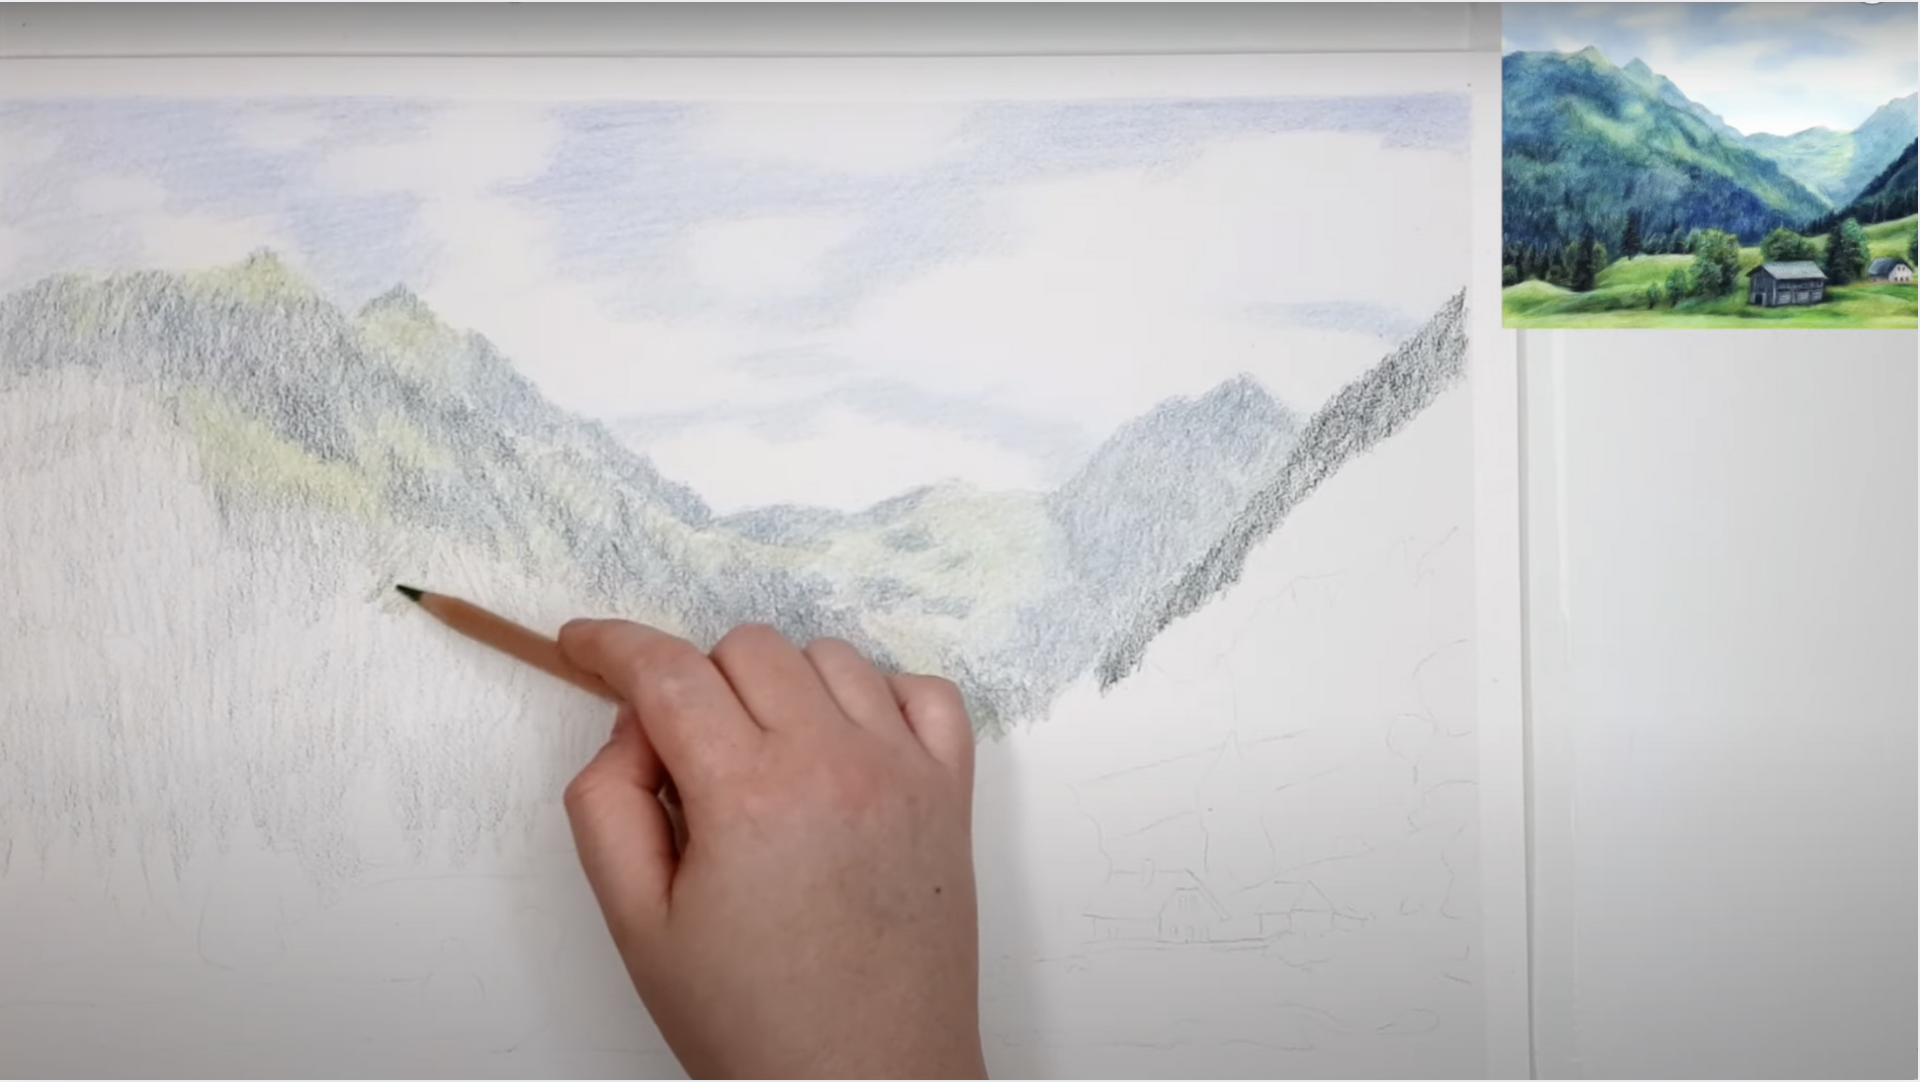
Use bold strokes to block in the scene’s main colors. Don’t worry about fine details at this stage. Begin with a variety of colors covering the broad areas in the scene, like the sky, mountains, and foreground.
Blend these colors using a solvent for a smooth transition, allowing the colors to pop.
Step 4: Color Choices and Layering
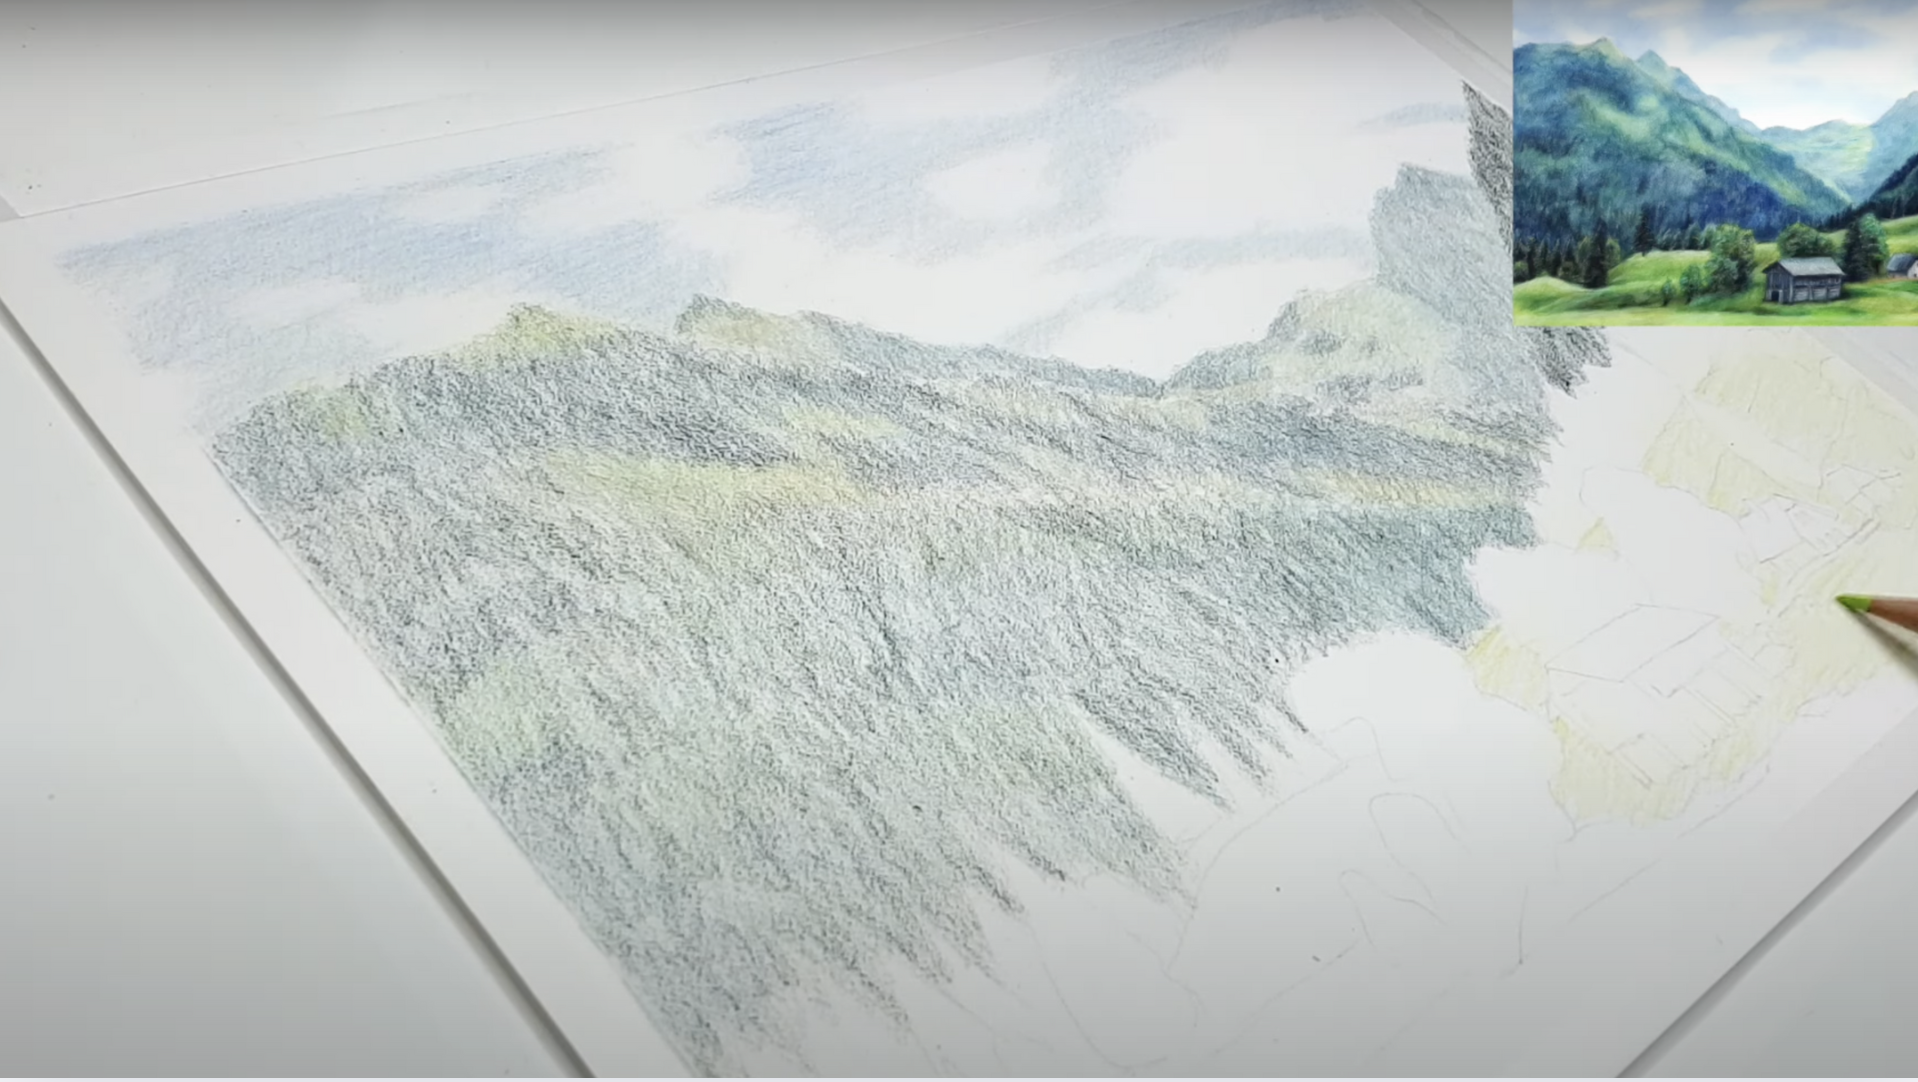
As you layer, focus on adding obvious colors from your reference photo. Start with one color that stands out and apply it to every area you see it in.
Repeat this with other noticeable colors, working systematically across the piece. For grass, use multiple shades of green, adding accents of yellows, blues, and browns to create depth and interest.
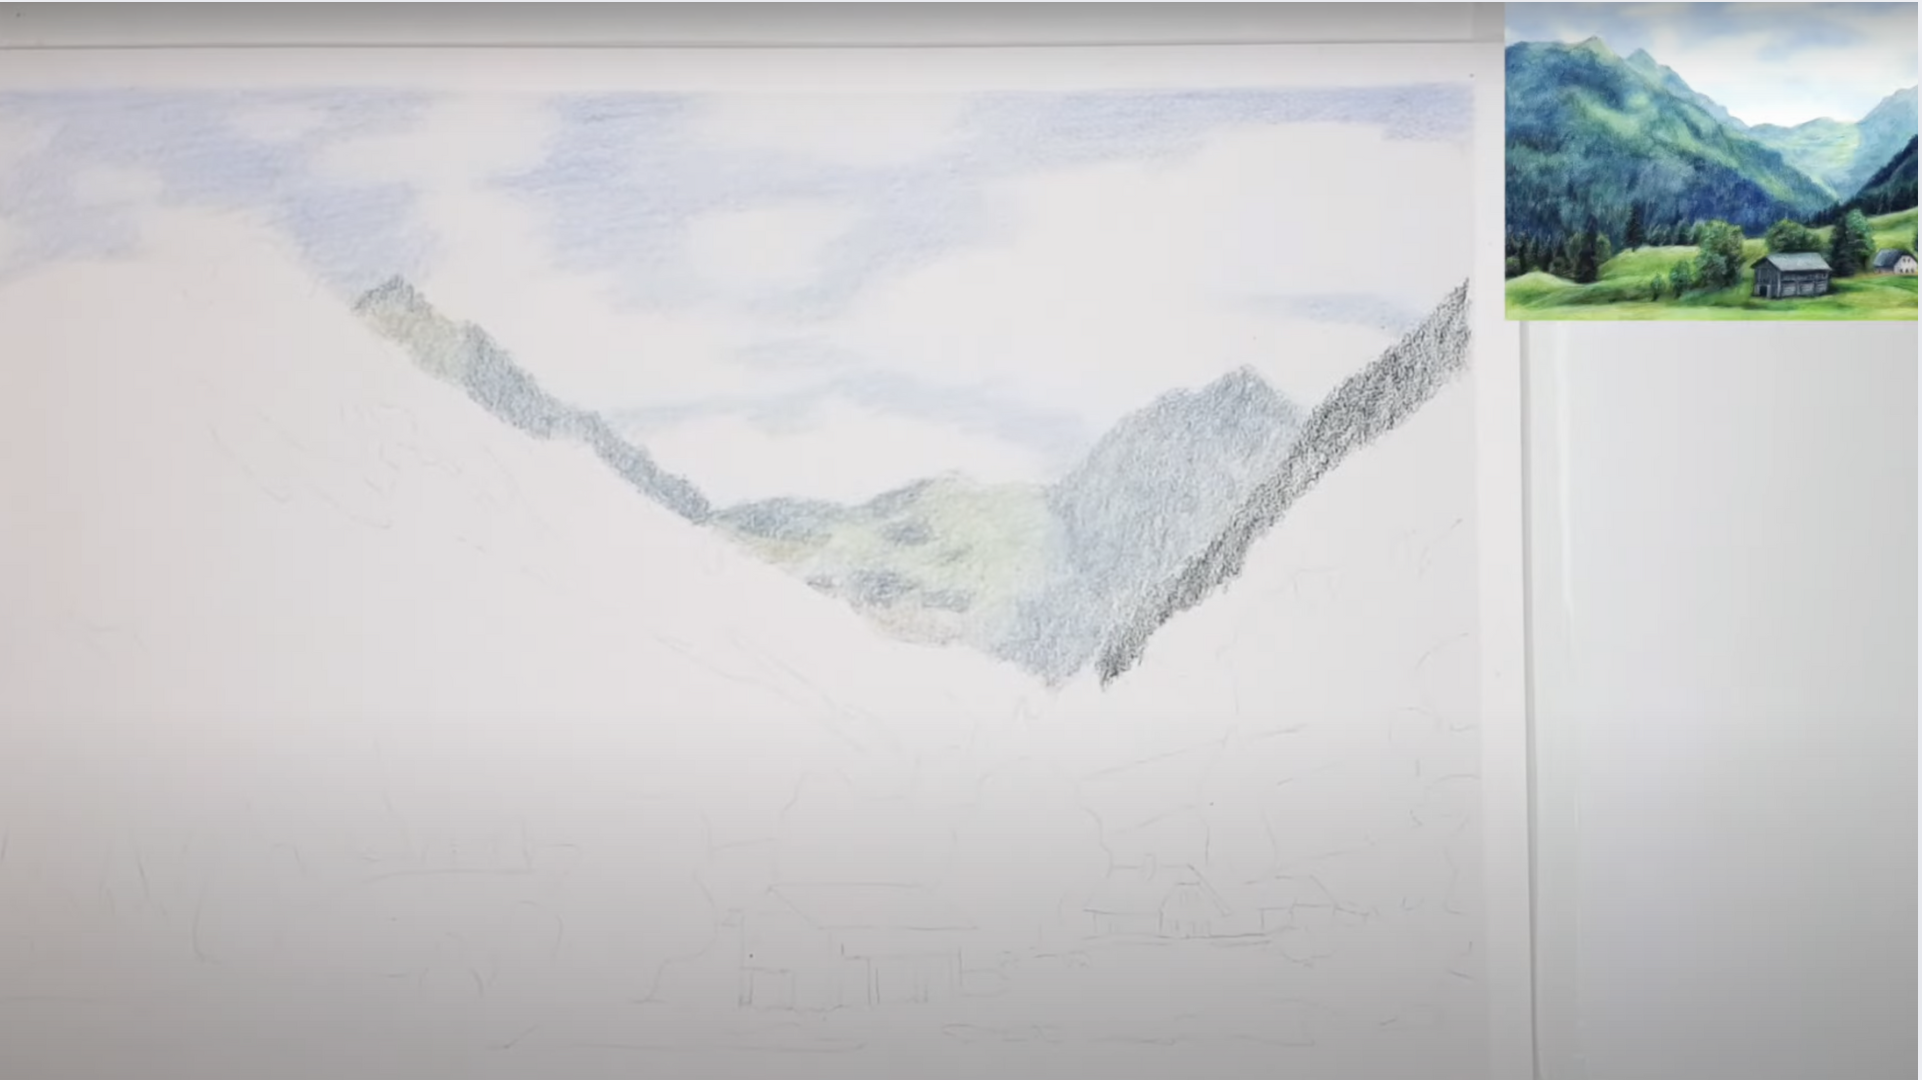
Step 5: Work on the Details Gradually
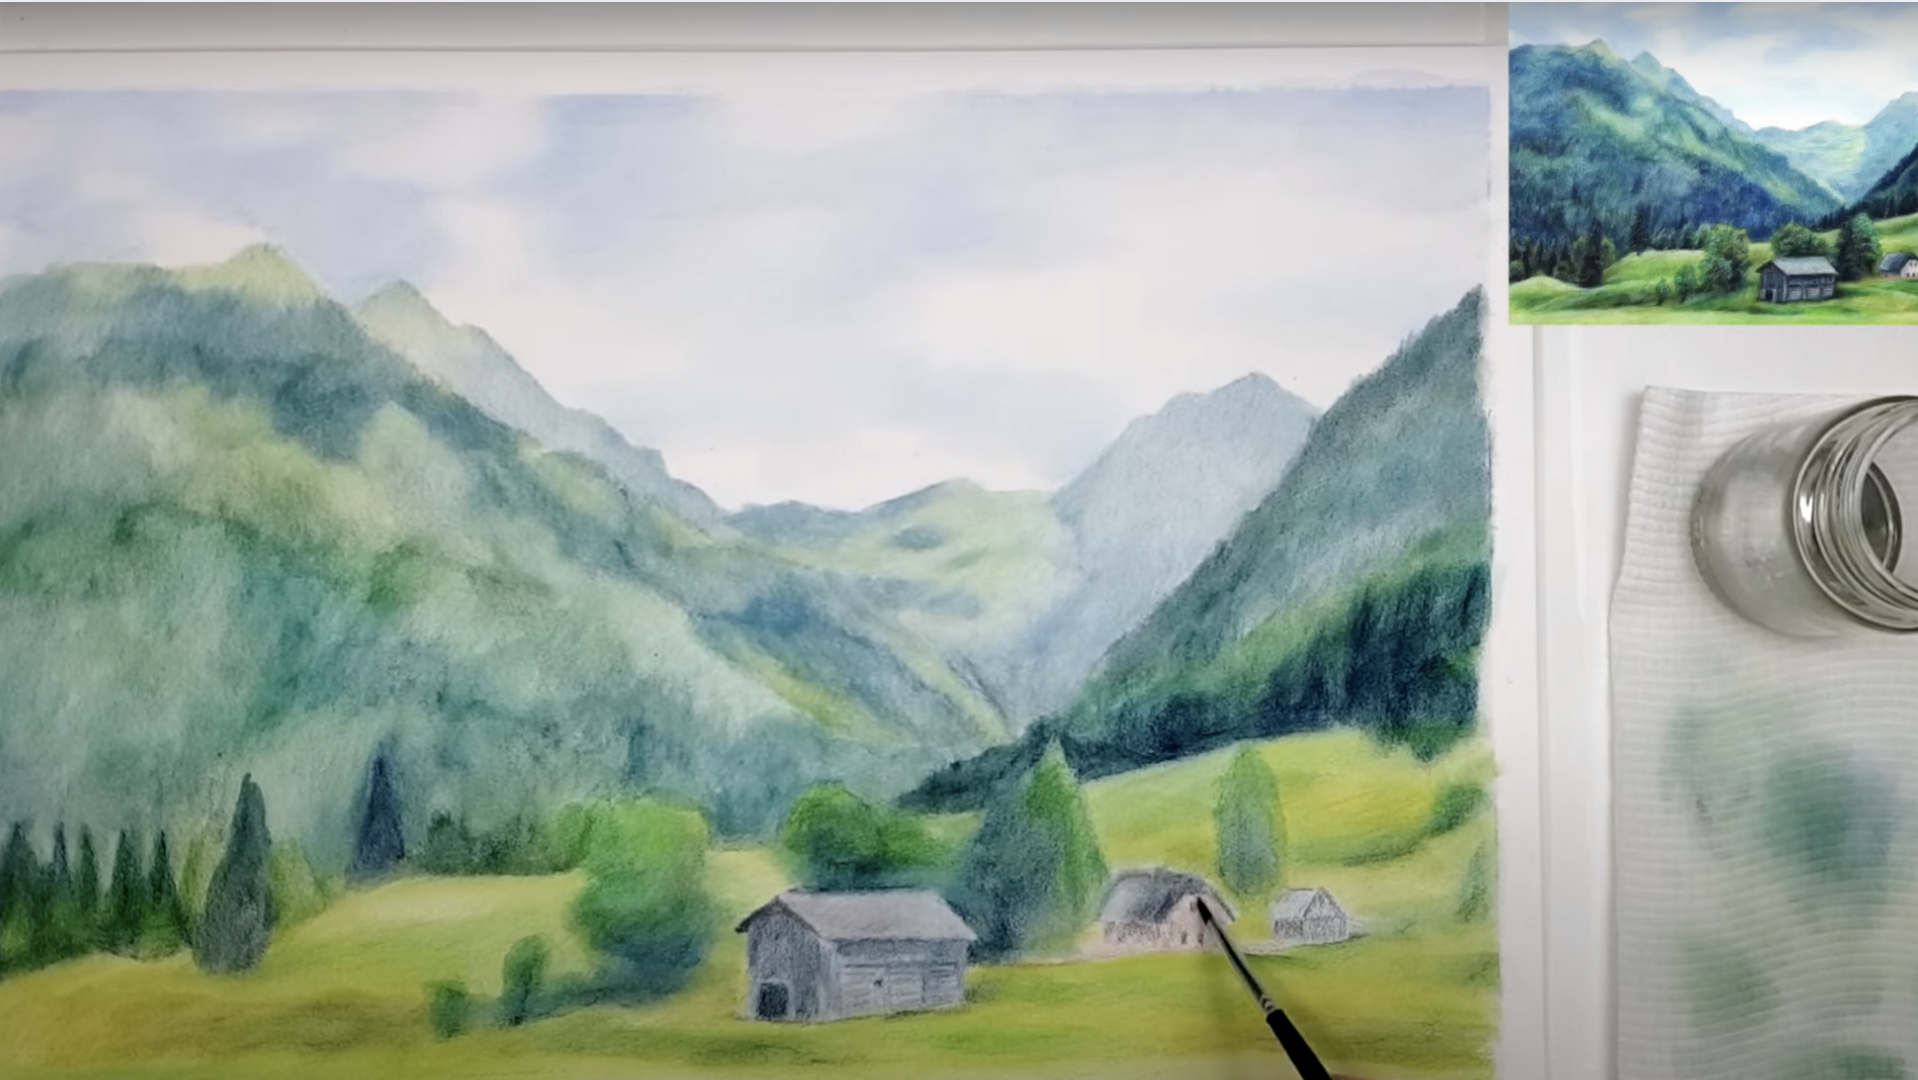
When creating landscapes, it’s important to gradually build up details.
The background, such as mountains or distant objects, should have fewer details. Keep the sharpest details in the foreground, which naturally draws attention. Focus on capturing shapes instead of perfect information.
- Background objects should have minimal detail.
- Foreground objects should feature sharper, more defined elements.
- Use abstract shapes for trees or rocks for a more organic feel.
Step 6: Values Over Details
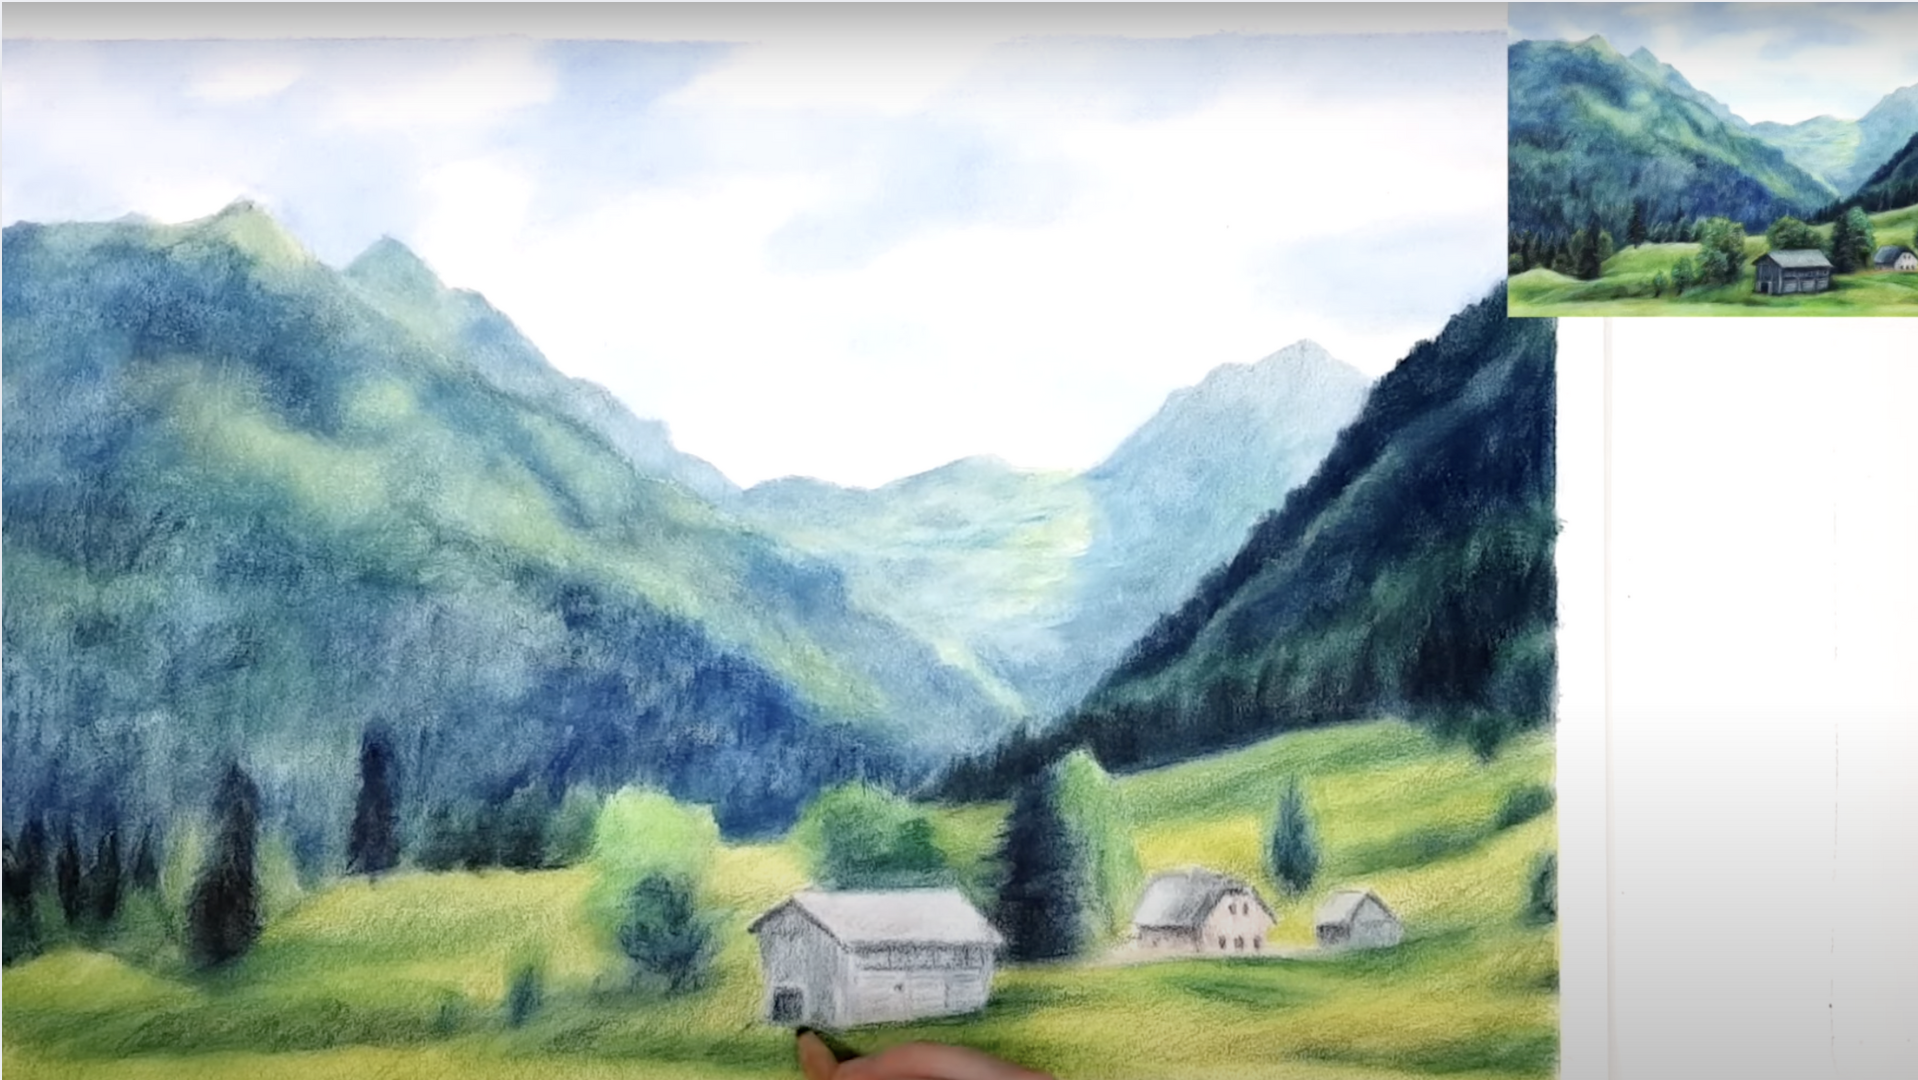
Rather than focusing on fine details, concentrate on getting the correct values, like how light or dark various areas are. This will give your landscape depth and realism.
- Take a photo of your work and turn it black and white.
- Compare your work to your reference to check values.
- Adjust shadows and highlights to achieve a more realistic piece.
Step 7: Finishing Touches and Final Adjustments
After blending your drawing with a solvent, let it dry completely to avoid damaging the texture of the paper. Once dry, step back and assess your work from a normal viewing distance. If any small details don’t stand out at this distance, they likely don’t need to be added.
The key to a successful landscape is in the values, proportions, and overall balance, not in the tiny details.
Must-Know Pro Shading Tips for Colour Pencil Art
Shading brings life to color pencil landscapes and creates visual depth. Artists who master various shading techniques can evolve flat drawings into three-dimensional scenes.
These professional tips help anyone improve their shading skills, regardless of experience level.
- Burnishing technique: Artists can create a smooth, polished look by applying heavy pressure with a colorless blender or light-colored pencil over existing layers. This technique fills in paper texture and results in rich, saturated color with no visible paper showing through.
- Directional shading: When shading, one should follow the natural direction of the object. Grass strokes go upward, water moves horizontally, and tree bark follows the trunk’s contour. This method enhances realism and helps viewers better understand the subject matter.
- Circular shading: Small, circular motions build up color gradually and create smooth transitions. This technique works particularly well for skies, still water, and soft objects in landscapes. The key is using consistent, light pressure to avoid marks and streaks.
- Cross-hatching: Artists can layer lines in different directions to build up tone and texture. Starting with parallel lines in one direction and adding another layer at a different angle creates interesting visual effects for rocks, rough surfaces, or complex shadow areas.
- Edge control: Soft edges need gradual transitions, while hard edges require more defined lines. Artists should decide which edges to soften and which to keep sharp based on the distance from the viewer and the importance of the focal point.
- Value mapping: Before adding color, one should create a simple value map of the darkest and lightest areas. This planning helps maintain proper contrast throughout the artwork and more effectively guides color application.
- Color layering: Building colors through transparent layers yields more realistic results than using a single color. Artists can start with complementary colors underneath to create rich shadows before applying the main colors.
Inspiring Landscape Color Pencil Drawing Ideas
Landscape color pencil drawing offers endless possibilities for artists seeking inspiration. Nature provides a wealth of subjects that can be captured with the simple but expressive medium of colored pencils.
The following ideas might spark creativity and encourage artists to try new subjects or approaches in their work.
1. Mountain Scenes
2. Forest Pathways
3. Beach Sunsets
4. Rural Farmland
5. Flowing Streams
6. Urban Parks
7. Seasonal Trees
The Bottom Line
Landscape color pencil drawing brings artistic visions to life through patience and practice. The techniques covered in this guide offer a starting point for both new and experienced artists.
From layering colors to capturing realistic textures, these skills build a foundation for creating beautiful natural scenes. Why does this matter? Because art allows people to express themselves and connect with nature in meaningful ways.
Artists who master these methods can produce works that evoke emotion and capture memories. What comes next? Readers can gather their supplies, choose an inspiring scene, and apply these tips to create their first or next landscape color pencil drawing.
The artistic path continues with each new piece, as skills grow and personal style develops. The joy comes in the creation process itself.