Have you ever looked at a watercolor landscape and felt a pull to create one yourself? Many beginners feel stuck when they first pick up a brush. The colors run together, the paper buckles, and the trees look nothing like trees.
But here’s the truth: anyone can learn to paint beautiful nature scenes with watercolors. The right methods make all the difference between frustration and joy when creating your first landscape.
This blog will show you simple beginner watercolor landscape techniques. You’ll learn how to start with basic shapes, blend colors effectively, and create realistic textures.
By the end, you’ll have the skills to paint your own peaceful nature scenes that you’ll want to display.
Simple Techniques for Beginner Watercolor Landscape Art
When you start with watercolor landscape painting, simple methods often work best. Many new painters try too hard at first. Let’s look at a few basic techniques that will help you create pretty nature scenes without much trouble.
1. Wet-on-wet: Is a good first method to try your hands at watercolor landscape. First, you wet your paper with clean water, then add paint. The colors spread and mix on their own. This works well for skies, water, and soft backgrounds.
2. Wet-on-dry: For more control, try out this method, where you paint on dry paper for sharp lines and clear shapes. This helps when you want to add details to trees, rocks, or buildings.
3. Layering: Is another helpful trick, in this process start with light colors, let them dry, then add darker tones on top. This builds depth in your landscapes and makes mountains or forests look more real.
4. Color blending: This creates smooth changes between shades. Mix colors where they meet while still wet. This makes sunsets and fields look natural rather than flat.
Try these simple methods in your next watercolor landscape. Start with just two or three colors to keep things easy. You can add more complex methods as you get better with the basics.
How to Paint a Beautiful Watercolour Landscape
Watercolor landscapes captivate viewers with their soft colors and flowing textures. Many people want to try their hand at this art form but feel stuck when starting.
With basic supplies and simple methods, readers will learn how to bring a scene to life on paper. The results can bring joy both during the creation process and when looking at the finished work.
Step 1: Prepare Your Workspace

Begin by setting up your workspace. Tape your watercolor paper to a board at a 45-degree angle to allow the paint to flow.
This helps create the natural movement of the water in your painting. Use ordinary masking tape to secure the paper, ensuring the edges stay crisp and clean throughout the process.
Step 2: Rinse the Paper

Begin by using a large, soft brush (such as the Escoda Ultimo Mop Brush, size 14) to evenly rinse your watercolor paper.
The goal is to cover the entire surface with water but leave a few dry patches for texture. The wet-on-wet technique will help create smooth transitions and soft edges in your painting.
Be sure not to soak the paper too much; you want to retain control over how the colors blend.
- Evenly wet the entire surface with water
- Leave a few dry patches for texture
- Ensure water is evenly spread but not soaked
Step 3: Lay Down the First Wash

Mix a soft wash using sap green, perylene green, and cadmium yellow. Lightly apply this to the paper, avoiding the center area where the light will shine through.
Dab the colors across the page, layering them softly to create an underpainting. Be sure to keep the center light, which will give you that sunlit effect later.
Step 4: Create Sunbeams
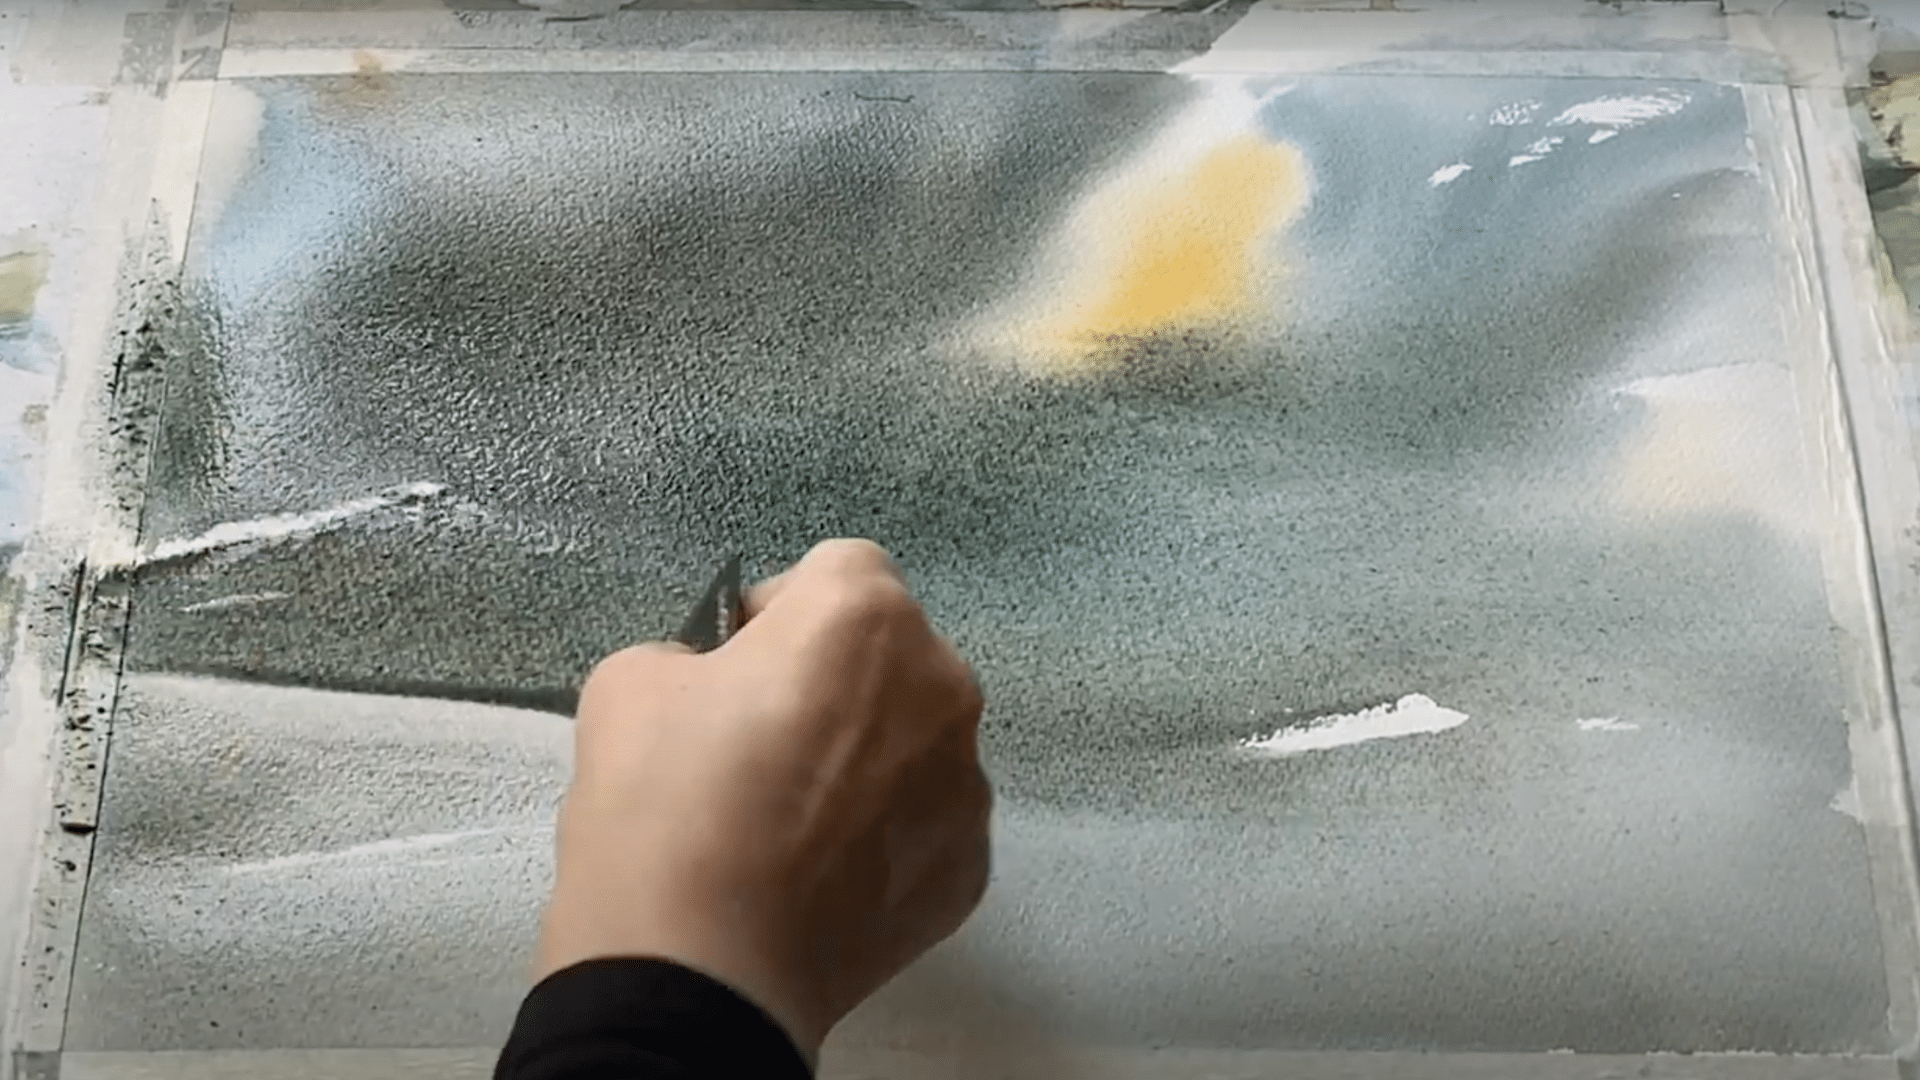
While the wash is still damp, take a clean tissue or paper towel. Gently dab it over areas where you want the sunbeams to shine through the trees.
Work quickly to keep the paint from drying. Repeat the process, using fresh pieces of tissue each time to avoid muddying the areas where the sunbeams appear.
Step 5: Add Tree Trunks and Branches

Once the wash has dried, return to your paper with a small calligraphy brush and paint in the tree trunks and branches using Payne’s Gray.
Work in stages, carefully painting over the sunbeams. Quickly use a tissue to dab out paint where the sunbeams hit, keeping the effect subtle and light.
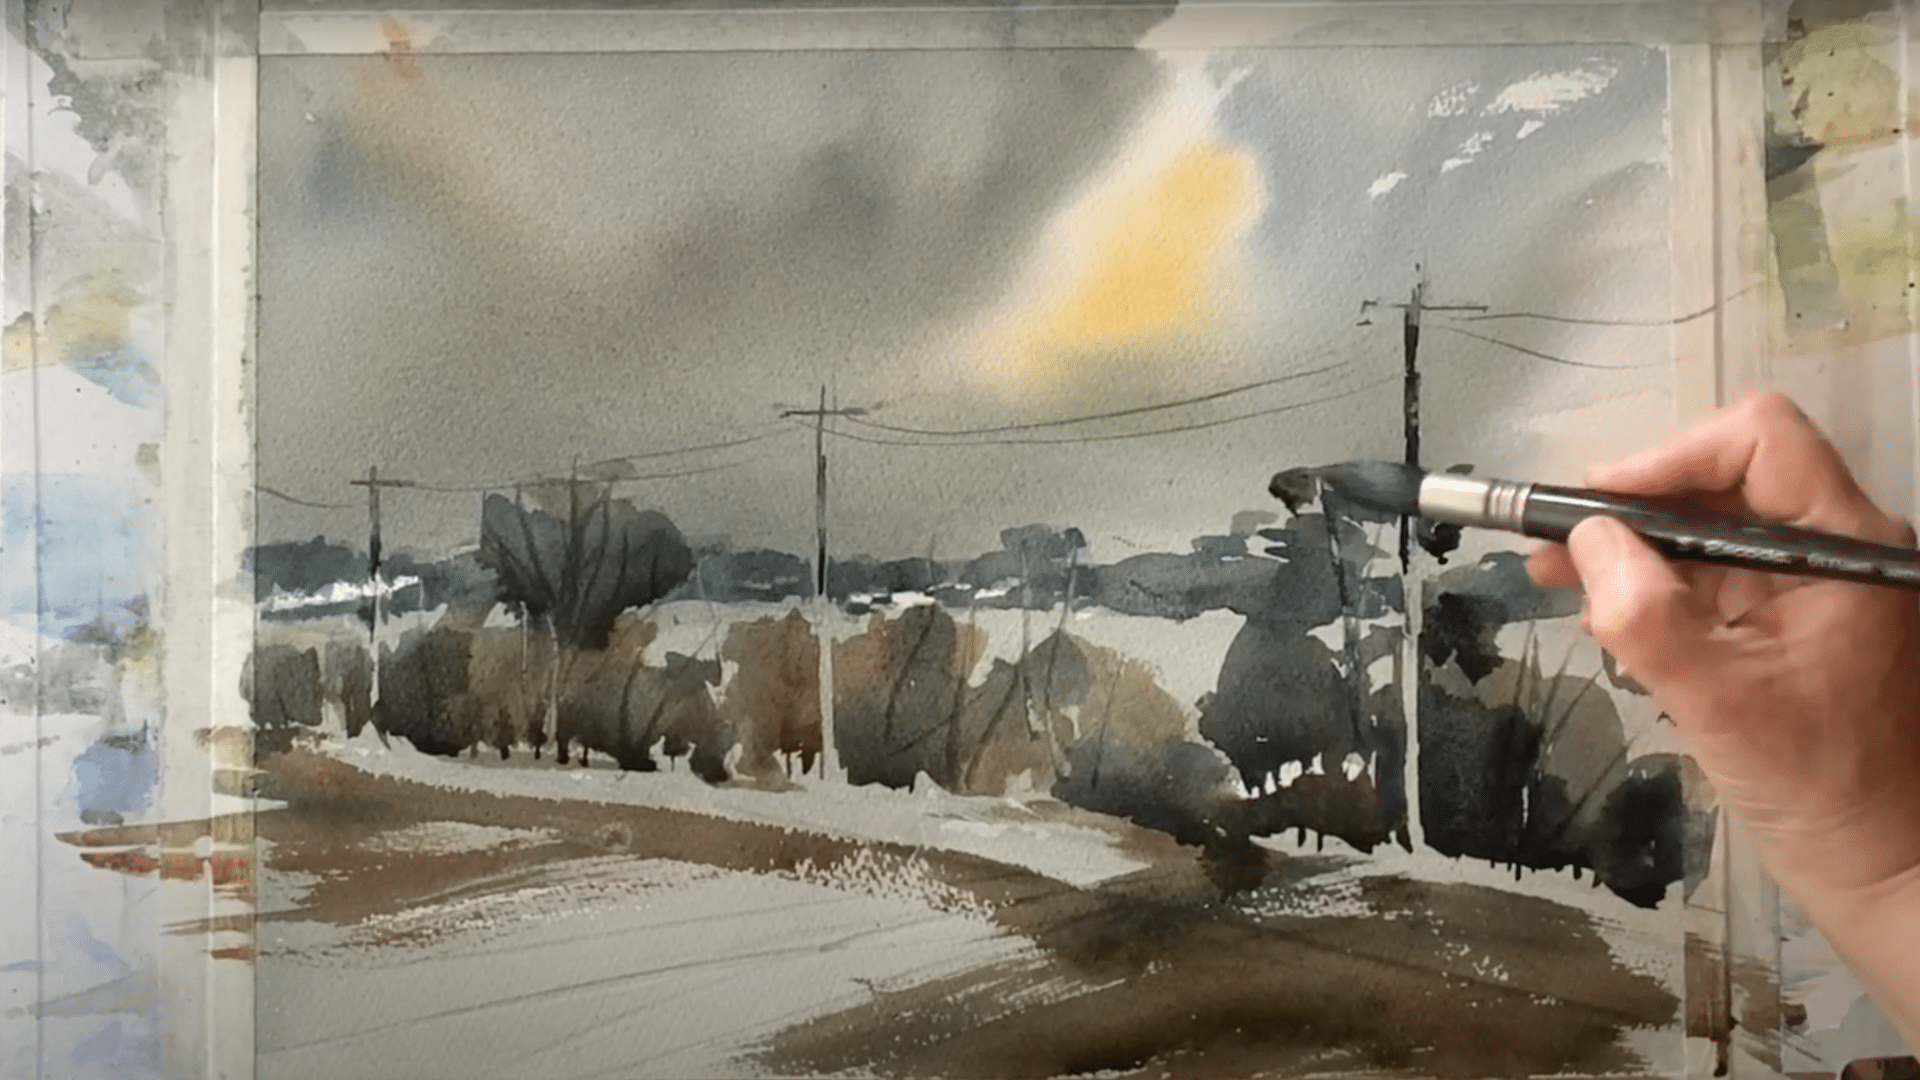
Step 6: Refine the Canopies and Shadows
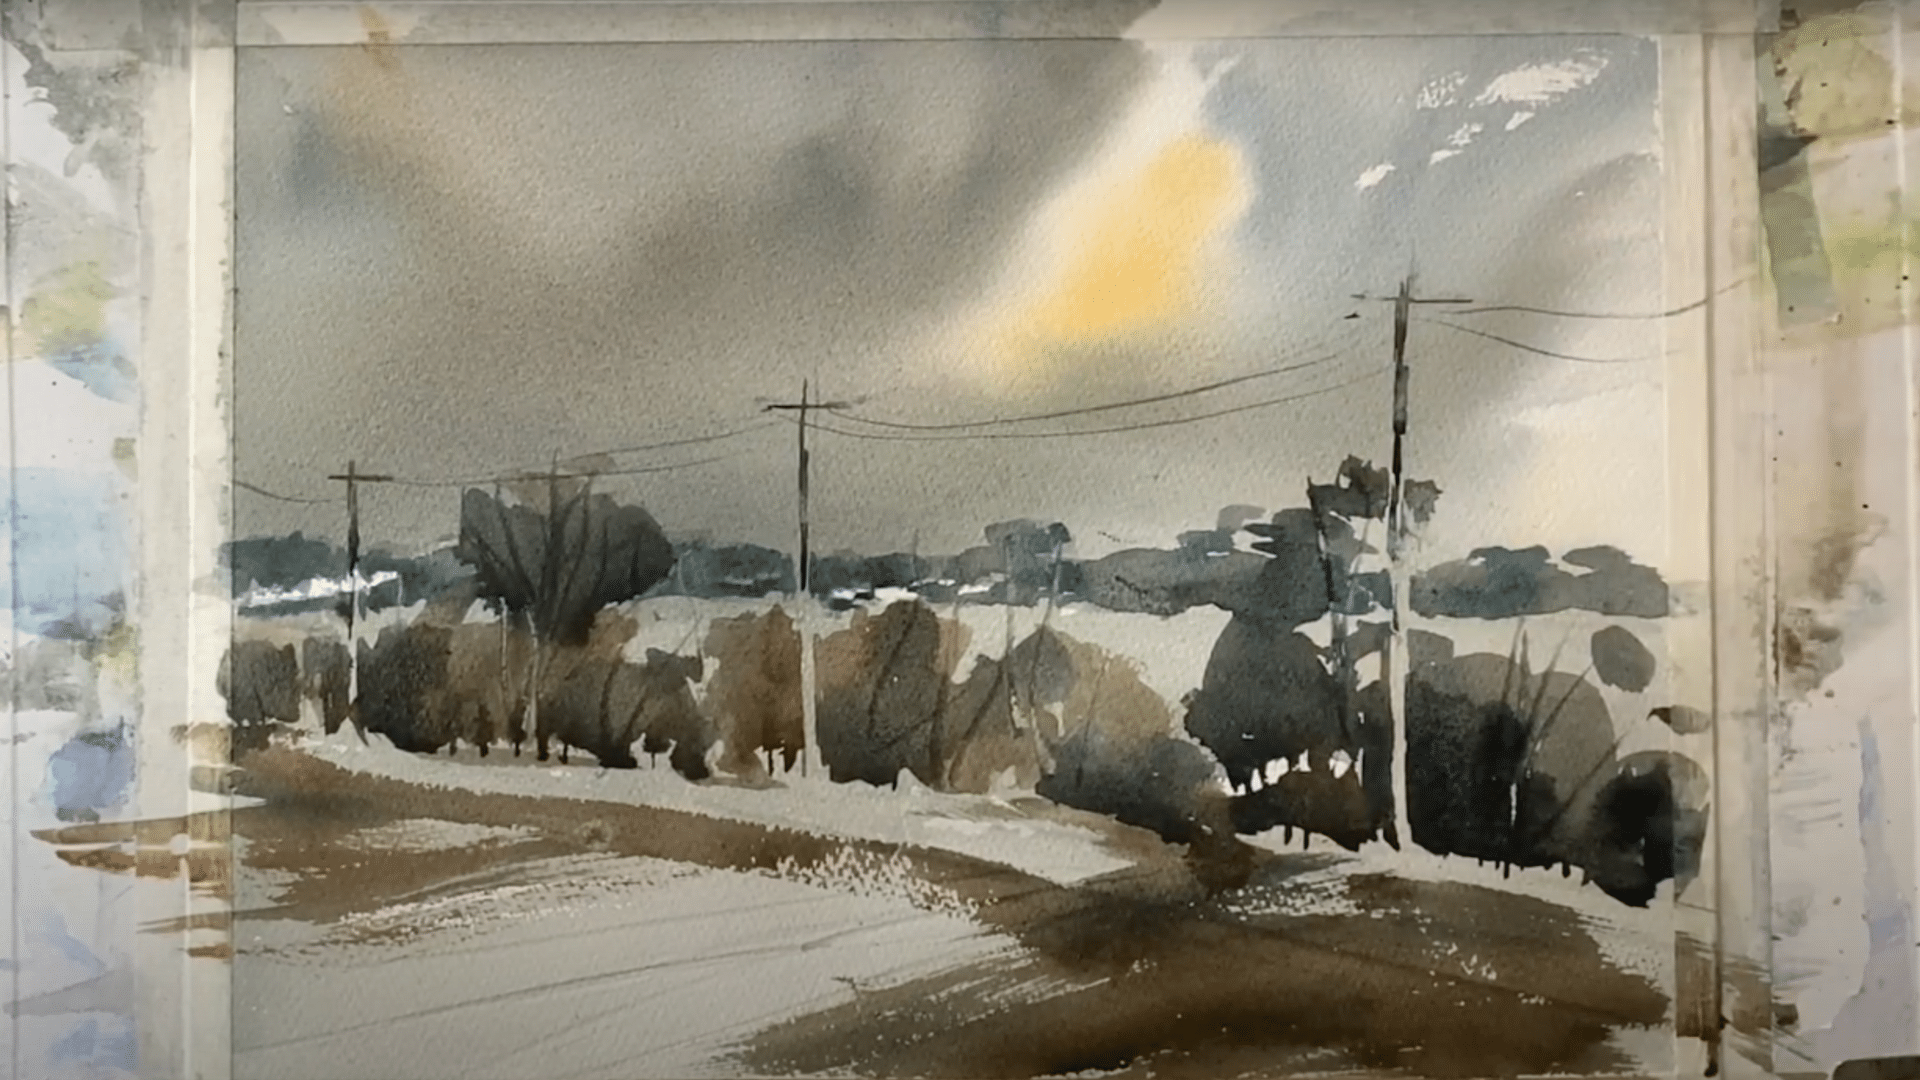
After painting your tree trunks and branches, focus on refining the tree canopies. This step adds depth and highlights areas touched by sunlight.
- Mix sap green, perylene green, and cadmium yellow to enhance the canopy
- Darken areas where sunlight doesn’t reach and brighten sunlit areas
- Use the corner of a plastic card to etch fine branches for texture
- Dab lighter areas where light hits, contrasting light and shadow
Step 7: Final Touches and Background Trees
Finish your painting by adding final touches to the foreground and distant trees. Using a diluted yellow-green mix, paint faint trees in the background to suggest depth.
Dab out areas where sunlight hits the forest floor to give a dappled light effect. Adjust the colors and details until the balance between light and shadow feels natural and pleasing.
Pro Tips to Paint a Classic Watercolor Landscape
- Start With a Light Sketch: Begin with a faint pencil outline of your landscape. Keep lines thin and soft so they won’t show through your paint later.
- Use a Limited Palette: Pick just 3-5 colors for your painting. Fewer colors create a more unified, pleasing look and help you focus on technique instead of choices.
- Paint the Sky First: Always work from top to bottom. The sky sets the mood for your entire landscape and should be painted before any other elements.
- Create Depth with Layers: Begin with light washes in the background, then add middle-ground elements, and finish with darker, sharper details in the foreground.
- Master the Value Scale: Light and dark areas make your landscape look real. Paint distant objects lighter and less detailed than close ones.
- Save White Spaces: Plan which parts of your paper will stay white. These bright spots draw the eye and add sparkle to water, clouds, or snow.
- Keep a Paper Towel Handy: Blot your brush to lift color or create texture in clouds, trees, or reflections on water surfaces.
- Let Areas Dry Completely: Allow each section to dry before adding new elements beside it. This prevents colors from running together when you don’t want them to.
Creative Watercolor Art Landscapes Ideas for Beginners
Watercolor painting offers beginners a wonderful way to create beautiful landscapes. This section presents helpful techniques through practical tips for basic tools and simple methods to build painting confidence.
Sunset Over Water
Pro tip: For vibrant sunset reflections, use warm colors (oranges, pinks) in the sky and cooler purples for mountains, then mirror these colors in the water with slightly softer tones.
Mountain Silhouette at Dusk
Pro tip: Create depth in mountain landscapes by progressively lightening each range and using a warm sky gradient to contrast with cool blue silhouettes in the foreground.
Abstract Field of Flowers
Pro tip: For misty meadow scenes, use wet-on-wet techniques with pale blue and peach for the sky, then add small floral details with quick dabs and splashes of color after the background dries.
Rainy Day Window View
Pro tip: Create realistic raindrops on windows by using white gel pen or paint over a dry cityscape background, varying droplet sizes and adding thin streaks for running water.
Beach with Gentle Waves
Pro tip: Add darker sand tones under the waves for depth and scatter small brown marks for realistic beach debris while the paint is still wet.
Sky with Floating Clouds
Pro tip: For painting fluffy clouds, use a damp brush to soften edges while keeping the center white and bright. Allow sky to dry before adding water reflections.
Desert Cactus Scene
Pro tip: Paint desert skies with wet-on-wet technique for smooth color transitions. Add cacti and vegetation after the background has completely dried.
Simple Forest Trees
Pro tip: Paint tree trunks first, then add foliage as soft background shapes in varying green tones. Leave white spaces between trees to create depth and light.
Night Sky with Stars
Pro tip: Create night sky gradients by working dark to light, top to bottom. Add stars with white gel pen or small brush after the background is fully dry.
Colorful Hills and Valleys
Pro tip: Create depth in landscapes by using darker greens for distant hills and lighter colors for foreground. Add small details like flowers only after larger elements have dried.
Conclusion
Beginner watercolor landscape painting opens a world of creative expression. The techniques shared in this post form a solid foundation for anyone starting this artistic path.
Wet-on-wet, wet-on-dry, layering, and color blending all serve as building blocks for beautiful nature scenes.
Why does this matter? Because creating art connects us to nature and ourselves. A simple watercolor landscape can bring joy both in the making and the viewing.
What’s next? Grab those brushes and start with one small scene. Perhaps a sunset or a simple mountain view. Don’t worry about perfection. Each painting teaches something new and builds confidence with every stroke.
The beginner watercolor landscape quest starts with these first steps and grows with practice.